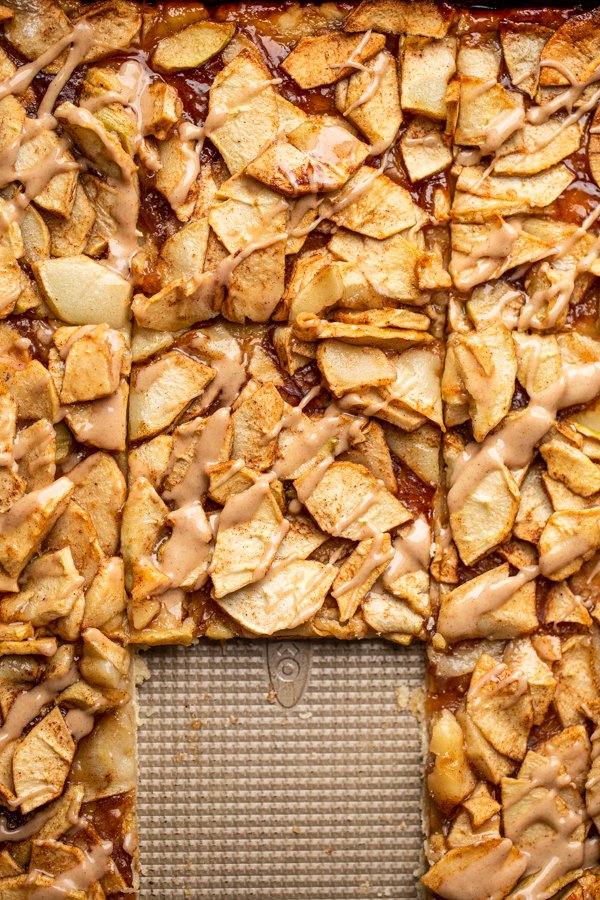
It’s really easy to make, serve & eat apple pie bars. You make a slab pie in a rimmed baking sheet and voila! The glaze is to die for.
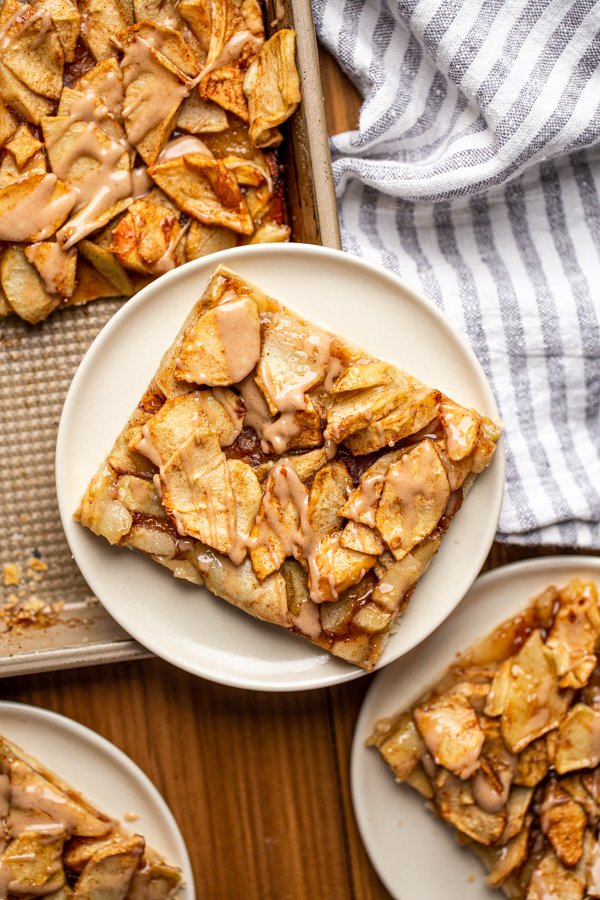
If I had to pick one kind of apple pie and eat it forever, apple pie would be it. And you guys know I love a good pie. The best thing about these apple pie bars is that you can slice them up and serve them SO easily.
Have you ever made a beautiful pie and when you go to slice into it, you wind up messing up the slice and you feel like you ruined the whole presentation?
You brush it off by saying – “well, it tastes better than it looks!”. But deep down, it sort of crushes you inside.
Fruit pies are notoriously hard to slice because the delicious filling comes oozing out the sides, and apple pie is no exception.
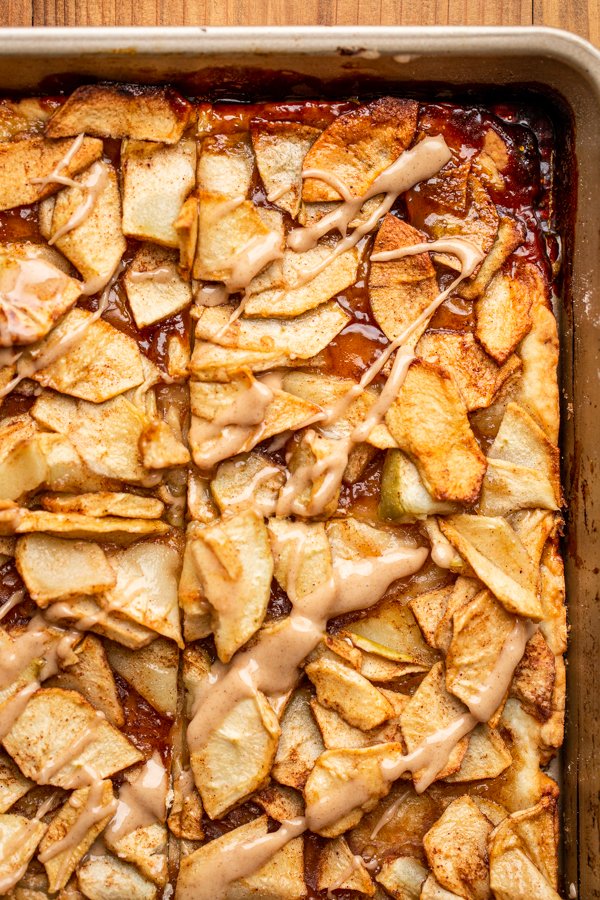
That’s where these apple pie bars come to the rescue! They bake PERFECTLY on a rimmed baking sheet and all you need to do is bake, cool, slice and serve. Because the filling is a little thinner, and you have a substantial square, everything stays in place.
You can also cut the squares a little larger, or nice and small depending on who and how many you’re serving. Wins all around!
How do you make apple pie into bars?
Here’s the simple part, all you need is a rimmed baking sheet. Mine is a 13×18 inch, but really any larger dish or baking sheet with a rim will do. You may need to adjust your cooking time to be a bit longer if you use a smaller baking vessel, but the recipe works just fine.
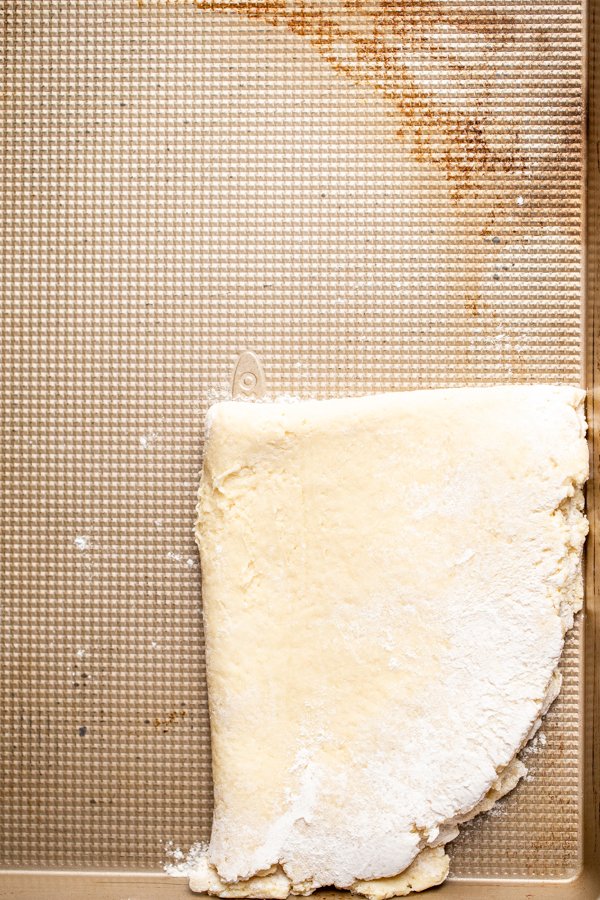
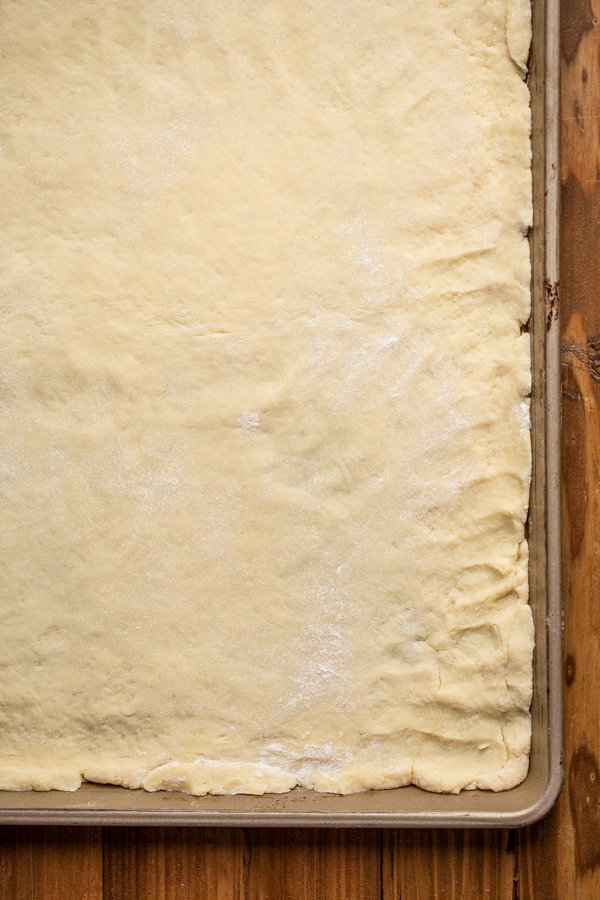
All you need to do is roll out your pie crust into a square shape, and then press it into the pan/sheet. The butter in the crust prevents any sticking so don’t worry about lining. I provide the perfect pie crust recipe for this, but if you want to go for store-bought, use 1 and 1/2 crusts (you can use 2 crusts, your crust will be thicker and your bake time will be longer). But I recommend saving the extra dough for decorations for another pie, or make something else with it, like a hand pie, if you go the store-bought route.
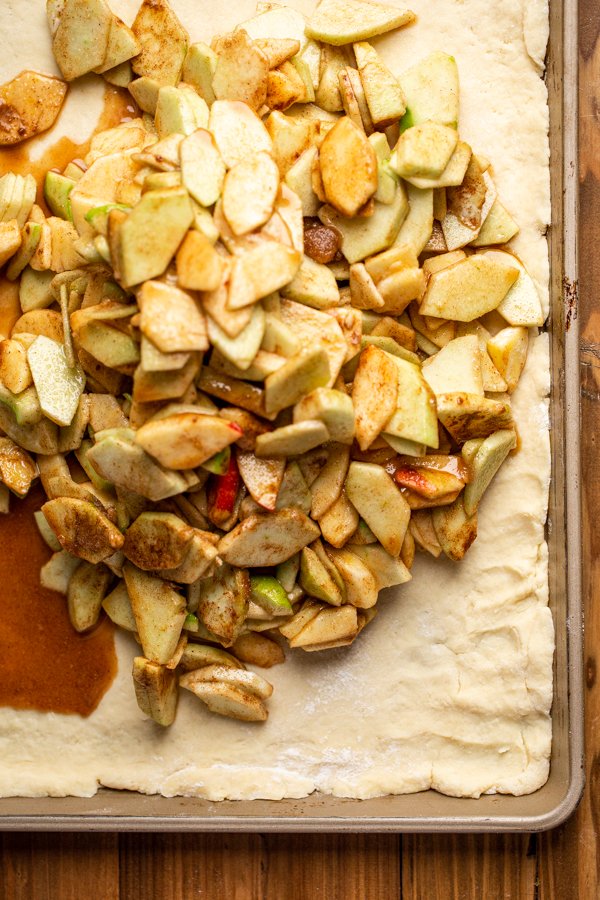
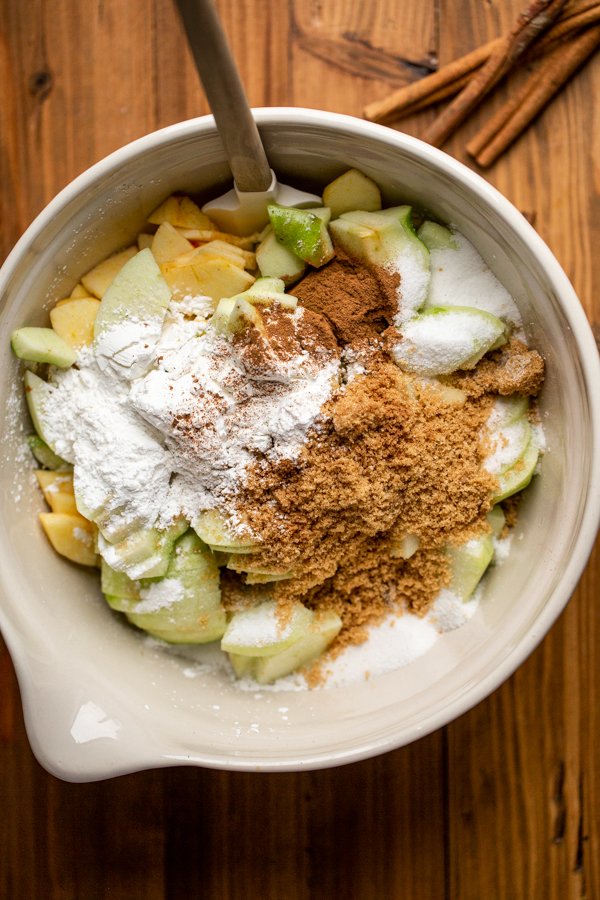
For the filling, cut the apple slices, toss them with the remaining filling ingredients, pour onto the crust & bake. Easy peasy!

Let’s talk about the cinnamon vanilla glaze…
I love having something super simple that you can add to a classic dessert that makes it out of this world. It takes seconds to mix together powdered sugar, vanilla, cinnamon, milk & a pinch of sea salt. A few more seconds to glaze and voila. PERFECTION!
Love apple desserts?? Try my apple galette OR my cranberry apple pie!
Print
Easy Apple Pie Bars | Simple Slab Pie Recipe
It’s really easy to make, serve & eat apple pie bars. You make a slab pie in a rimmed baking sheet and voila!
- Prep Time: 45 minutes
- Cook Time: 45 minutes
- Total Time: 1 hour 30 minutes
- Yield: 12–15 bars 1x
- Category: Dessert
- Method: Oven
- Cuisine: American
Ingredients
For the crust (see notes for store-bought crust instructions):
- 2 and 1/4 cups all-purpose flour (double my gluten-free crust recipe for gluten-free)
- 1/3 cup sugar
- 3/4 tsp. salt
- 1 and 1/2 sticks (12 Tbsp.) butter
- about 6–8 Tbsp. ice water
For the apple pie filling:
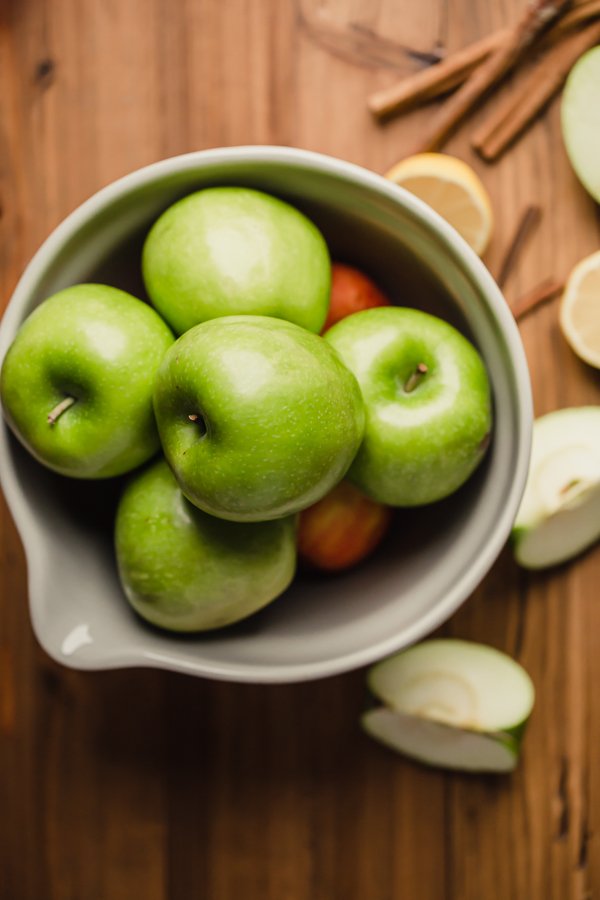
- 8–9 medium-large apples (I used a blend of Granny Smith and Gala), peeled, cored & sliced
- 1/2 cup granulated sugar
- 1/2 cup brown or coconut sugar
- 1/4 cup arrowroot powder (or tapioca or corn starch)
- 2 teaspoons apple pie spice
- 1 teaspoon cinnamon
- 1 lemon, juiced
For the cinnamon vanilla glaze:
- 2/3 cup powdered sugar
- 2 tsp. milk
- 1 tsp. vanilla
- 3/4 tsp. cinnamon
- 1 pinch sea salt
Instructions
- Place the butter in the freezer 15-30 mins before making the crust. Then, get out a glass or bowl and fill with ice water while you get out the remaining ingredients for your crust to make sure the water is nice and cold.
- If you have a food processor, add the dry crust ingredients (flour, sugar & salt) to the food processor and pulse to combine. If you don’t use a fork or pastry cutter or fork, and add the dry ingredients to a large bowl and whisk together.
- Cube the cold butter and add it to the dry mixture. Incorporate the butter with a food processor, pastry cutter, or fork until pea-sized crumbs form. If you’re using a food processor, just pulse a few times.
- Add the water, 1 tbsp at a time, until dough pulls together. Add more water if needed.
- Shape the dough into a rectangle, wrap in plastic wrap, and refrigerate for 20 mins (but up to 2 days) before rolling it out.
- When you’re ready to roll the dough out, let the dough come to room temperature for a few minutes on the counter and roll it out into a rectangle that will be large enough to cover the bottom of your baking sheet/dish (I used a 13×18 in rimmed sheet*).
- Lay crust into the sheet/dish and press all the way to the sides. Refrigerate again for about 15-20 minutes before adding the filling.
- Preheat the oven to 425 F while you peel your apples and let the crust chill.
- Mix together the apples, granulated sugar, brown sugar, arrowroot powder or starch, apple pie spice, cinnamon and lemon juice.
- Remove the crust from the fridge and pour the apple filling on top, spreading to the edges. Slide it into the oven for 15 minutes.
- After the 15 minutes is up, reset the temperature to 350F and bake for about 30 additional minutes, or until the apples are soft and the edges of the crust are golden brown.
- Let the pie cool for 3-4 hours before serving. When you’re ready to serve, whisk together the glaze ingredients and drizzle all over the bars.
Notes
- My baking sheet is a 13×18 inch, but really any larger dish or baking sheet with a rim will do. You may need to adjust your cooking time to be a bit longer if you use a smaller baking vessel, but the recipe works just fine.
- If you want to go for store-bought, use 1 and 1/2 crusts (you can use 2 crusts, your crust will be thicker and your bake time will be longer). But I recommend saving the extra dough for decorations for another pie, or make something else with it, like a hand pie, if you go the store-bought route.