A step by step tutorial on How to Make the Best Pie Dough with photos, troubleshooting and more.
Here’s a video so you can see how I do it!

For me, living a little means diving into a piece of flaky, buttery and sweet pie. Probably with a fair obscene amount of homemade whipped cream piled on top.
You just can’t have good pie without good crust. Miss AK rule. I’ll be sharing numerous pie recipes in the future, and this will always be the standard vessel that I’ll link back to. I think it deserves its own post because making perfect pie dough is very simple, but there is some science to it that needs to be explained.

This pie crust is sweeter and thicker than some, but still incredibly flaky. If you haven’t heard yet, the secret to flaky pie dough is freezing cold fat and liquid. You’ll also want to heed my advice when I tell you to place the raw dough in the fridge before you roll it out, and once again after it has been pressed into the pie dish. The changes in temperature are what cause the crust to have that delicate texture.
What you’ll do:
To start, place your refrigerated butter in the freezer for about 15 min. Pour water into a glass or bowl filled with ice. In the meantime, measure out your flour, sugar, and salt. Give these a quick mix to distribute.
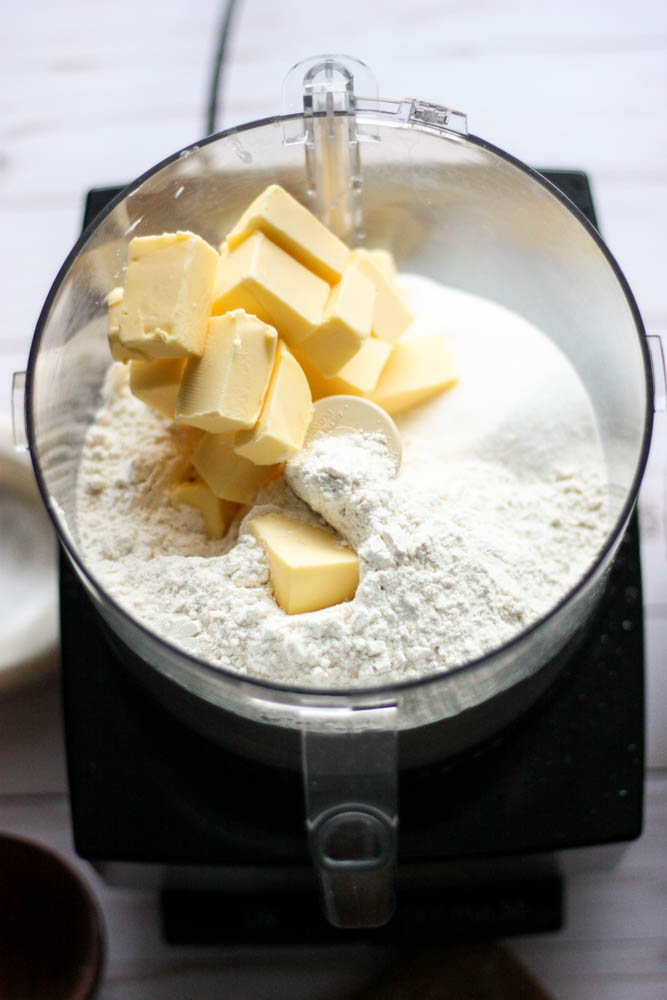
When I have a food processor on hand (I have this one – Cuisinart DFP-14BCNY 14-Cup Food Processor, Brushed Stainless Steel![]() ), I like to use that to make my dough.
), I like to use that to make my dough.
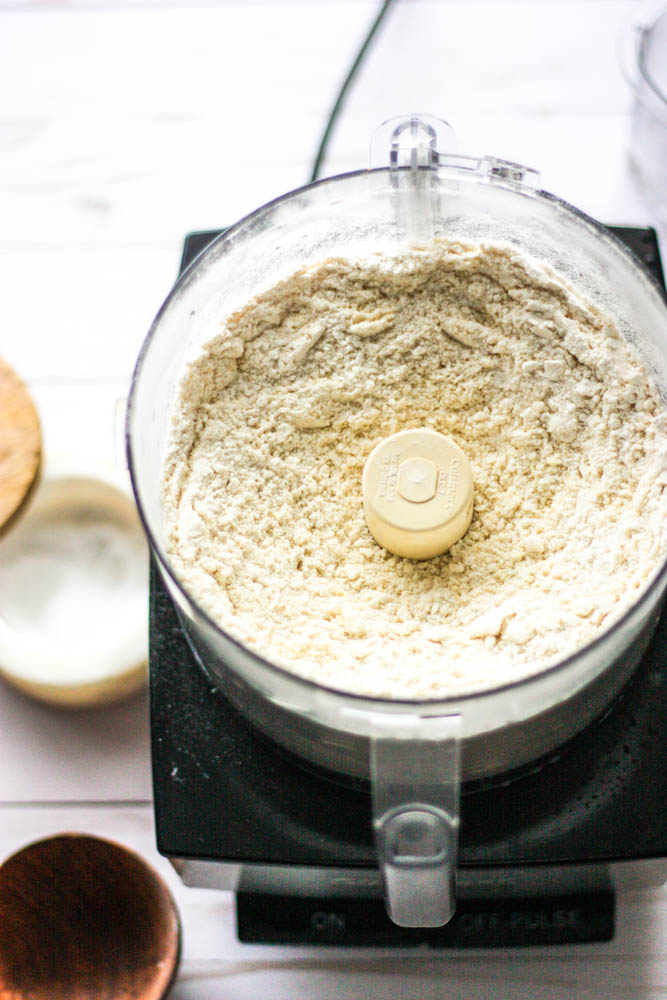
If not, a good, old-fashioned pastry cutter or fork will work fine. Cut your freezing butter into small cubes. Begin to work the butter into the dough, or pulse your food processor until the mixture looks like pea-sized crumbs. Start adding your water tablespoon by tablespoon, until the dough pulls together into a ball.
This should not be sticky, but it should hold together well without crumbling. Divide the dough in half, form into a ball, and flatten with your hand to make a disc. Wrap this tightly in plastic wrap and refrigerate for a least 20 mins. This can be refrigerated for 24 hours, or at this stage, you can place the wrapped dough into freezer bags and freeze them for a rainy day. This recipe makes two crusts, so if you aren’t making a covered pie, you can freeze one disc and use the other right away.
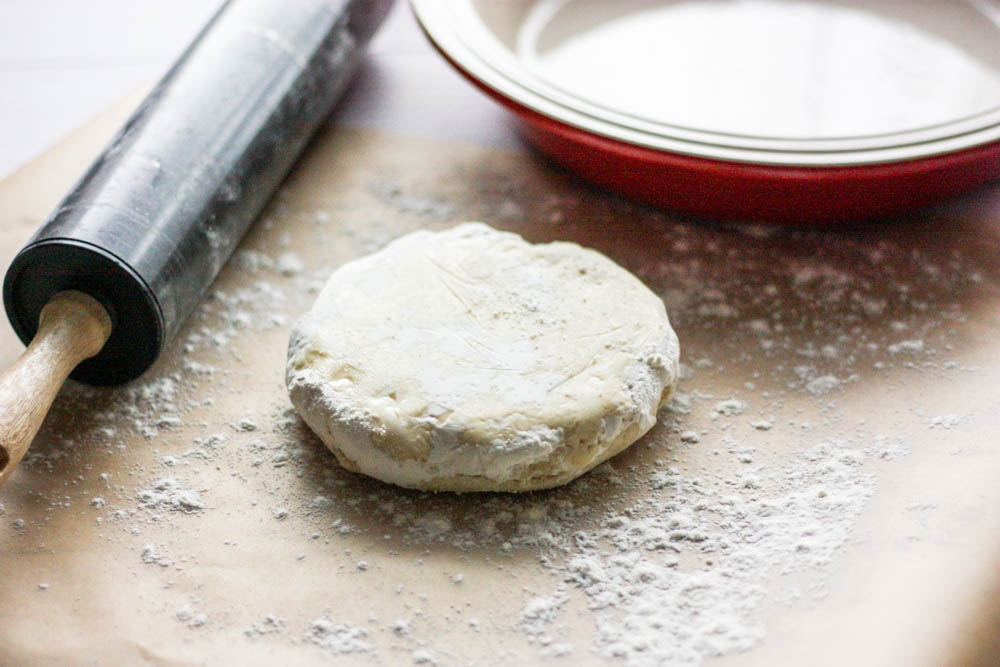
When you want to bake, pull your dough out of the refrigerator and let it come to room temp. Flour a work surface, your dough, and a rolling pin lightly.
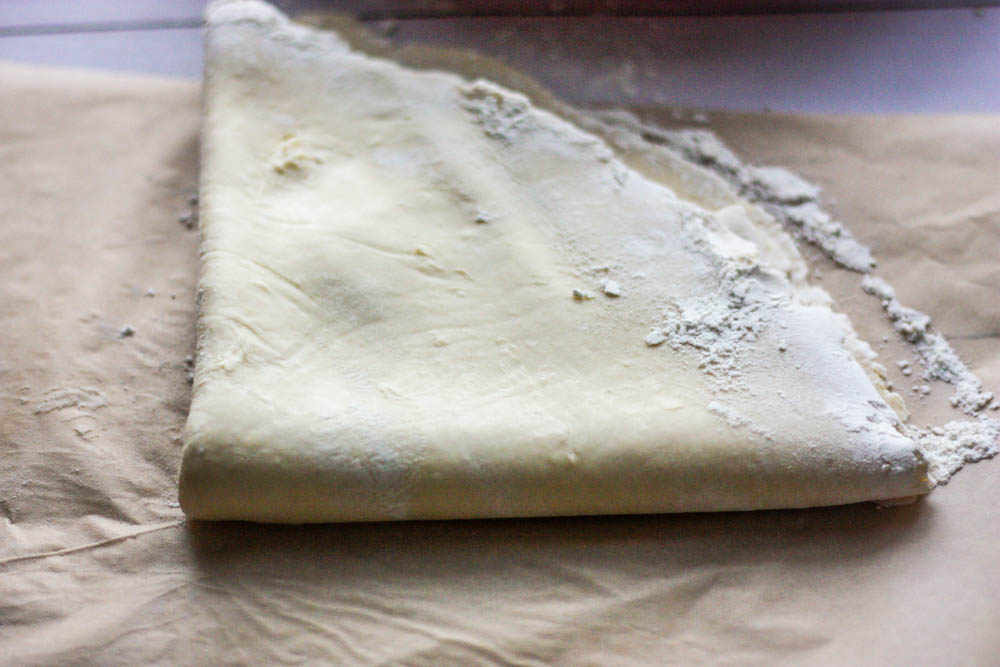
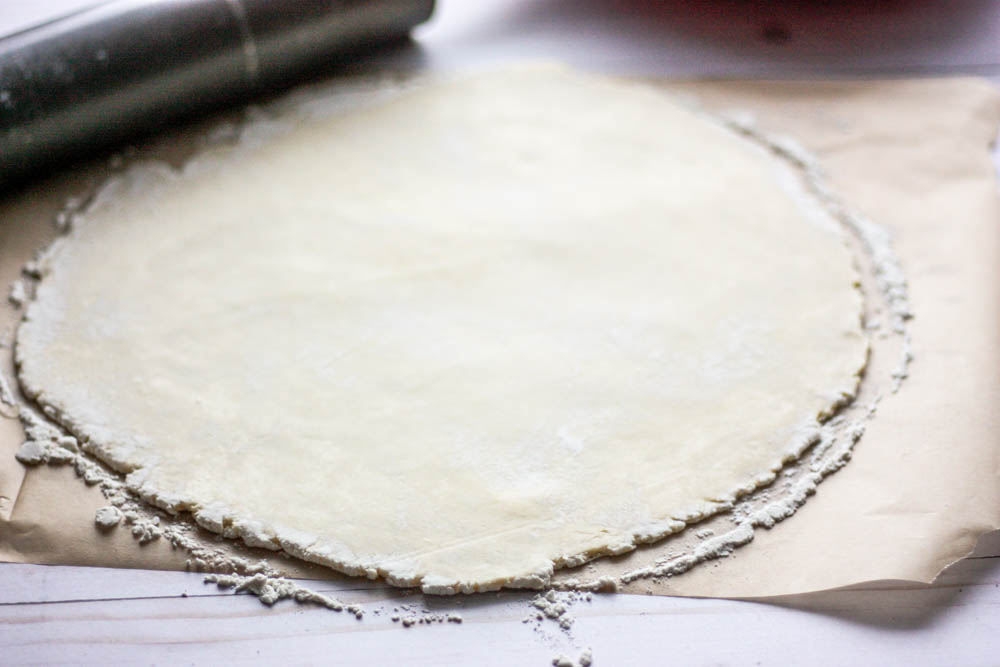
Roll your dough out to about 1/4 inch thick. You should place your pie plate in the center of the rolled dough to make sure you have at least 2-3 inches of extra dough around the plate to form your rolled edge.
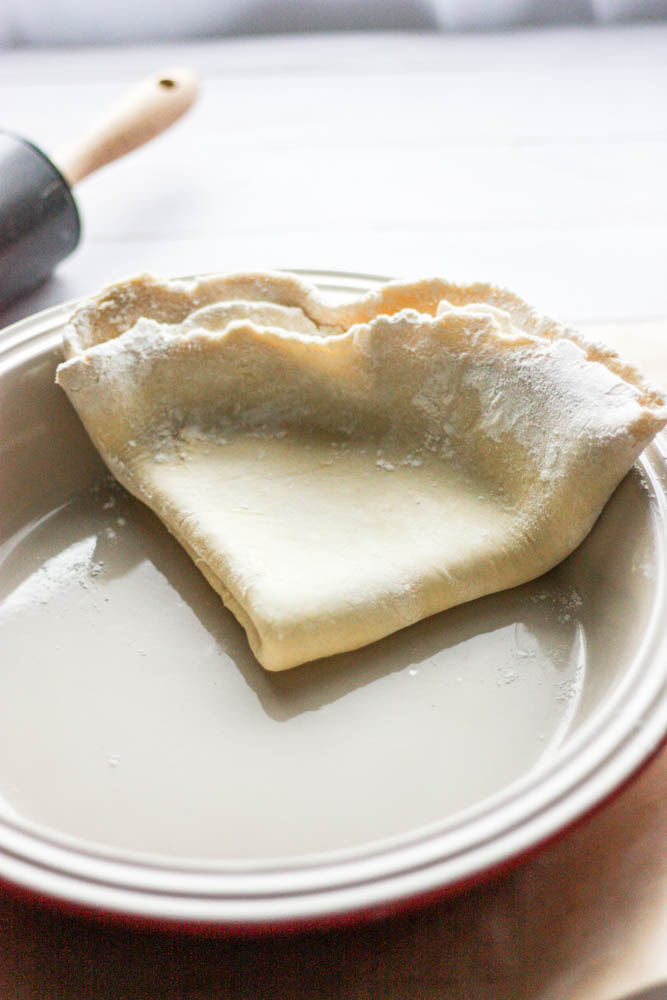
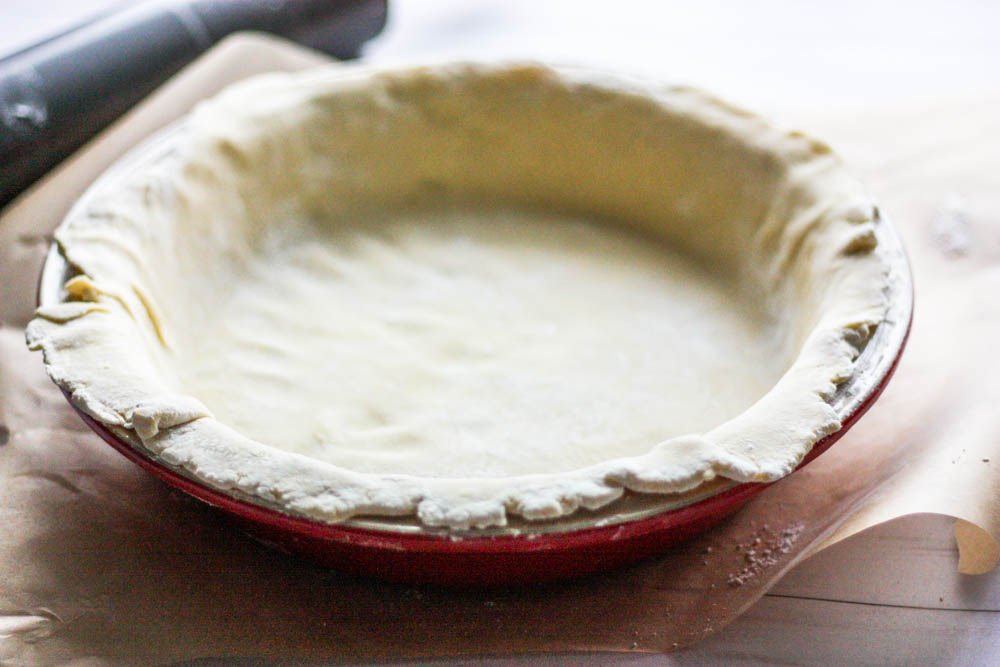
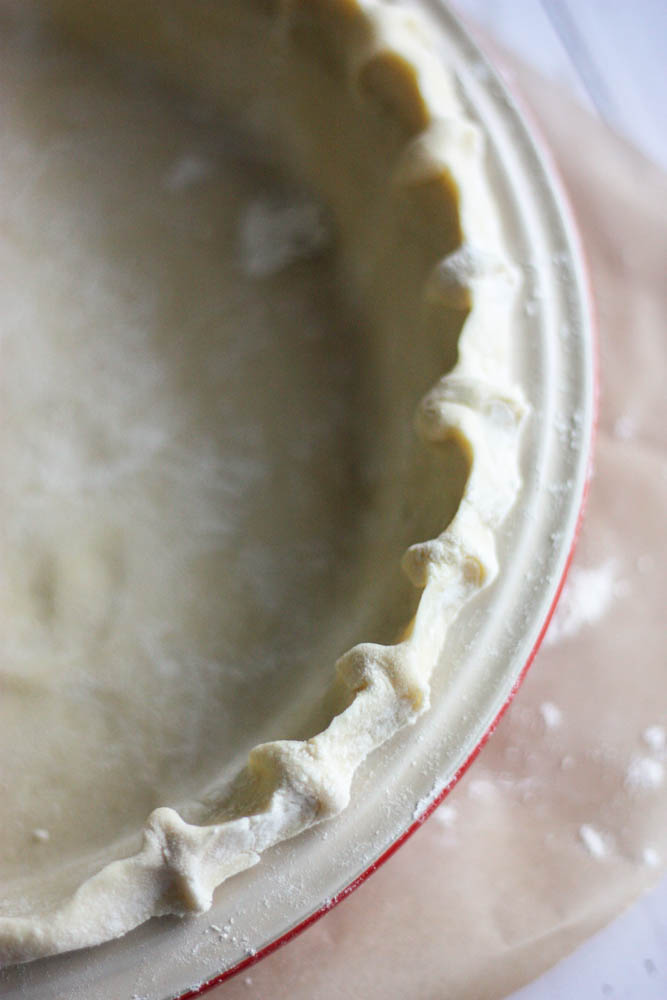
Fold the dough in half once and once more (like you are making a pizza slice). Place the tip of your dough into the center of the pie plate. Unfold. Trim the overhanging edges so they are even, and tuck them under.
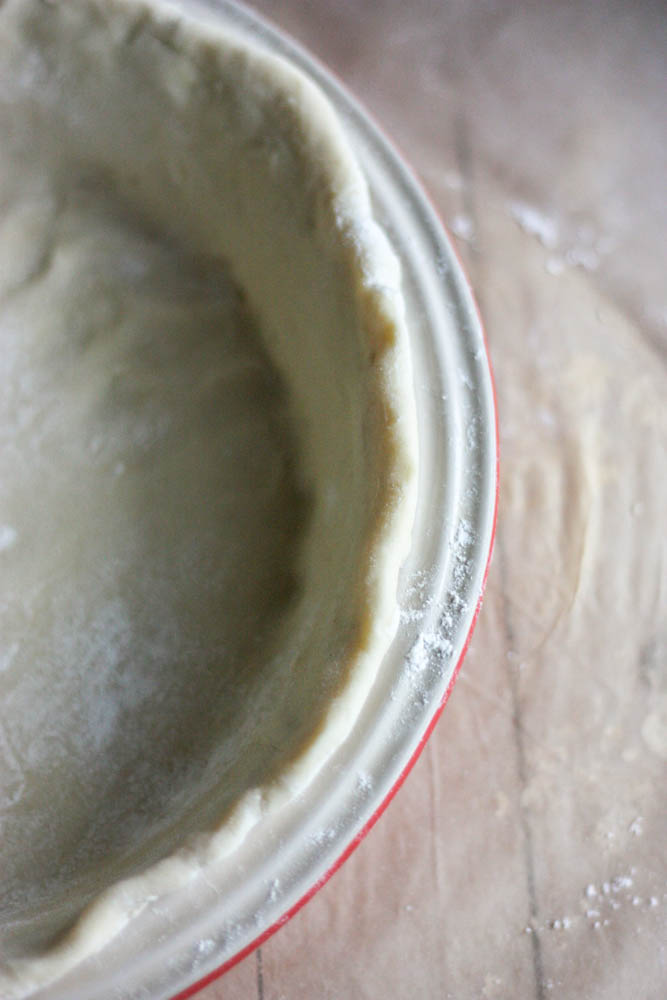
Pinch your dough between your thumb and pointer finger, pressing with your opposite pointer finger to make a crimped edge. Or, you can always press your dough with a fork! Place the pie back in the fridge for at least 20-30 mins before adding your filling and baking.
Remove the crust from the fridge, pour in the desired filling and bake following the instructions listed in the recipe you’re using. If you need a baked shell, pierce the dough with a fork so that air is not trapped between the plate and dough; trapped air causes your crust to bubble and shrink. You’ll also need to weigh it down in the center to prevent the bubbling. When I’m baking a shell, I always weigh it down with pie weights. You can find these: here. If you don’t want to invest, line your pie with parchment paper and weigh it by pouring beans or rice onto the parchment.
For a first-time pie baker, I know this can seem daunting. After your first few pies, you’ll see they are actually pretty easy to assemble, and I promise you’ll fall in love with them as much as I have.
As always, I love to help you troubleshoot-please feel free to send me a message in the Contact Me section above!
Check out all of the pie recipes on Miss AK HERE!

How to Make the Best Pie Dough
A step by step tutorial on How to Make the Best Pie Dough with photos, troubleshooting and more.
- Prep Time: 10 minutes
- Total Time: 10 minutes
- Yield: 2 crusts 1x
Ingredients
- 3 cups of all purpose flour
- 1 cup of cold, unsalted butter*
- 1/4 cup of sugar
- 1/2 tsp of salt
- 6-8 tbsp of ice cold water*
Instructions
- Place the butter in the freezer 15-30 mins before making the crust. Then, get out a glass or bowl and fill with ice water while you get out the remaining ingredients for your crust to make sure the water is nice and cold.
- If you’re using a food processor, add the dry ingredients to the food processor and pulse to combine. If you’re using a fork or pastry cutter or fork, add the dry ingredients to a large bowl and whisk together.
- Cube the cold butter and add it to the dry mixture. Incorporate the butter with a food processor, pastry cutter, or fork until pea-sized crumbs form. If you’re using a food processor, just pulse a few times.
- Add the water, 1 tbsp at a time, until dough pulls together.
- Next, divide the dough in half wrap each half tightly in plastic wrap. Each half will give you one pie crust. If you need both crusts right away, refrigerate for 20 mins (but up to 2 days) before rolling them out. If you only need one, place one half of the dough into a zip-top, freezer-safe bag and freeze for up to 6 months.
- When you’re ready to roll the dough out, let the dough come to room temperature for a few minutes on the counter and roll it out. For a 9-inch pie plate or tart pan, you’ll need a circle that’s about 12-14 inches in diameter.
- Lay crust into pie plate. Refrigerate again for about 15-20 minutes before adding the filling.
- For recipes that call for a cooked pie shell ONLY: bake for 20-25 mins at 375 degrees, with pie weights, rice or beans inside so it doesn’t puff up.
Notes
- can sub ghee or coconut oil for the butter. measure it first, and then place in the fridge or freezer for a few minutes to harden.
- can also sub buttermilk for the water.
- You need at least a 7 cup food processor for this to work in a food processor.
This post contains affiliate links. This post was originally written on May 27th, 2016 and was updated on December 1, 2017.


I love making pie! I wish I always had extra dough in the fridge for emergency pie 😉 I have to try your recipe soon!
Oh my goodness, totally let me know when you try!!! I’d love to hear what you think of the recipe! xoxx
Adding to my recipe book. Can I freeze these if I make a handful at a time? How long do you think the freezer life is on these guys?
Yayyy! You found it! Absolutely, you can freeze them. The crust makes enough for a covered pie, so you can technically make 2 pies from each recipe. I often freeze half of the dough, and I’ve used it even 6 months after making it if it doesn’t get freezer burnt! I’ll warn you: I like making one batch at a time as opposed to doubling the recipe. It really overloads the food processor and sometimes it doesn’t mix correctly. Sometimes, I’ll make a few batches in October and November and I’m good to go for the holidays!
Question! Have you tried this recipe with the Gluten Free 1 to 1 flour at all? Just wondering if it will be too crumbly to roll or if it will actually work. Looks delicious though!
I haven’t tried it yet!!!! I would definitely recommend using a mix like Gluten Free 1 to 1 flour and using the same amount of butter, sugar, salt, and water. I’ll have to break into gluten free crusts soon!!!
Thoughts on if Ghee or a “vegan” butter would work? I’m really sensitive to dairy, so would love to try an alternative!
Ghee and coconut oil work perfectly!!! I like to measure them out, chill, and then cut into chunks and proceed as the recipe directs. I haven’t used vegan butter, and I’d be hesitant if it had fillers or chemicals, but ghee and coconut oil work like a charm.
Yay! thank you! Can’t wait to give it a shot
Let me know when you do!