This Slice & Bake Brown Butter Chocolate Chip Cookie Recipe has the convenience store-bought cookie dough and the homemade flavor of brown butter chocolate chip cookies!
I don’t know about you, but holiday baking is in full swing around here and these Slice and Bake Brown Butter Chocolate Chip Cookies are at the top of our list, along with my Cranberry and Orange Shortbread Slice and Bake Cookies. They are perfectly chewy, soft and melt in your mouth delicious. The secret to these cookies is the brown butter (check out the tutorial here) which adds a depth of flavor, a total game changer. Plus, you can keep these in the freezer and bake them up as needed (no cookie scoop needed).
They are truly the best chocolate chip cookies I’ve ever had. If you need some other cookie inspiration, I recommend trying these Peanut Butter Cookies With Chocolate And Sea Salt, or my Triple Chocolate Peppermint Shortbread Cookies. They are always a hit on a holiday cookie platter or at a cookie swap. We love serving these with some of my homemade hot cocoa mix and to twist things up, try out my bone broth hot cocoa for a healthier option.
These Slice & Bake Brown Butter Chocolate Chip Cookies are sure to be the coziest cookies of the season! They are the perfect blend of convenience and homemade magic. Imagine having cookie dough at the ready, just like the store-bought kind, but packed with rich, nutty brown butter flavor. Slice off a few, bake them up, and in no time, you’ll have warm, gooey cookies that taste like you’ve been baking all day!

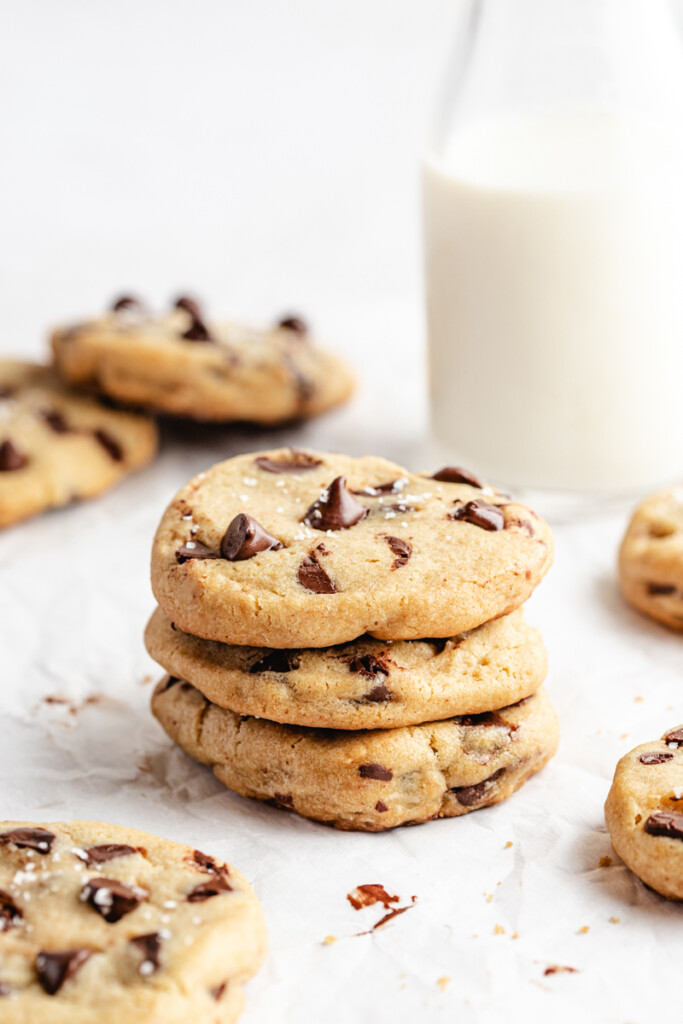
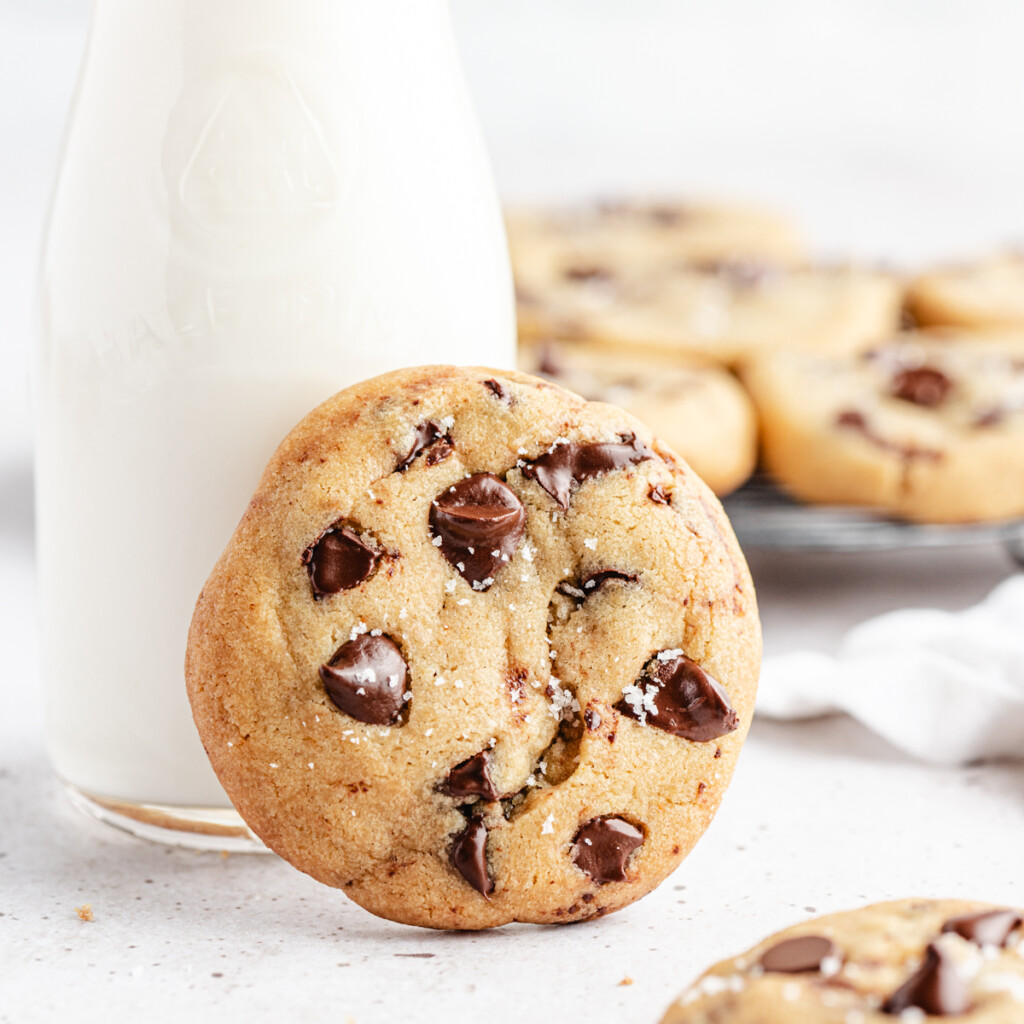
Don’t forget to top these cookies with a sprinkle of flakey sea salt for that extra touch of indulgence, and grab a cold glass of milk. Whether you’re curled up with a blanket or getting into the holiday baking spirit, these cookies will bring all the cozy vibes to your kitchen.
INGREDIENTS AND KITCHEN TOOLS
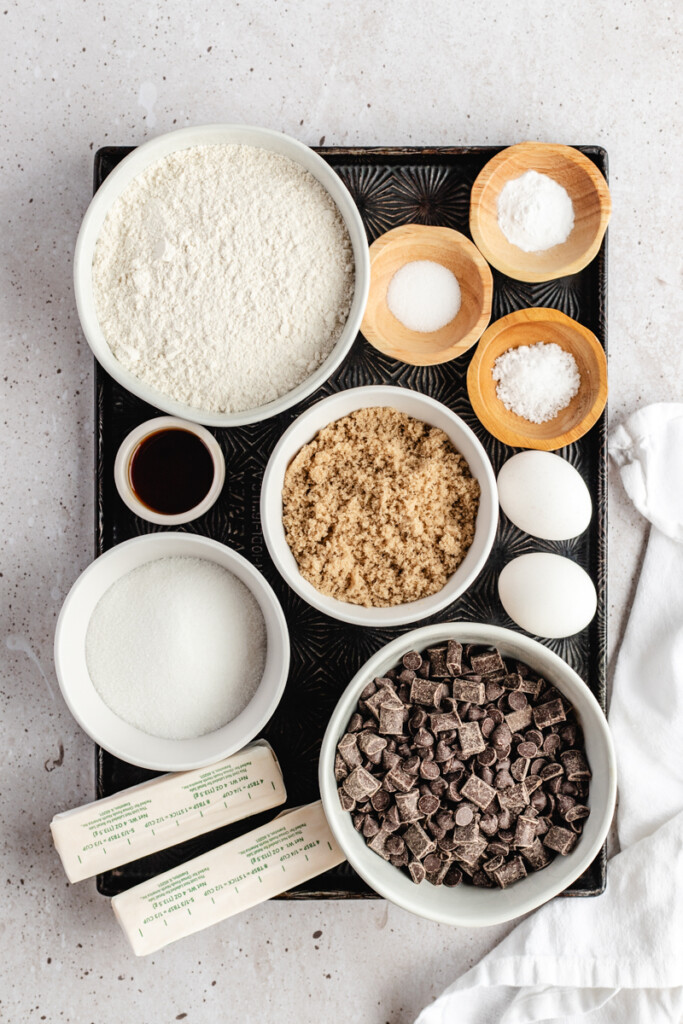
- Salted butter (grass fed is best) – see recipe for browning instructions (I don’t recommend using unsalted butter for this recipe)
- Granulated sugar
- Light brown sugar
- Eggs
- Vanilla extract
- All purpose flour
- Baking soda
- Salt
- Semi-sweet chocolate chips or chunks, plus extra for baking
- Flakey sea salt
- Plastic wrap & plastic bags for freezing
(Here’s a great brown butter tutorial)
STEP BY STEP
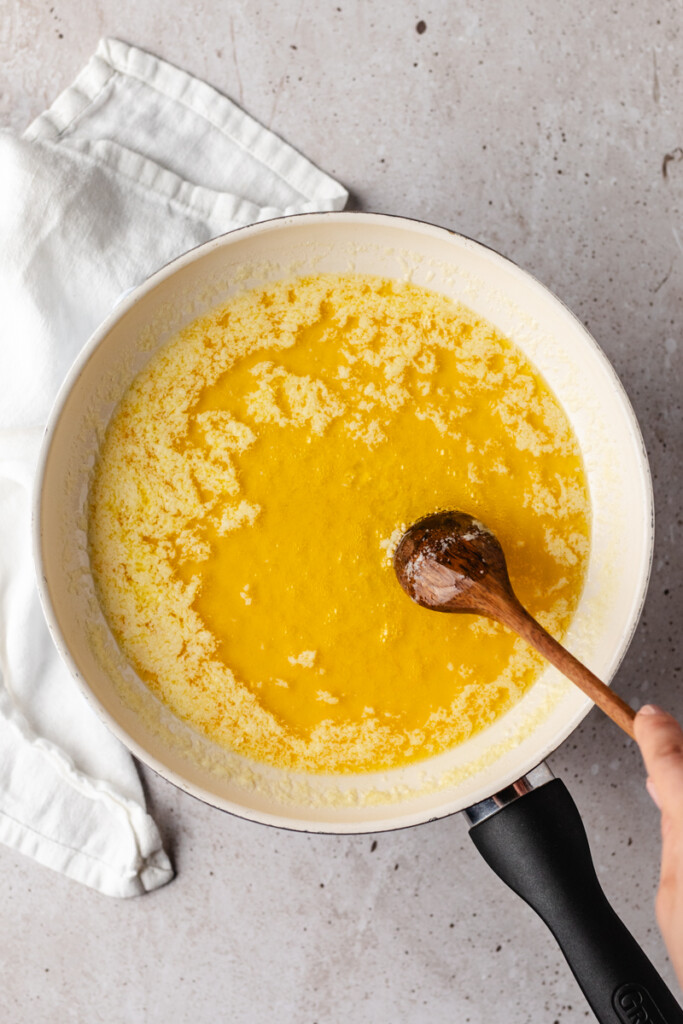
To brown the butter (this can be done a few days ahead of time and the butter can be brought to room temperature before baking), place the sticks of butter in a saucepan over medium heat.
Step 1: Preliminary note: Browning butter is pretty quick, so don’t leave the stove unattended. Have a heatproof bowl next to the stove ready to go for step 3.
Step 2: Place the butter in a light-colored pan over medium-low heat. Medium heat ensures the butter cooks evenly, an important factor in this process. Stir the butter the entire time to keep it moving. Once melted, the butter will begin to foam and sizzle around the edges. Keep stirring. In about 5–8 minutes from when you started (depending on the amount of butter you used), the butter will turn a golden brown color. Some foam will subside and the milk solids at the bottom of the pan will be toasty brown. It will smell intensely buttery and have a nutty aroma.
Step 3: Immediately remove the pan from heat and pour the butter into heatproof bowl to stop the cooking process. If left in the hot pan, the butter will burn.
Making your cookies:
Step 1: Allow the butter to melt and cook for the next 5-8 minutes over medium heat but watch it constantly. It will first bubble and when the bubbles start to pop/clear and you notice a nutty brown color and flecks of brown at the bottom of the pan, immediately remove the pan from the heat and pour your butter into a heat safe bowl or dish. Don’t leave it in the pan, it will burn.
Step 2: Allow the butter to cool and either store it in the fridge, or let it chill for 20-30 minutes on the counter before making your cookies. If you make your brown butter ahead of time, allow it to come to room temp/soften before making these cookies. This is imperative that all ingredients are at room temp!
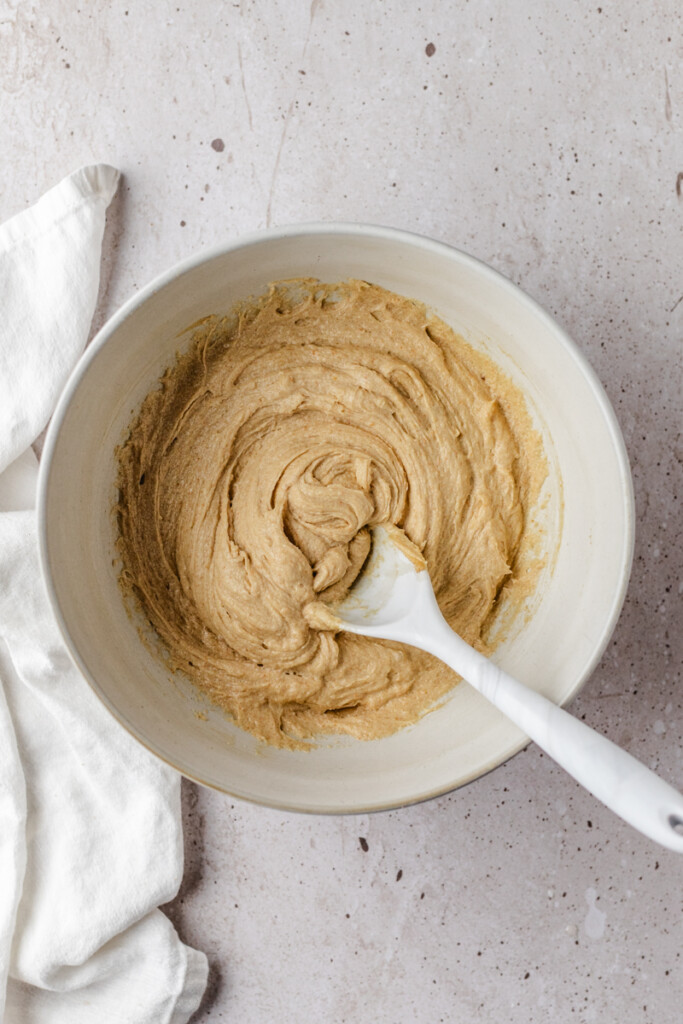
Step 3: Add the butter to the bottom of a stand mixer with the sugars or beat the two together with a hand mixer. Beat for 2-3 minutes until fluffy/the sugar looks to be smooth and more dissolved.
Step 4: Add the eggs, one at a time, and the vanilla. Mix well.
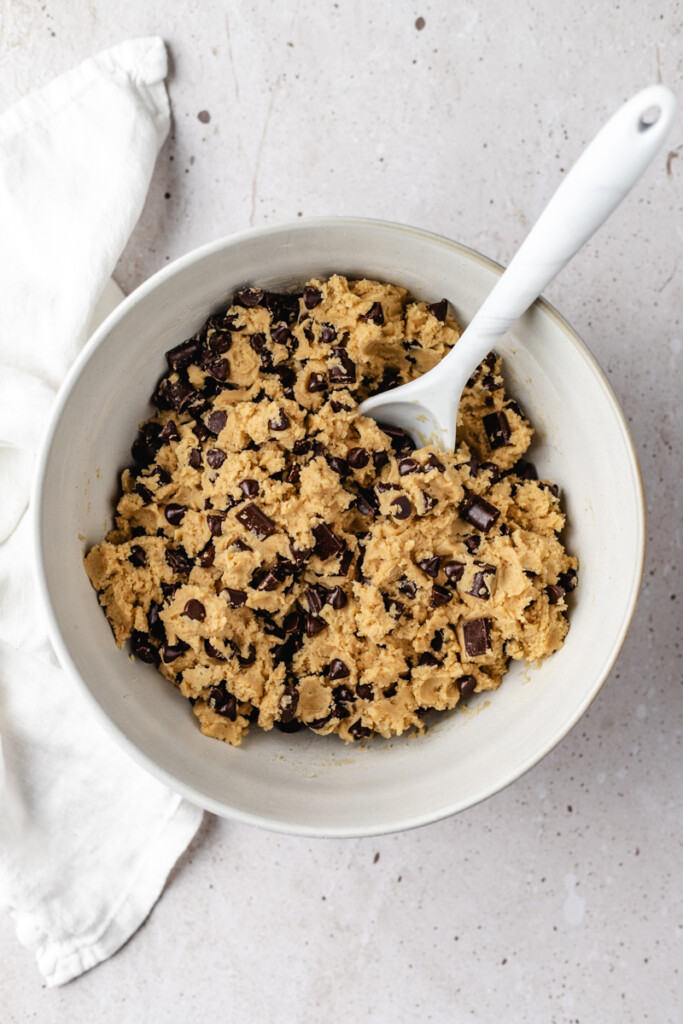
Step 5: In a separate bowl, gently whisk together the flour, baking soda and salt until just combined.
Step 6: In 3 stages, add the dry ingredients to the wet mixing until just incorporated. Fold in the chocolate chips.
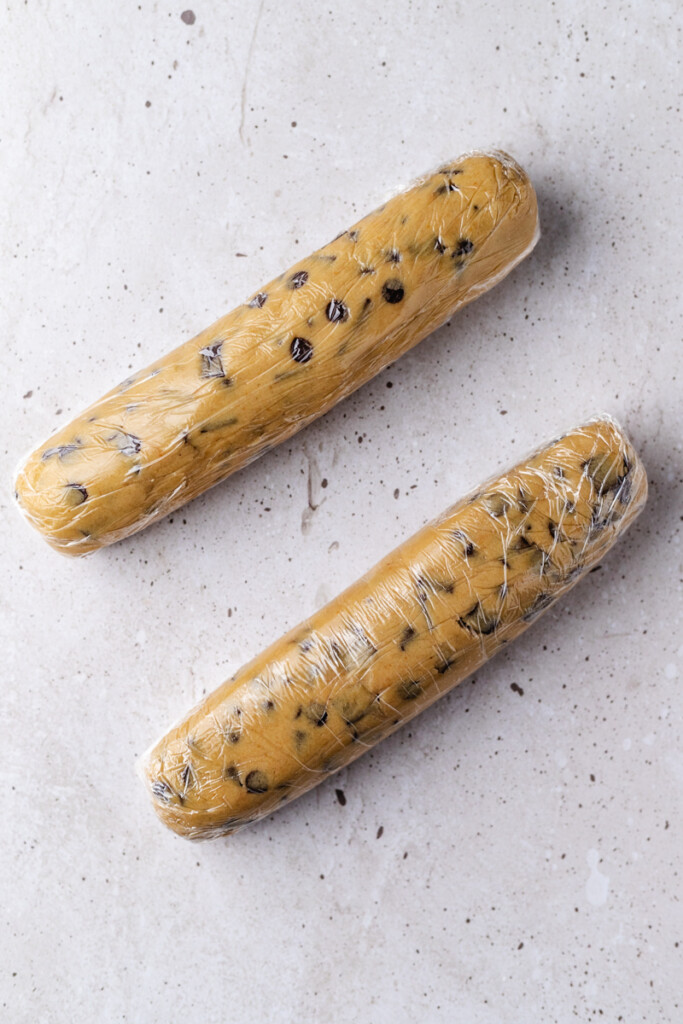
Step 7: Tear off two large sheets of plastic wrap.
Step 8: Divide the cookie dough in half and place each half on the plastic wrap.
Step 9: Wrap and shape each into a cylindrical log. Place the cylinders into a large plastic bag in the freezer.
Step 10: When you’re ready to bake, preheat the oven to 375F.
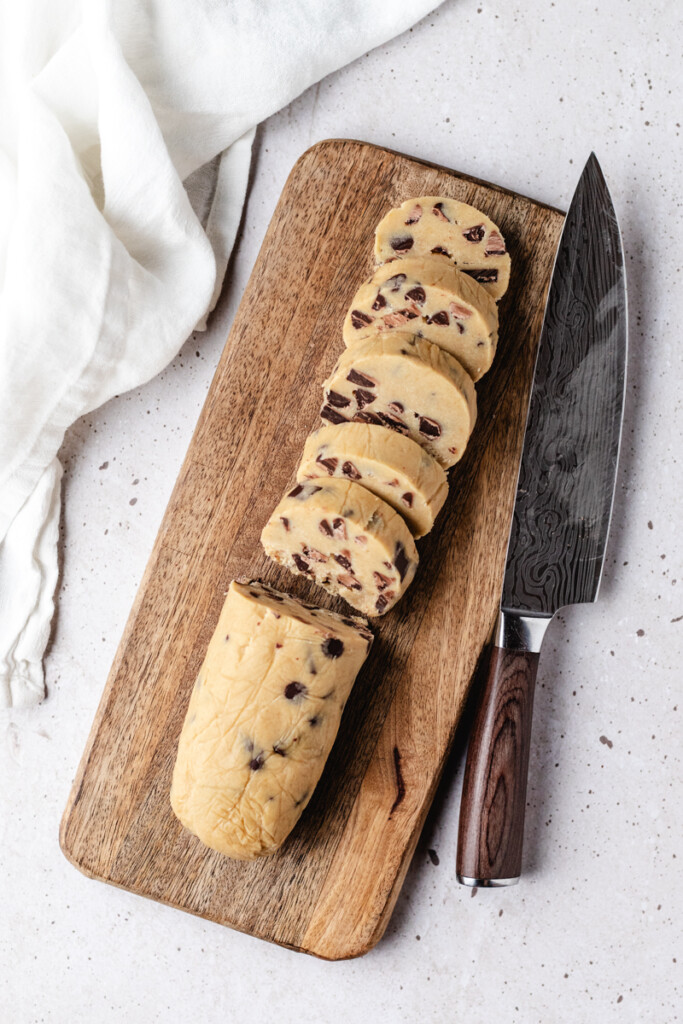
Step 11: Remove the frozen dough from the freezer and slice 1/2-3/4 inch thick slices. Only slice off what you want to bake!
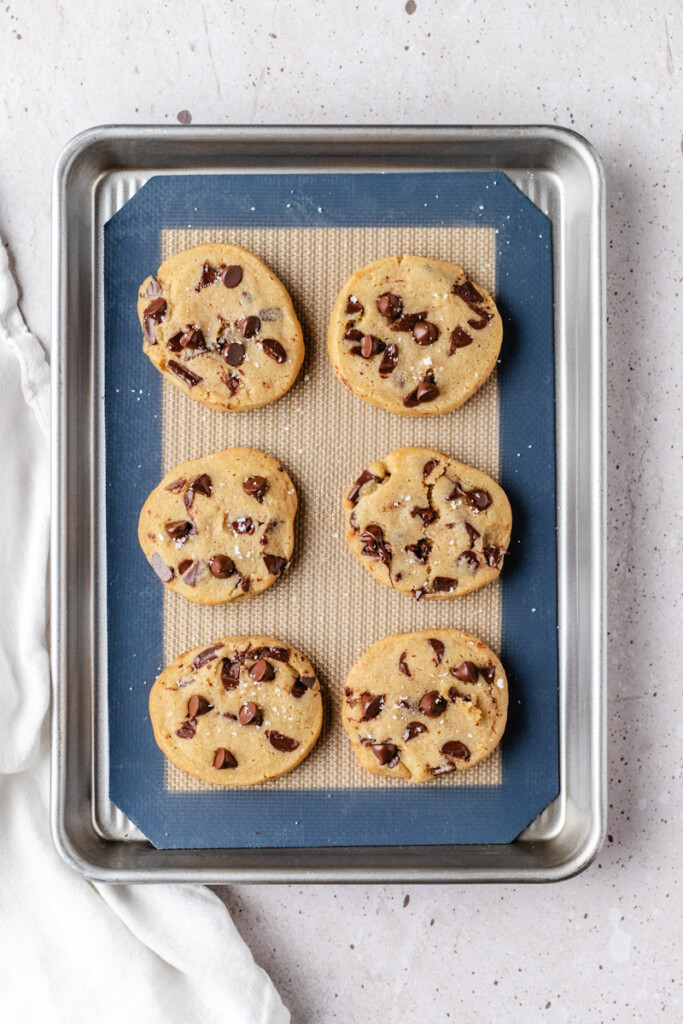
Step 12: On a silpat or parchment paper lined baking sheet, arrange the slices of dough and sprinkle on a few chocolate chips.
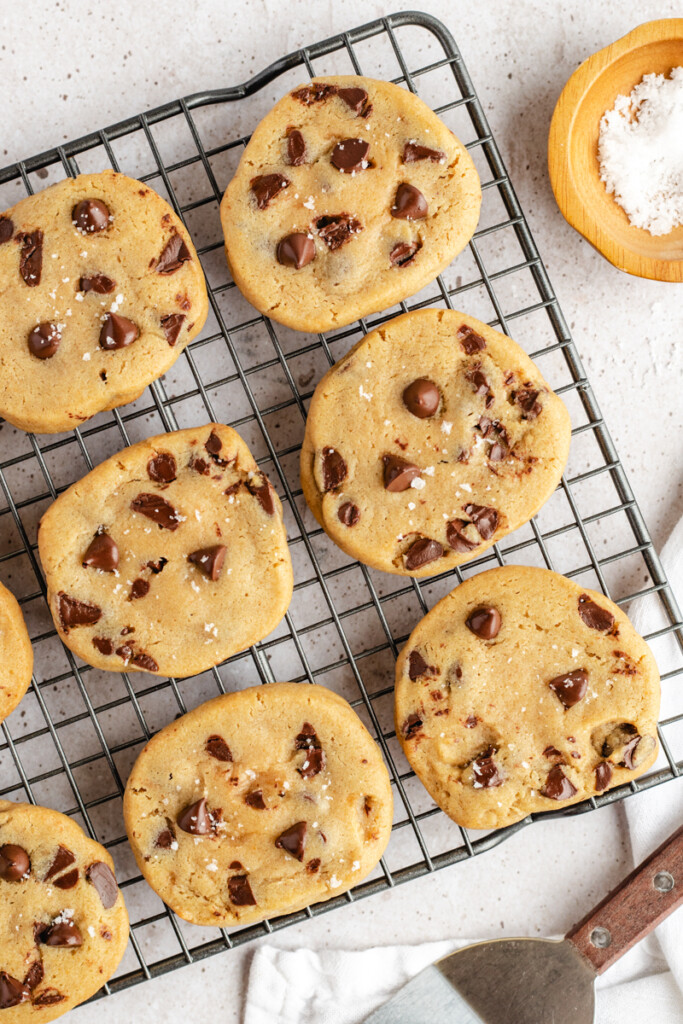
Step 13: Bake for about 14-17 minutes until the edges are browned and cook on the sheet for about 5 minutes.
Step 16: Sprinkle with flakey sea salt if desired and enjoy with a glass of milk

Cooking Tip
Don’t forget to top these cookies with a sprinkle of flakey sea salt for that extra touch of indulgence, and grab a cold glass of milk.
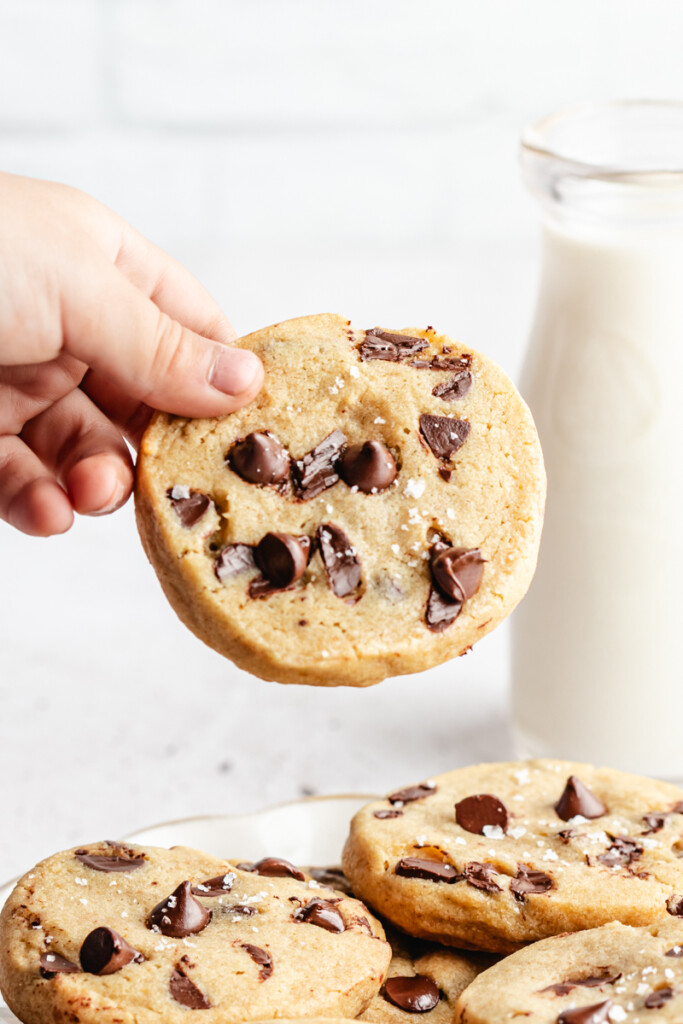
HOW TO SERVE
These are served perfectly with some homemade hot cocoa (or try out my bone broth hot cocoa), or a glass of milk. Don’t forget to sprinkle with some flakey sea salt for the perfect finishing touch!
OTHER RECIPES YOU’LL LOVE
- Cranberry and Orange Shortbread Slice and Bake Cookies
- Peanut Butter Cookies With Chocolate And Sea Salt
- Triple Chocolate Peppermint Shortbread Cookies
- Bone Broth Hot Chocolate
- Healthy, Homemade Hot Cocoa Mix Recipe {Hot Cacao}

Slice & Bake Brown Butter Chocolate Chip Cookie Recipe
This Slice & Bake Brown Butter Chocolate Chip Cookie Recipe has the convenience store-bought cookie dough and the homemade flavor of brown butter chocolate chip cookies!
- Prep Time: 20 minutes + freezing time
- Cook Time: 15 minutes
- Total Time: 35+
- Yield: 16–18 cookies 1x
- Category: Desserts
- Method: Oven
- Cuisine: American
Ingredients
- 1 cup (2 sticks) salted butter (grass fed is best) – see recipe for browning instructions
- 3/4 cup granulated sugar
- 3/4 cup packed light brown sugar
- 2 eggs, at room temperature
- 2 tsp. vanilla extract (OR 1 tsp. vanilla extract + 1 tsp. vanilla bean paste)
- 2 and 1/2 cups all purpose flour
- 1 tsp. baking soda
- 3/4 tsp. salt
- 2 cups semi-sweet chocolate chips or chunks, plus extra for baking
- flakey sea salt
- plastic wrap & plastic bags for freezing
- 1/2 cup (8 Tbsp; 113g) butter, cut into 1-Tablespoon-size pieces*
- Light colored pan or skillet
Instructions
To brown the butter (this can be done a few days ahead of time and the butter can be brought to room temperature before baking)
- Preliminary note: Browning butter is pretty quick, so don’t leave the stove unattended. Have a heatproof bowl next to the stove ready to go for step 3.
- Place the butter in a light-colored pan over medium heat. Medium heat ensures the butter cooks evenly, an important factor in this process. Stir the butter the entire time to keep it moving. Once melted, the butter will begin to foam and sizzle around the edges. Keep stirring. In about 5–8 minutes from when you started (depending on the amount of butter you used), the butter will turn golden brown. Some foam will subside and the milk solids at the bottom of the pan will be toasty brown. It will smell intensely buttery and nutty.
- Immediately remove the pan from heat and pour the butter into heatproof bowl to stop the cooking process. If left in the hot pan, the butter will burn.
- Allow the butter to melt and cook for the next 5-8 minutes over medium heat but watch it constantly. It will first bubble and when the bubbles start to pop/clear and you notice a nutty brown color and flecks of brown at the bottom of the pan, immediately remove the pan from the heat and pour your butter into a heat safe bowl or dish. Don’t leave it in the pan, it will burn.
- Allow the butter to cool and either store it in the fridge, or let it cool for 20-30 minutes on the counter before making your cookies. If you make your brown butter ahead of time, allow it to come to room temp/soften before making these cookies. This is imperative that all ingredients are at room temp!
- Add the butter to the bottom of a stand mixer with the sugars or beat the two together with a hand mixer. Beat for 2-3 minutes until fluffy/the sugar looks to be smooth and more dissolved.
- Add the eggs, one at a time, and the vanilla. Mix well.
- In a separate bowl, gently whisk together the flour, baking soda and salt until just combined.
- In 3 stages, add the dry ingredients to the wet mixing until just incorporated. Fold in the chocolate chips.
- Tear off two large sheets of plastic wrap.
- Divide the cookie dough in half and place each half on the plastic wrap.
- Wrap and shape each into a cylindrical log. Place the cylinders into a large plastic bag in the freezer.
- When you’re ready to bake, preheat the oven to 375F.
- Remove the frozen dough from the freezer and slice 1/2-3/4 inch thick slices. Only slice off what you want to bake!
- On a silpat or parchment lined baking sheet, arrange the slices of dough and sprinkle on a few chocolate chips.
- Bake for about 14-17 minutes until the edges are browned and cook on the sheet for about 5 minutes.
- Sprinkle with flakey sea salt if desired and enjoy with a glass of milk!


Amazing cookies, love the browned butter flavor! Every time I make them they are gone so quick and everyone loves them!
Thank you so much, Amber <3