Venison Everyday Cookbook

Buy Now

Jerk Rubbed Pork Loin

who’s ready for bold, bright summer flavors?! let’s dive in! 

Jerk Spiced Pork

Jerk Rubbed Pork Loin

Every time I make pork that little commercial with “Pork the Other White Meat” slogan comes to mind. It’s more like “Poohharrkkk, the Otha White Meat!!!”. Lol, know what I’m talking about?

All randomness aside, pork is pretty underrated in my humble little opinion. It’s very versatile, pairs well with a variety of flavors, and plays very well with both white and red wines. Playing well with wine is key my friends. I mean, I play well with wine. LOL.

Anyway, spring makes me all giddy for summer which has me craving bold & smokey flavors, and alas this recipe for Jerk Rubbed Pork Loin was born. You can thank me later (I’m in a very punchy mood today, can you tell?!) Anyway…

Let’s get to it!

Jerk Rubbed Pork

WHAT YOU’LL NEED (measurements below):

Pork Loin

Garlic powder

Cayenne

Paprika

Coconut sugar (or brown sugar)

Thyme

Nutmeg

Cinnamon

Jerk Rubbed Pork Loin

WHAT YOU’LL DO:

Preheat oven to 350 degrees. Pull your pork loin out of the fridge and let it come to room temp. Combine all spices, salt and coconut sugar into a ramekin and mix well.

Trim the fat off of the pork, pat it dry with a paper towel and liberally rub with 2.5 tablespoons of the jerk seasoning. You can save the remaining seasoning for whatever you like. Place the pork onto a cookie sheet lined with a wire rack and roast in the oven for 80-90 minutes. Low & slow, friends. A thermometer should read 145 degrees and there should be no pink in the middle. Let this rest for 10 minutes for serving, slice up and dig in!


xoxx,

Miss AK

Don’t Forget To Follow Me On Social Media!

Instagram – https://www.instagram.com/miss.allieskitchen/

Facebook – https://www.facebook.com/missallieskitchen/

Pinterest – https://www.pinterest.com/miss_ak/

Twitter – https://twitter.com/missallieskitch

Print

Jerk Rubbed Pork Loin

  • Author: Allie Doran
  • Prep Time: 10 mins
  • Cook Time: 90 mins
  • Total Time: 1 hour 40 mins
  • Yield: 8 1x

Ingredients

  • For the jerk rub:
  • 1 Tbsp coconut sugar (or brown sugar)
  • 2 tsp garlic powder
  • 2 tsp cayenne
  • 2 tsp paprika
  • 2 tsp salt
  • 1 tspThyme
  • 1/2 tsp Nutmeg
  • 1/2 tsp Cinnamon
  • For the pork:
  • 2lb pork loin (mine was a very thick cut)
  • 2 + 1/2 Tbsp jerk seasoning

Instructions

  1. Preheat oven to 350 degrees. Pull your pork loin out of the fridge and let it come to room temp. Combine all spices, salt and coconut sugar into a ramekin and mix well.
  2. Trim the fat off of the pork, pat it dry with a paper towel and liberally rub with 2.5 tablespoons of the jerk seasoning. You can save the remaining seasoning for whatever you like. Place the pork onto a cookie sheet lined with a wire rack and roast in the oven for 80-90 minutes. A thermometer should read 145 degrees and there should be no pink in the middle. Let this rest for 10 minutes for serving, slice up and dig in!


Pin It For Later:

Jerk Rubbed Pork Loin

Cranberry Rosemary Magic Bread

The best Cranberry Rosemary No Knead Bread bread studded with sweet cranberries and fragrant rosemary. This one is sure to be dubbed THE bread in your household, too!

The best no-knead bread studded with sweet cranberries and fragrant rosemary. This one is sure to be dubbed THE bread in your household, too!

As this post is being published, it’s Tuesday morning. Tuesday, April 25th, 2017. My second day of self-employment.   (whhhhhhaaaaaaaat??!)

I announced this news via social media yesterday, and if you know me personally you may already know, but as of this week, I am a full-time recipe developer, food photographer, and food blog content manager. I’ll be dividing my time between Miss Allie’s Kitchen and another website, which I will announce in weeks to come. To stay in the loop, join my email list!

Basically, I quit my office job to do what I love. And, I am terrified. I’m sure there are a few of you rolling your eyes out there, wanting to spit on me. “Oh my gosh you’re so lucky, why would you even be nervous? You get to sit at home and cook all day! Isn’t that what you love to do?!”

My answer is yes. And truly, I am elated. I’m also scared as hell. I feel like I have spent my life in this box. This box compartmentalized my life. From ages 5-18 I went to school, following a schedule and concrete start and end times each day. College was filled with classes, sorority meetings, parties, study blocks, and projects, all which had deadlines and timeframes. My first job out of college was not necessarily a desk job; I worked as a farm manager, horseback riding instructor, and community relations manager at a therapeutic horseback riding facility. I was still expected to arrive on time, teach lessons at certain times, and feed a variety of critters at certain times of the day…TIME TIME TIME.

After that position ended, I started working in office jobs behind a desk. I have had the pleasure of working for two fantastic companies, and I must say, I enjoyed the corporate world much more than I thought I would. Deep down, however, I knew this 9-5er just wasn’t me. I’m somewhat of a wild child, and wild things don’t do well in boxes.

I started Miss Allie’s Kitchen with hopes that one day, very far down the road, I may be able to make a career out of blogging. It evolved out of a hobby, but I always operated with some intention for “someday”. For those of you that think I’m “lucky” (which, hey, maybe I am) I wish I could have invited you to watch me struggle for the past year. I spoke before about what it was like to be a Beginner Blogger, but ultimately, it’s a lot of work. It’s also work I happen to love, and through the past 11 months, I have felt this current pushing me along through the ups and downs, probably preparing me for today, Tuesday, April 25th, 2017. My second day of self-employment. The second day the box opened.

Whole Wheat with Cranberry Rosemary Magic

I’m giving you this magic bread recipe today kind of because I feel like I’m operating in this magical fairyland. This new land still requires a lot of work (probably more than I had before, and of course there are deadlines), but it all just feels so open and wild. Now, this bread is wildly delicious, and with its folds & pockets of warm carb-y goodness, I want to apologize for going on and on about my new reality. I just want you to feel a part of this newness because you are. Your support and involvement has opened this door for me, so I want to offer this bread recipe as a thank you, too. Because what says “thank you” better than a steaming loaf of cranberry – rosemary goodness?


Let’s get to it!

Cranberry Rosemary Magic Whole Wheat Bread

xoxx,

Miss AK

Don’t Forget To Follow Me On Social Media!

Instagram – https://www.instagram.com/miss.allieskitchen/

Facebook – https://www.facebook.com/missallieskitchen/

Pinterest – https://www.pinterest.com/miss_ak/

Twitter – https://twitter.com/missallieskitch

Print

Cranberry Rosemary Magic Bread

The best no-knead bread studded with sweet cranberries and fragrant rosemary. This one is sure to be dubbed THE bread in your household, too!

  • Author: Allie Doran

Ingredients

1 +1/2 cups all-purpose flour
1 + 1/2 cups whole wheat flour
1 + 1/2 cup water
3/4 tsp yeast
1 Tbsp honey
1-2 Tbsp chopped rosemary
½ cup dried cranberries
1 ½ tsp salt

Instructions

  1. Measure the flour, salt, yeast, honey, rosemary, and cranberries into a bowl and mix them together with a whisk or wooden spoon.
  2. Mix in the water. Don’t get concerned if it looks a little chunky; it should be wet and gloopy. After this, cover your bowl with plastic wrap and you’re just going to leave it on the counter for 12-18 hours. Overnight is great.
  3. When you’re ready to bake, preheat the oven to 450 and stick the Dutch oven in the hot oven to heat for 30 minutes.
  4. Remove the Dutch oven, line it with parchment and place the dough on it. Cover it with the lid and bake for 30 minutes.
  5. Pull the Dutch oven out, take off the lid and allow it to bake for 15 additional minutes so the crust gets golden. I suggest serving with a swipe of honey butter.


*recipe inspiration drawn from Pinch of Yum

Tips For Developing Creative Recipies

tips and strategies for organizing and creating your own original recipe development flow 

Tips for Developing Your Own Creative Recipes

Tips For Developing Creative Recipies

I get a lot of questions about how I create my own original recipes. My simple answer is that I just, sort of, do it. I know that isn’t super helpful, but keep reading. It’s in my genetic makeup to want to add things to recipes, throw things together, and substitute instead of running to the store. I pay a lot of attention to flavors when I’m in restaurants, and I rely heavily on my palate and memory to combine different tastes and textures I think might work. I have a creative personality and I express a lot of this through my cooking. I have developed Type A tendencies over the years, but I am not a  perfectionist by nature. In the beginning, if I made something that turned out spectacular, I would grab my camera (no matter what time of day – LOL), snap some photos and put a post up on the blog rather haphazardly.

However, as my blog has turned more into a business, I had to develop some sort of workflow. AND, I learned rather quickly that photographing under my dim apartment lighting at 9 pm did not produce beautiful work. And let’s face it, you guys like to look at pretty stuff, amirite? For more fun facts about my blogging journey check out my post on Beginner Blogger Tips!

As time has passed, I have developed a much more streamlined approach for recipe development which helps me stay organized and on top of blog content and creations for clients. I’ll give you an outline and some strategies that I use below!

Record Every Little Idea

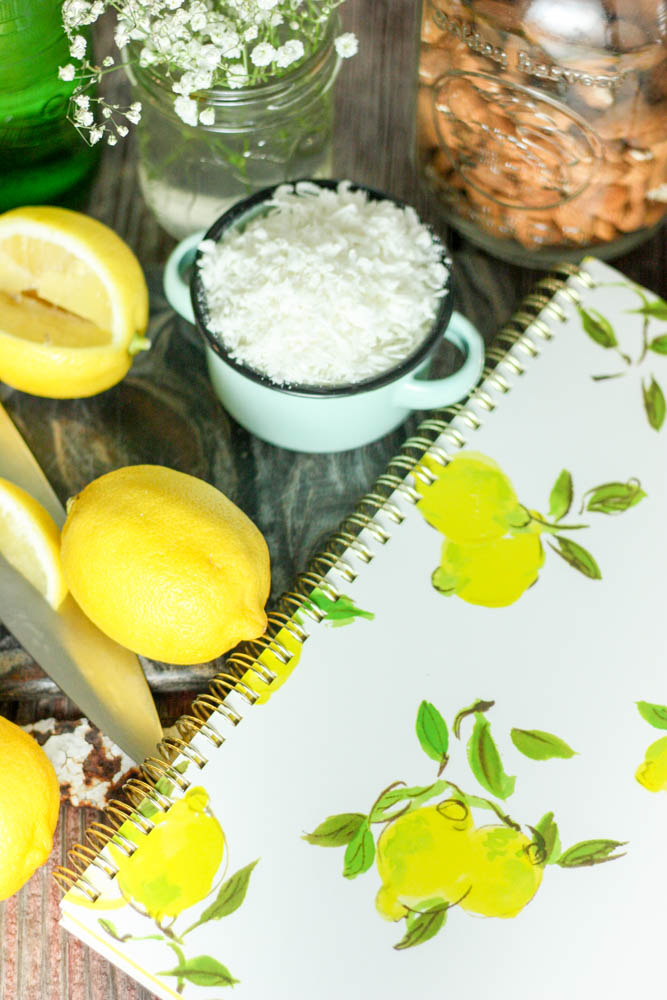
I keep notes in two different places – on my iPhone in the notes section and in an actual, spiral-bound notebook. That’s really it. I sync my iPhone notes into my iCloud, so I can access them on my Mac, as well. I do use all Apple products. I have one notebook that contains thoughts, notes, to-do lists, recipes, and ideas. I am someone that needs to have everything easily accessible in one place. I do have a binder that I file old notes, contracts, and downloads in every once in a while, but I don’t use that every day. On my phone and in my notebook I have a page (or six lol) dedicated to just recipe ideas. If I’m out or away from my notebook and something pops into my head I write it in the notes section of my phone (which syncs to my computer), or if I’m by my notebook I’ll jot it there. As you continue to develop recipes and understand how food and flavors work, you will be FLOODED with ideas if you’re anything like me. I actually dream recipes now. Not kidding. I make sure to capitalize on those creative moments because my brain isn’t always “on” and I like to make sure I remember my best ideas. When I plan out content, I just browse through my notes for appropriate ideas.

Plan Out Content In Advance

This really might not work for you. And when I plan content it isn’t set in stone, but I like to get a rough idea of what I’m making each week about a month before I post it. That way, I can make sure there’s a variety of content, check for any major holidays, and see what time constraints I may be working with considering that I do have a personal life. I use a Google Calendar and each month, I write in when I would like to post content and what I would like that content to be. I may not have an exact recipe in mind, but I know that the third week in May, I want to post a dessert.

Test New Creations on a Weekday

When I create something really new for the first time, I like to do it on a weeknight, and not the day that I’m actually photographing it. That way, I have no time constraints, I don’t have to worry about making it picture perfect, and I can just cook. If I want to make a new dessert, maybe I’ll test something out 3-4 weeks prior to posting. If I need to make tweaks (which I almost always do with baking), I have plenty of time to do so and I can get a feel for the types of photos that may compliment the creation. There are some exceptions to this rule (especially when I’m modifying an old favorite), but I’m striving to implement this practice. It really alleviates some pressure on photography day!

Thought Notebook for Recording Recipes

Cook With a Notebook

Okay, back to my little notebook. Before I start cooking I usually write down what ratios of ingredients I think will work and I make notes as I go. If a cookie batter is too thick – I add that I added an extra tablespoon of milk as I do it. I can’t stress how important it is to do this AS YOU COOK. I always get so distracted in the kitchen, and if I don’t write something right away, I’ll likely forget and have to go back to the drawing board. So, on the night I test a new creation I’ll have my notebook handy to take notes as I go, and then when I go to make it again, the recipe is right there ready for me!

Don’t Let Flops Make You Quit

Cooking “flops”, as I call them, will happen and it IS frustrating because you spent time and money on a creation. If you test a recipe beforehand, it won’t be as big of a deal to re-adjust because you won’t be under pressure to take photos and crank the content out for that next week’s post. Try to take a deep breath, think about what went wrong (too much salt, too little fat, more sugar needed?) and make a game plan for next time. Also, can you re-purpose the recipe and make it into something else for you to have for a meal or snack? A few weeks ago I made a Lemon Meringue Pie. The crust was made from a batch of Coconut Flour Lemon Blondies that were delish, but drier than the Sahara Desert. J and I shared the pie with friends and ate the other half ourselves. In 2 days. Balance, yo?

Recipe Developing Tips

Batch Photograph Recipies

Unless you’re insanely lucky or live in a glass house, I’m going to go ahead and assume that your favorite photography spot is not always in prime condition for snapping blog worth shots. Something that has helped me tremendously is picking out a day that is open, and taking my food photos on that day. I may wake up a little early on a Saturday, whip up some recipes, and then snap a few photos. I don’t always worry about editing right away, but doing things in blocks is so hugely helpful!

Take Time for Creative Exploration

For me, it’s very important to remind myself that I DO love to cook and that it is a part of me. I like to take the time to cook a favorite recipe or try out something new, without the pen, paper, and camera. I like to remind myself why I love to cook and do so freely. Blogging can feel like a full-time job, so it’s important to remind ourselves why we do what we do. This really helps with inspiration down the line, too.

Blogging is a profession that I’m passionate about, so when I say I’m here for you, I mean it. Send me an email, shoot me a note on Instagram if you feel alone. There’s room for everyone & we’re all in this blogging world together!

xoxx,

Miss AK

Don’t Forget To Follow Me On Social Media!

Instagram – https://www.instagram.com/miss.allieskitchen/

Facebook – https://www.facebook.com/missallieskitchen/

Pinterest – https://www.pinterest.com/miss_ak/

Twitter – https://twitter.com/missallieskitch

7 Simple Steps for Creating Unique Recipes for Food Bloggers

How To Make Nut Milk

one of the easiest DIY projects you can do, right in your own kitchen!  

Making your own nut milk is easy!

How To Make Nut Milk

Do you ever feel really accomplished when you figure out how to make something your regularly buy successfully? It’s this totally awe-empowering feeling of – “ha! I just made my own dryer sheets – BOY BYE, Downey!”  I have this dream to one day be very self-sufficient. I’m talking bulk ordering meat from farms, growing my own produce, baking my own loaves of bread, ordering mass quantities of nuts and seeds so I can make all of my own nut butters and milks. So, I’ve been trying to practice, lately.

One thing that I’m finding is that while some of these processes take a bit of time, they really are no-brainers. What I’m getting at is that you can expect a lot more tutorials and “how to’s” on Miss AK in days, months and years to come.

DIY Nut Milk

Making your own nut milk in one of those no-brainer projects. You soak the type of nut you want to use overnight, drain the soaking water, add fresh water into a blender with the soaked nuts, process, and strain. That’s basically it, y’all.

I’m going to give you my template recipe below, the photos I’m sharing display almond milk, but you can honestly follow these steps for any type of nut your prefer. I like to use a quart mason jar for storing & soaking and I have been using these Bigger Better Nut Milk Bags by Ellie’s Best to make the straining process easier. Grab you own bags by visiting Ellie’s Best and enter in my code allie10 to receive 10% off your order!

Let’s get to it!

Learn to make your own nut milk!

WHAT YOU’LL NEED (measurements below):

Your nut of choice

Water

Sea salt

Vanilla

Quart sized Mason Jar

Blender

Nut milk bags or kitchen towel


WHAT YOU’LL DO:

Add the nuts in the mason jar and fill the jar with water. All of the nuts should be covered. Allow this to soak overnight.

Almond Milk in the making!

Drain the water from the nuts and add the soaked nuts to a blender. Add the remaining 4 cups of water to the blender with vanilla and sea salt. Blend until the nuts are all broken down and the mixture is frothy.

Make your own almond milk!


Frothy Almond Milk

Place the nut milk bag or kitchen towel over a large bowl and pour the milk into the bag or strainer. Squeeze the liquid through the bag or strainer until all of the liquid is extracted.

Straining a nut milk bag

Pour the milk back into the Mason Jar and store for a week or so in the fridge!

Homemade nut milk

xoxx,

Miss AK

Don’t Forget To Follow Me On Social Media!

Instagram – https://www.instagram.com/miss.allieskitchen/

Facebook – https://www.facebook.com/missallieskitchen/

Pinterest – https://www.pinterest.com/miss_ak/

Twitter – https://twitter.com/missallieskitch

Print

How To Make Nut Milk

  • Author: Allie Doran
  • Prep Time: 10 mins
  • Total Time: 10 mins
  • Yield: 4 cups 1x

Ingredients

  • 1 cup of your nut of choice (almonds pictured)
  • 8 cups of water, divided
  • 1 pinch of sea salt
  • 1 tsp of vanilla
  • 1 quart sized Mason Jar (holds 4 cups)
  • Blender
  • Nut milk bags or kitchen towel

Instructions

  1. Add the nuts in the mason jar and fill the jar with water. All of the nuts should be covered. Allow this to soak overnight.
  2. Drain the water from the nuts and add the soaked nuts to a blender. Add the remaining 4 cups of water to the blender with vanilla and sea salt. Blend until the nuts are all broken down and the mixture is frothy.
  3. Place the nut milk bag or kitchen towel over a large bowl and pour the milk into the bag or strainer. Squeeze the liquid through the bag or strainer until all of the liquid is extracted. Pour the milk back into the Mason Jar and store for a week or so in the fridge!


Pin It For Later:

How to easily make natural nut milk at home!

Almond Butter Stuffed Chocolate Bars

an easy spin on a classic peanut butter cup, with all of the bells & whistles 

Almond Butter Stuffed Chocolate Bars

    Almond Butter Stuffed Chocolate Bars

I have become a total peanut butter cup SNOB. Even since I tried one of those Justin’s Dark Chocolate PB cups, I was like Reese’s, who the heck are you? I really want to invest in one of those little PB cup molds, but every time I log on to my Amazon account, I totally forget. Anddd, I also tend to be really cheap where kitchen tools are concerned. I literally have one good knife, one good cutting board, and I finally bought two additional baking sheets when my $5 one from college ignited in flames a few months ago…hm. Don’t ask how that happened. You get the gist, I’m a simple gal.

Chocolate Bars stuffed with Almond Butter

So, what’s this simple gal to do when she has no PB cup mold and has been making her own almond butter like a cray-cray person? Well, put a spin on a chocolate peanut butter cups and make these Almond Butter Stuffed Chocolate Bars, of course.

Almond Butter & Chocolate Candy Bars

I love these because they’re rich enough to satisfy that sweet tooth craving after a few bites, which is JUST what you need sometimes. Anddd I wanted to give you all something easy & chocolatey for Easter weekend. You know, watch the kids run around hunting for Easter eggs and a measly jelly bean while you savor this decadent square of chocolate nut butter heaven. Yep. That’s what I have in mind for you. Note: sharing is not a requirement. #treatyoself

Let’s get to it!

Almond & Chocolate Bars

WHAT YOU’LL NEED (measurements below):

Semi-sweet chocolate chips or morsels – absolutely use dairy free if you prefer/ for Paleo

Almond butter – the more simple the ingredients the better, I used homemade

Almonds

Coconut oil

Maple syrup

Sea salt (the magic ingredient)

Paleo Chocolate Bars

WHAT YOU’LL DO:

Fill a medium saucepan about halfway with water. Place pan on the stove over high heat until the water almost boils, then turn the heat to medium or medium-low. Place a medium sized glass or metal bowl over the saucepan to create a double boiler. Add the chocolate, 2 tablespoons of coconut oil, 1 teaspoon of maple syrup, and a pinch of salt into the double boiler and allow it to melt.

While the chocolate mixture melts, line a loaf pan with parchment or wax paper. Either is fine to use because we will not be baking (note: wax paper melts/ burns in the oven). When the chocolate is melted, pour half of the chocolate mixture into the lined loaf pan, smooth out the chocolate with a spatula and place it into the freezer to set for 10-20 minutes. Turn the burner off, but leave the remaining chocolate in the double boiler so it continues to stay in a liquid state.

When the first chocolate layer is set, measure the almond butter, remaining tablespoon of oil, and remaining two teaspoons of maple syrup into a ramekin and heat in the microwave. Heat for 15-second intervals until the coconut oil is melted, and stir together until smooth and creamy.

Pour almond butter mixture over the set chocolate, then pour the remaining liquid chocolate over the almond butter. Top with the chopped almonds and remaining pinch of sea salt. Allow this to partially set in the freezer for 20 minutes. The top layer will still be soft, but this is what we want when cutting into these morsels. By cutting it while still soft, we won’t have to press as hard on the bars which can result in cracking or squishing. Heat a sharp knife in hot water, dry and slice into 8 bars. Keep the candy on the parchment, lift them back into the loaf pan, and allow them to fully set for an additional 20 minutes. When finished the bars will be sliced and ready to devour!

Chocolate Bars with Almond Butter Filling

xoxx,

Miss AK

Don’t Forget To Follow Me On Social Media!

Instagram – https://www.instagram.com/miss.allieskitchen/

Facebook – https://www.facebook.com/missallieskitchen/

Pinterest – https://www.pinterest.com/miss_ak/

Twitter – https://twitter.com/missallieskitch

Print

Almond Butter Stuffed Chocolate Bars

  • Author: Allie Doran
  • Yield: 8 1x

Ingredients

  • 10 oz semi-sweet chocolate chips or morsels – absolutely use dairy free if you prefer/ for Paleo
  • 1/3 cup almond butter – the more simple the ingredients the better, I used homemade
  • 10 almonds
  • 2 Tbsp. coconut oil, divided
  • 3 tsp. maple syrup, divided
  • 2 pinches sea salt, divided

Instructions

  1. Fill a medium saucepan about halfway with water. Place pan on the stove over high heat until the water almost boils, then turn the heat to medium or medium-low. Place a medium sized glass or metal bowl over the saucepan to create a double boiler.
  2. Add the chocolate, 2 tablespoons of coconut oil, 1 teaspoon of maple syrup, and a pinch of salt into the double boiler and allow it to melt.
  3. While the chocolate mixture melts, line a loaf pan with parchment or wax paper. Either is fine to use because we will not be baking (note: wax paper melts/ burns in the oven).
  4. When the chocolate is melted, pour half of the chocolate mixture into the lined loaf pan, smooth out the chocolate with a spatula and place it into the freezer to set for 10-20 minutes. Turn the burner off, but leave the remaining chocolate in the double boiler so it continues to stay in a liquid state.
  5. When the first chocolate layer is set, measure the almond butter, remaining tablespoon of oil, and remaining two teaspoons of maple syrup into a ramekin and heat in the microwave. Heat for 15-second intervals until the coconut oil is melted, and stir together until smooth and creamy.
  6. Pour almond butter mixture over the set chocolate, then pour the remaining liquid chocolate over the almond butter. Top with the chopped almonds and remaining pinch of sea salt.
  7. Allow this to partially set in the freezer for 20 minutes. The top layer will still be soft, but this is what we want when cutting into these morsels. By cutting it while still soft, we won’t have to press as hard on the bars which can result in cracking or squishing.
  8. Heat a sharp knife in hot water, dry and slice into 8 bars. Keep the candy on the parchment, lift them back into the loaf pan, and allow them to fully set for an additional 20 minutes. When finished the bars will be sliced and ready to devour!


Pin It For Later:

Almond Butter Stuffed Chocolate Bars - with a Paleo option!

5 Ingredient Chorizo Salsa Breakfast Bake

make your next breakfast or brunch a breeze with this chorizo and salsa-infused masterpiece. And yes, I said 5 ingredients. 

    Salsa and Chorizo Egg Bake

Chorizo Salsa Breakfast Bake

thanks to Green Mountain Gringo Salsa for sponsoring this post. as always, all thoughts and opinions remain my own and I only work with brands I trust. thank you for supporting the growth of Miss Allie’s Kitchen.

Has anyone else noticed that brunch has gotten to be insanely popular these past few years? It’s the new thing to find the trendiest spot, round up all of your most fabulous friends (who are still gushing about the night before), pile into a plush booth and order farm to table food and craft cocktails.

Oh wait… I live in the middle of nowhere. Yeah, about that, the verdict is still out on whether I should open up my own little brunch joint. Anyone looking to make an investment? Just kidding.

Anyway, BRUNCH. Honestly, I love to host my own. Not only do I (happily) live in a town where the restaurant pickings are slim, but um, my budget doesn’t love weekly brunch either. So, I’ve started making it myself.

The Best Brunch: Chorizo & Salsa Egg Bake

It’s such a fun meal to make! It isn’t as complex as dinner, all you really need is a main dish, a fruit salad or parfait, cheery cocktails and perhaps a muffin…or two.

I guess the only downside to brunch is that you’d don’t have all day to prep it. Simple and easy is key if you don’t want your guests to arrive while you’re still in a tizzy.

This 5 ingredient egg bake couldn’t be simpler. We’re just combining eggs, roasted sweet potatoes, chorizo, salsa, cheese, mixing and baking until golden brown. There’s no need to chop a million veggies, we’re using Green Mountain Gringo Salsa to cut down on prep time. I absolutely love using jarred salsa in recipes; it’s such a life hack.  Premium Green Mountain Gringo Salsa is my absolute favorite – their ingredients are natural and fresh, it feels like I went out to pick the veggies myself, to be honest. I’m all about simple, non-GMO ingredients, and their blend of tomatoes, onions, and peppers is pulled together with a bit of ACV and sea salt.  If I can find it in my small town grocery store, I bet you can find it in yours!

This would make the perfect accompaniment to your spring table or Easter Brunch!

Let’s get to it!

Chorizo & Salsa Egg Bake

WHAT YOU’LL NEED (measurements below):

Eggs

Chorizo

A jar of salsa – I love Green Mountain Gringo 

Sweet potatoes

Cheese (for Whole30/ Paleo omit cheese)

(note: I’m assuming you have olive or avocado oil, salt, and pepper)

Salsa Infused Easy Egg Bake

WHAT YOU’LL DO:

Begin by roasting your sweet potatoes. You can certainly use leftovers or do this the night before. To roast, heat your oven to 400 degrees. Wash, peel and chop your sweet potatoes into small 1/2 inch cubes. Toss them in 1 teaspoon of oil and 1/2 teaspoon of salt. Roast for 22-25 minutes until they are soft and slightly browned.

Next, heat a pan or skillet over medium heat. Add a teaspoon of oil and heat in the pan. Add the chorizo and cook thoroughly for about 8 minutes. Spoon the chorizo onto a paper towel set on a plate to absorb some grease.

Allow the sweet potatoes and chorizo to cool slightly while cracking all of the eggs into a bowl and whisking vigorously for about 1 minute with a fork. Grate your cheese. Add the sweet potatoes, chorizo, remaining 1/2 teaspoon of salt, 1/2 teaspoon of pepper and 1/2 cup of cheese into the whisked eggs and stir. Pour mixture into a casserole dish lightly greased with the remaining teaspoon of oil. Spoon half of the jar of salsa randomly into the dish and swirl in. Cover the casserole dish with foil. Place it into the oven and remove foil when 40 minutes have passed. Cook for an additional 10 minutes, remove from the oven and add the remaining 1/2 cup of cheese. Place back into the oven for 8 minutes or until the cheese is golden and bubbly. Enjoy!

Southwest Chorizo Egg Bake

xoxx,

Miss AK

Don’t Forget To Follow Me On Social Media!

Instagram – https://www.instagram.com/miss.allieskitchen/

Facebook – https://www.facebook.com/missallieskitchen/

Pinterest – https://www.pinterest.com/miss_ak/

Twitter – https://twitter.com/missallieskitch

Print

5 Ingredient Chorizo Salsa Breakfast Bake

  • Author: Allie Doran
  • Prep Time: 10 mins
  • Cook Time: 1 hour 20 mins
  • Total Time: 1 hour 30 mins
  • Yield: 8 1x

Ingredients

  • 12 eggs
  • 1 lb ground chorizo
  • 1/2 jar of salsa
  • 4 cups roasted sweet potatoes – about 2-3 medium sweet potatoes
  • 1 cup grated Manchego cheese (for Whole30/ Paleo omit cheese)
  • 3 tsp olive or avocado oil, divided
  • 1 tsp salt divided
  • 1/2 tsp pepper

Instructions

  1. Begin by roasting your sweet potatoes. You can certainly use leftovers or do this the night before. To roast, heat your oven to 400 degrees. Wash, peel and chop your sweet potatoes into small 1/2 inch cubes. Toss them in 1 teaspoon of oil and 1/2 teaspoon of salt. Roast for 22-25 minutes until they are soft and slightly browned.
  2. Next, heat a pan or skillet over medium heat. Add a teaspoon of oil and heat in the pan. Add the chorizo and cook thoroughly for about 8 minutes. Spoon the chorizo onto a paper towel set on a plate to absorb some grease.
  3. Allow the sweet potatoes and chorizo to cool slightly while cracking all of the eggs into a bowl and whisking vigorously for about 1 minute with a fork.
  4. Grate your cheese.
  5. Add the sweet potatoes, chorizo, remaining 1/2 teaspoon of salt, 1/2 teaspoon of pepper and 1/2 cup of cheese into the whisked eggs and stir. Pour mixture into a casserole dish lightly greased with the remaining teaspoon of oil. Spoon half of the jar of salsa randomly into the dish and swirl in. Cover the casserole dish with foil.
  6. Place it into the oven and remove foil when 40 minutes have passed. Cook for an additional 10 minutes, remove from the oven and add the remaining 1/2 cup of cheese. Place back into the oven for 8 minutes or until the cheese is golden and bubbly. Enjoy!


Pin It For Later:

5 Ingredient Chorizo & Salsa Egg Bake - with a Whole30 option!