



Milk & Cookies Cheesecake | Chocolate Chip Cookie Crust Cheesecake
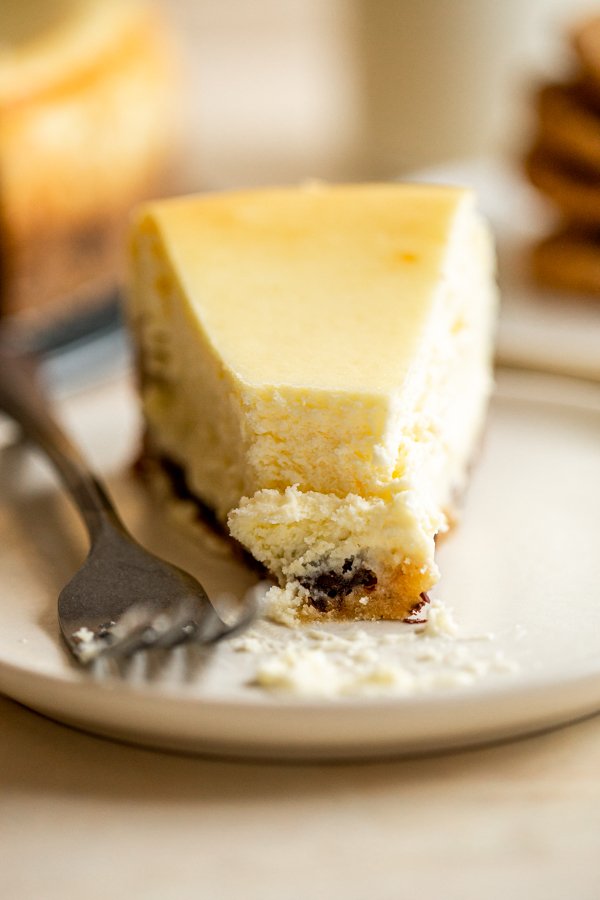
Classic cheesecake gets an upgrade with a perfectly baked chocolate chip cookie crust. It’s milk & cookies…but better.
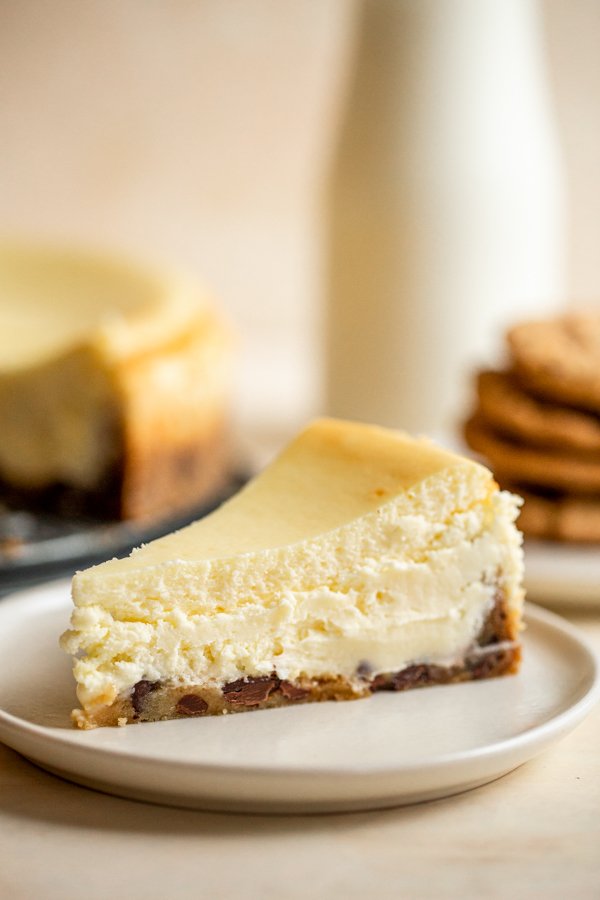
This chocolate chip cookie cheesecake recipe is sponsored by Philadelphia Cream Cheese. As always, all opinions remain my own and I am proud to partner with brands I love. Thanks for supporting MAK!
Does it get better than cookies and milk? Well, yeah, actually it does and I’m about to show you how in this post. But really, back to my main point. Few things can beat a glass of cold milk and a gooey, chocolate chip cookie.
Which is why I had to figure out how to make something better than cookies and milk. Because WHY NOT.
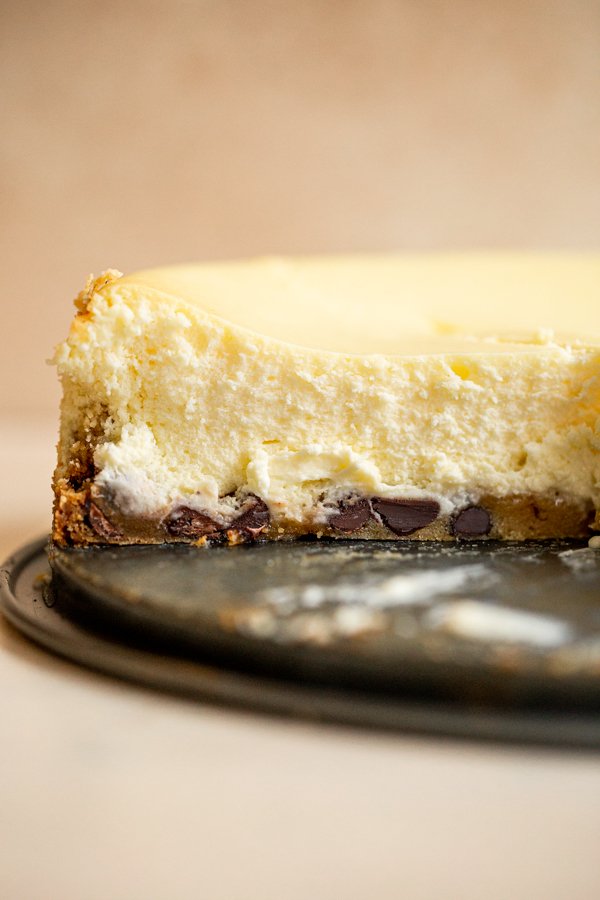
If there’s something all of you readers out there love, it’s cheesecake. Chocolate cheesecake, lemon cheesecake, pumpkin cheesecake…you name it, you guys are INTO it. And, I know we all agree that Philadelphia Cream Cheese is the KING of cream cheese. So, I thought, why not take two favorites and combine them!
At first, when I thought of a chocolate chip cookie cheesecake I thought of baked chocolate chip cookies ground up with butter to make a play on a graham cracker crust. But honeystly, that just seemed to basic to me when I really got to thinking about it.
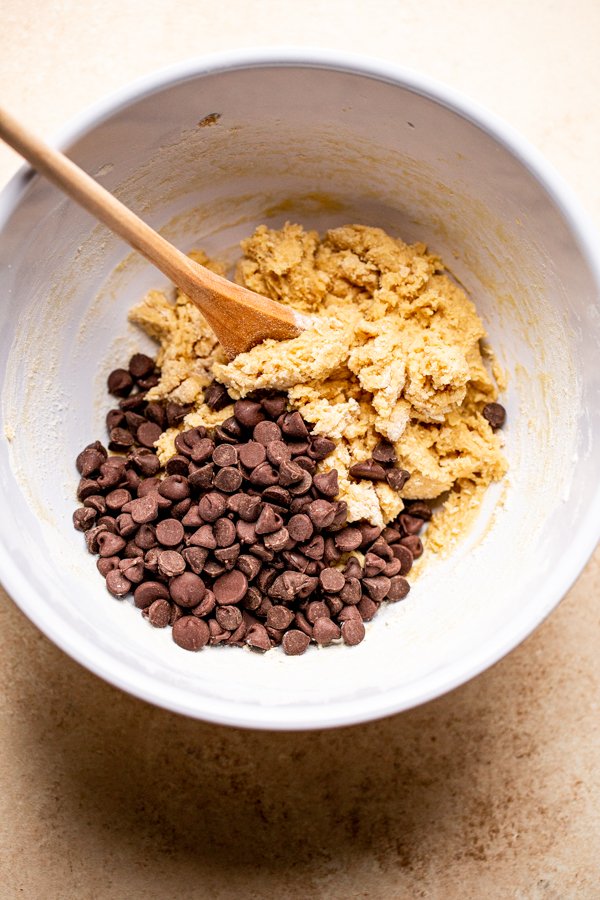
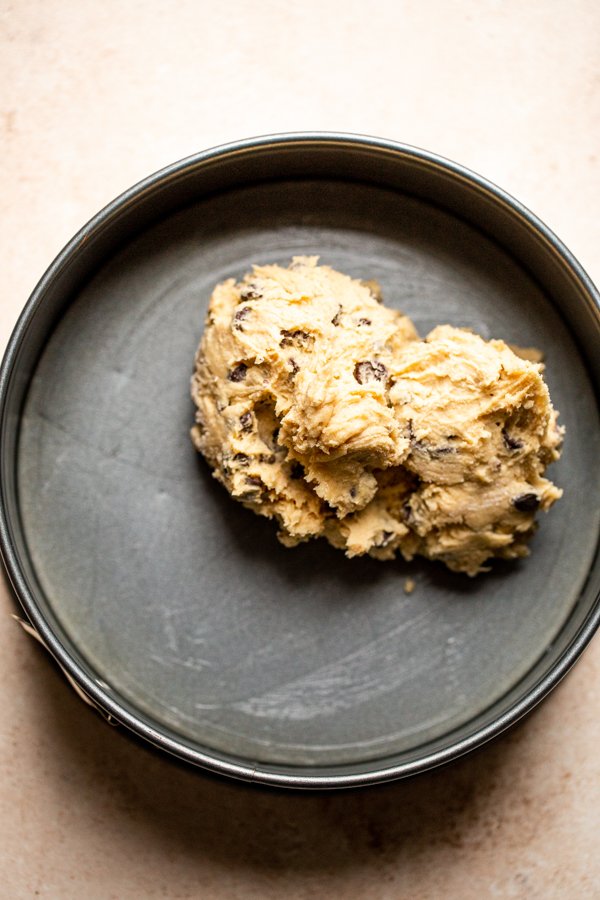
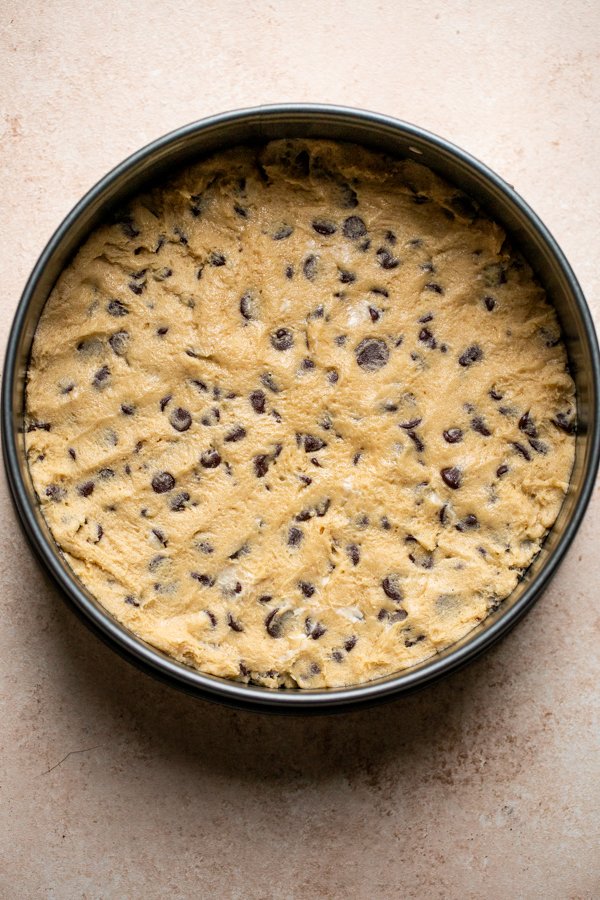
The recipe needed ooey-gooey, fresh-baked chocolate chip cookie goodness to live up to a name like chocolate chip cookie cheesecake, you know? So that’s when I decided. We were going to make a classic cheesecake made with nothing but the best Philadelphia Cream Cheese and pour the unbaked cheesecake batter over cookie dough and bake it all together.
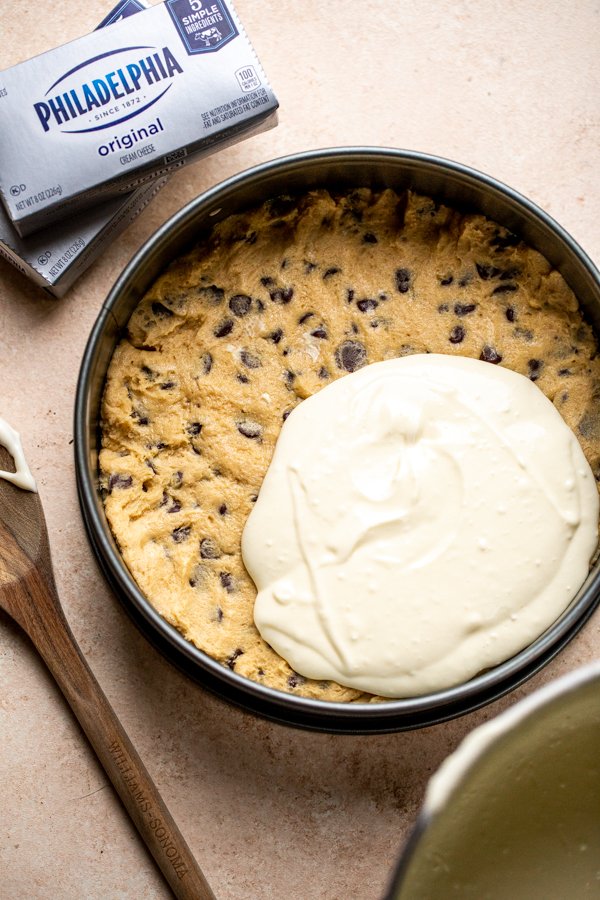
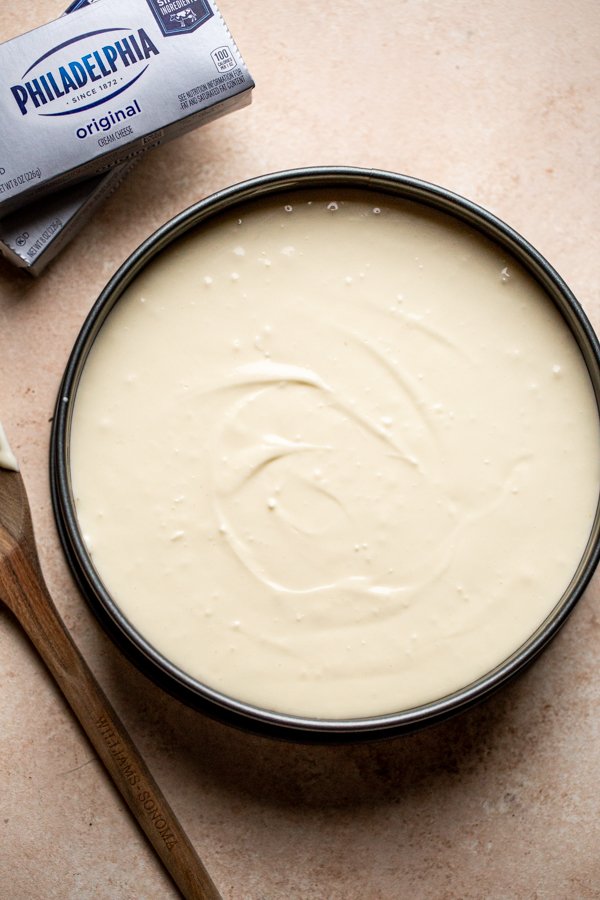
The best part is that this works PERFECTLY. The cheesecake and chocolate chip cookie bake together in a 325F oven for about 45-55 minutes and each separate layer is perfectly done!
The cheesecake is creamy and moist and the cookie gets nicely browned on the edges, but still slightly gooey on the inside. It really does create a nice crust for the cheesecake, and I was so pleasantly surprised with how easy this was to do!
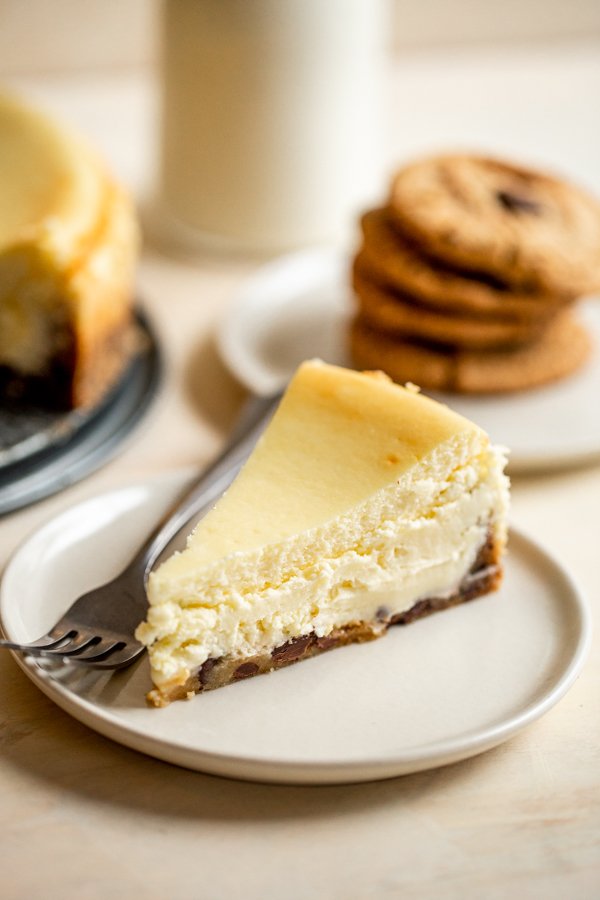
So, how do you assemble the chocolate chip cookie cheesecake?
I’m telling you…beyond simple. All you need to do is whip up some cookie dough. THEN, press the unbaked dough into the bottom of a springform pan. Then, whip together your cheesecake batter.
Pour the cheesecake batter directly over the cookie dough, et voila! Check out the recipe card below for my water bath hack so your cheesecake doesn’t crack. Happy baking!
When you make this, come tag me on Instagram!
Print
Milk & Cookies Cheesecake | Chocolate Chip Cookie Crust Cheesecake
Classic cheesecake gets an upgrade with a perfectly baked chocolate chip cookie crust. It’s milk & cookies…but better.
- Prep Time: 20 minutes
- Cook Time: 45 minutes
- Total Time: 65 minutes + 4 hours cooling time
- Yield: 16 slices 1x
- Category: Dessert
- Method: Oven
- Cuisine: American
Ingredients
For the crust:
-
6 Tbsp. softened butter
-
1/2 cup granulated sugar
-
1/3 cup brown sugar
-
1 egg, at room temperature
-
1 tsp. vanilla
-
1 cup flour
-
1/2 tsp. baking soda
-
1 pinch sea salt
-
1 cup chocolate chips, morsels or chunks
For the cheesecake:
-
4 pkg. (8oz. each) Philadelphia Cream Cheese
-
1 cup granulated sugar
-
4 eggs, at room temperature
-
1/4 cup sour cream, at room temperature
-
1/4 cup heavy whipping cream, at room temperature
-
2 tsp. vanilla extract
Instructions
-
Before beginning, set all ingredients out on the counter to come to room temperature. This is very important because it ensures a creamy cheesecake.
-
Preheat the oven to 325ºF and put a large pot of water on to boil. When it reaches a boiling point, pour it into a casserole dish or oven-safe pot placed on the bottom rack in the oven. This acts as a makeshift water bath and turns the oven into a “steam room”, ensuring that your crust won’t crack.
-
To make the cookie crust, start by creaming together the sugar and butter until light and fluffy. Then incorporate the egg and vanilla until fully combined.
-
Next, add the flour, baking soda, and salt and mix until just combined. Then, fold in the chocolate chips.
-
Scoop all of the cookie dough out of the bowl and press it into the bottom of a greased 9-inch springform pan. Make sure to press the dough up the sides of the pan a bit to make a crust. Set the pan aside.
-
To make the cheesecake filling, add the cream cheese to a bowl and beat with a standing or hand-held mixer for 30 seconds, or until smooth. Add the sugar and cream together for about 1 minute. Then, add the sour cream, heavy cream, and vanilla. Combine.
-
Crack the eggs into a separate bowl. Add the eggs one at a time to the cream cheese, scraping the sides of the bowl after each addition. Combine everything well until you have a very smooth cheesecake batter.
-
Pour the cheesecake batter over the cookie crust into the springform pan.
-
Slide the cheesecake into the oven on the middle rack. Bake for 45-50 minutes or until the sides look set but the center still jiggles slightly when nudged.
-
Turn the oven off and prop it open a little bit. Allow the cheesecake to cool for an hour in the oven.
-
After the hour has passed, allow the cheesecake to cool completely before placing in the fridge to cool for at least 2 hours.
-
Slice with a hot, clean knife and serve!
Peanut Butter Cookies with Chocolate and Sea Salt
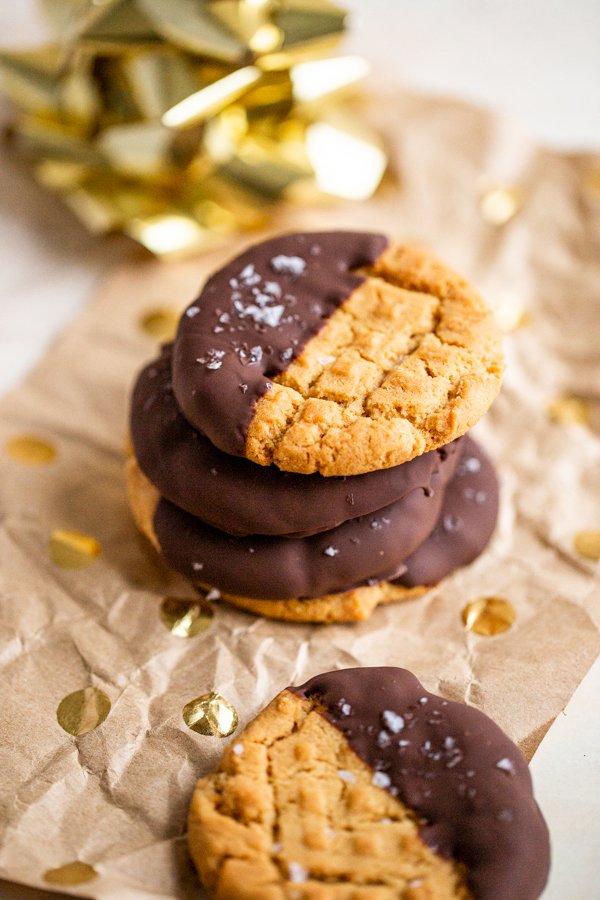
Classic peanut butter cookies get dipped in melted chocolate and are sprinkled with flakey sea salt. The flavor balance is out of this world!

This recipe for peanut butter cookies is sponsored by ALDI. As always, all thoughts and opinions remain my own and I’m proud to partner with brands I love. Thank you for supporting the growth of Miss AK!
The way to my husband’s heart is through peanut butter. And chocolate. He’ll pretend that he’s not a big sweets guy, and then I’ll find him in the kitchen rustling around…and he starts hinting about how good a warm cookie would be.
Usually, I keep frozen chocolate chip cookie dough in the freezer so I can make a couple for him without having to heat up the oven (THIS is the best recipe, hands down). But the problem with chocolate chip cookies is that they don’t have peanut butter. And since Jared IS Santa Claus this year in our house, I figured I’d create the perfect recipe just for him.
Admittedly, complicated recipes are not on my agenda this year. With a new baby in the house, we’re really trying to enjoy the holidays and DO less. So, when I put in my ALDI order I just add some extra peanut butter, chocolate chips and made sure I have all of my baking essentials. Easy peasy because I order online and affordable, as always. ALDI seriously makes it so easy to have everything I need for the holidays right on my doorstep.
And the cookies that result are FABULOUS and very much “Santa” approved.
A recipe for the best peanut butter cookies
The secret to melt-in-your-mouth peanut butter cookies is to have enough of a fat (peanut butter and butter, of course) ratio to flour. Just one egg to bind the recipe but not make them too puffy or cakey.
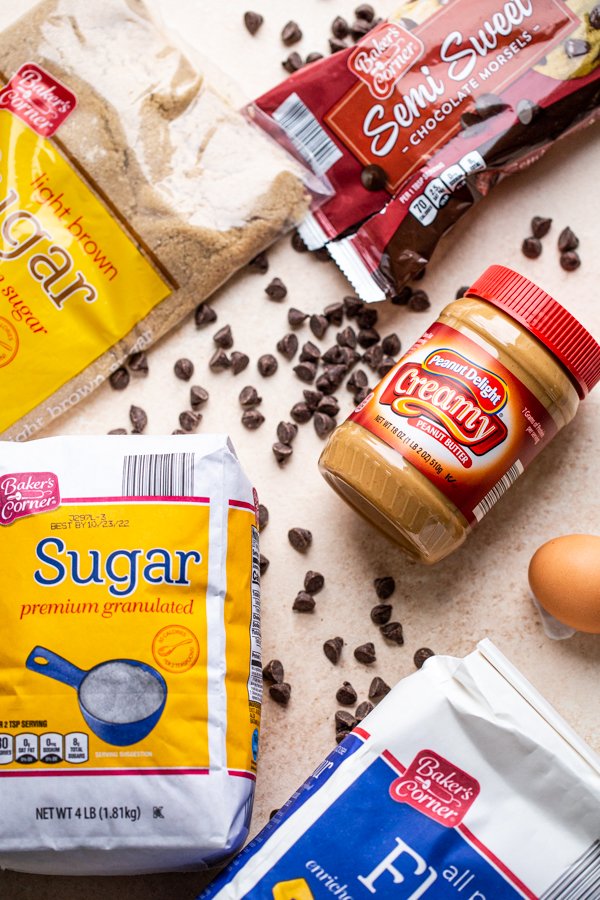
Like I said, I get all of my baking ingredients from ALDI. For this recipe, I stocked up on their Baker’s Corner flour, sugar and brown sugar, Peanut Delight Creamy Peanut Butter (it’s better to use the classic stuff, not the natural), Baker’s Corner Chocolate Morsels, and my favorite Simply Nature Organic Cage Free Brown Eggs and Organic Salted Butter. I love how I can get everything I need all at one store.
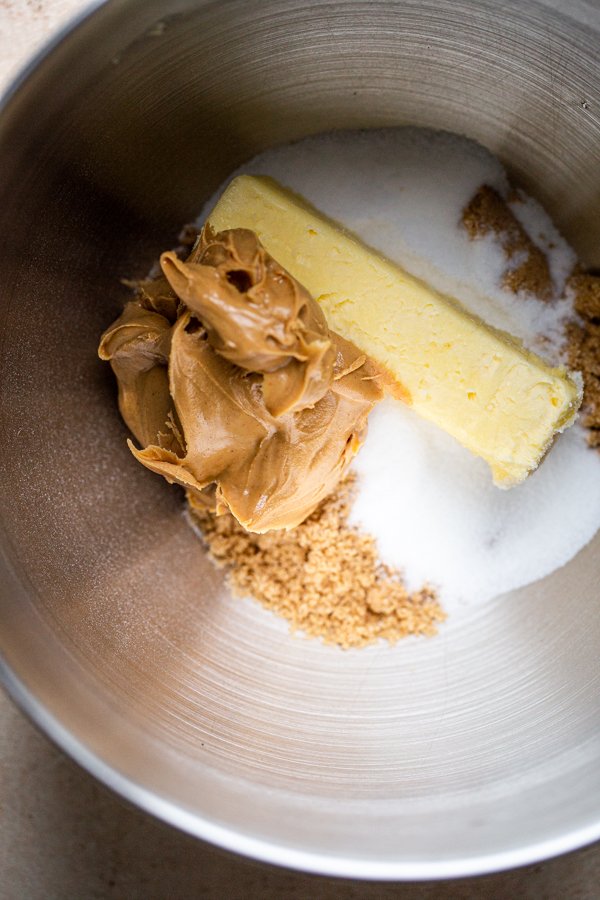
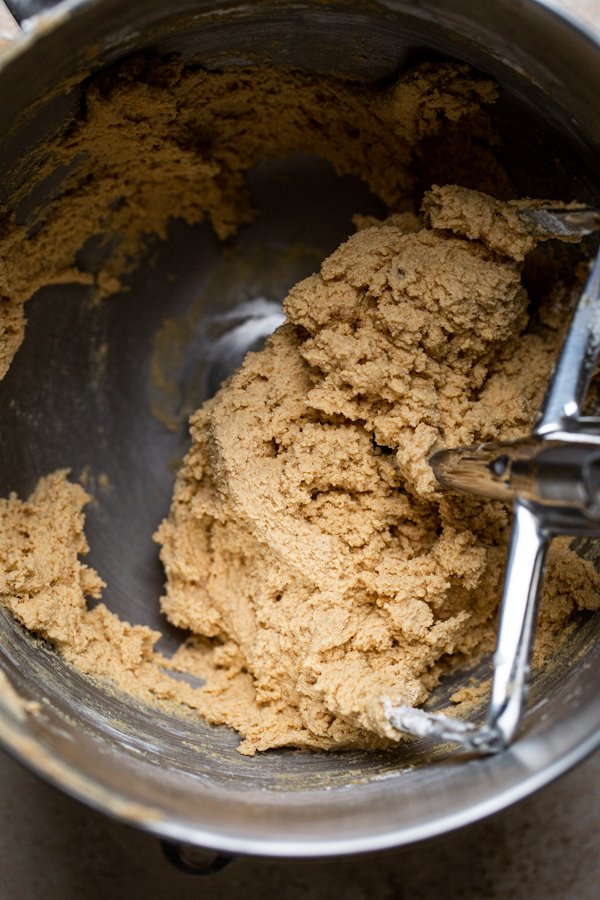
The other key is to not over-bake these babies. Wait until the cookies are just dry around the edges, pull them from the oven, and let them cool on a rack.
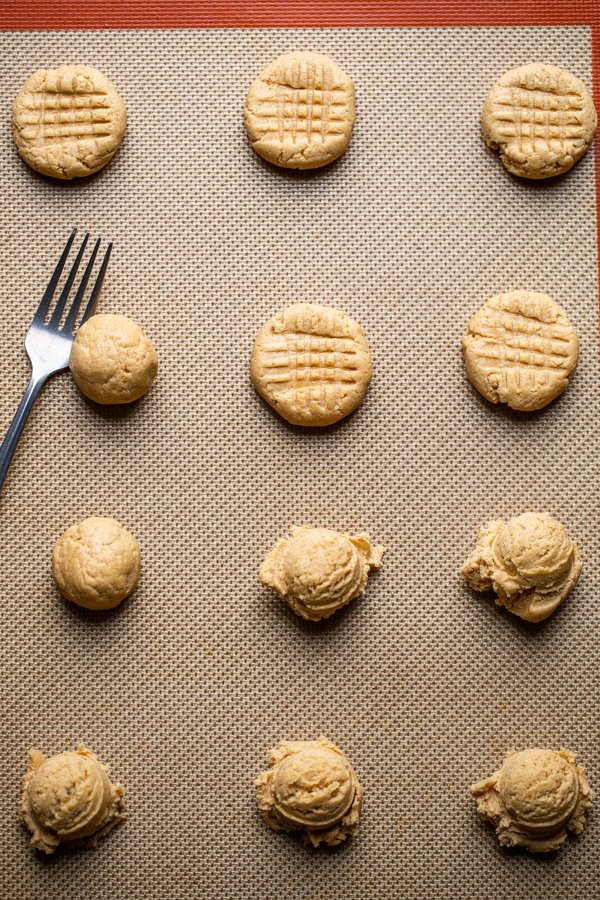
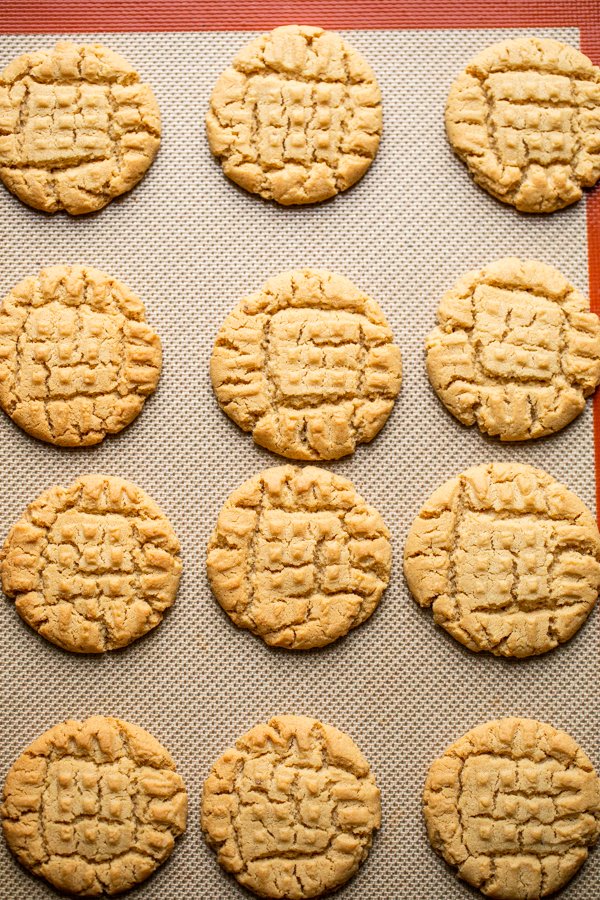
While the cookies cool, melt some chocolate. Then, gingerly dip half of your cookie into said melted chocolate. Then sprinkle on some flakey sea salt.
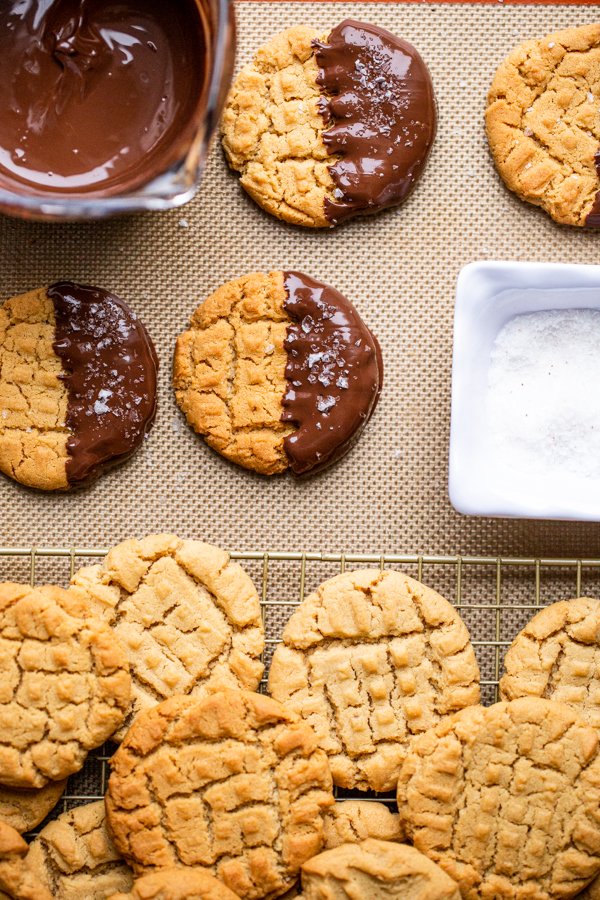
The result is like an inside out, well-balanced peanut butter cup in cookie form. What more could a peanut butter & chocolate lover want?
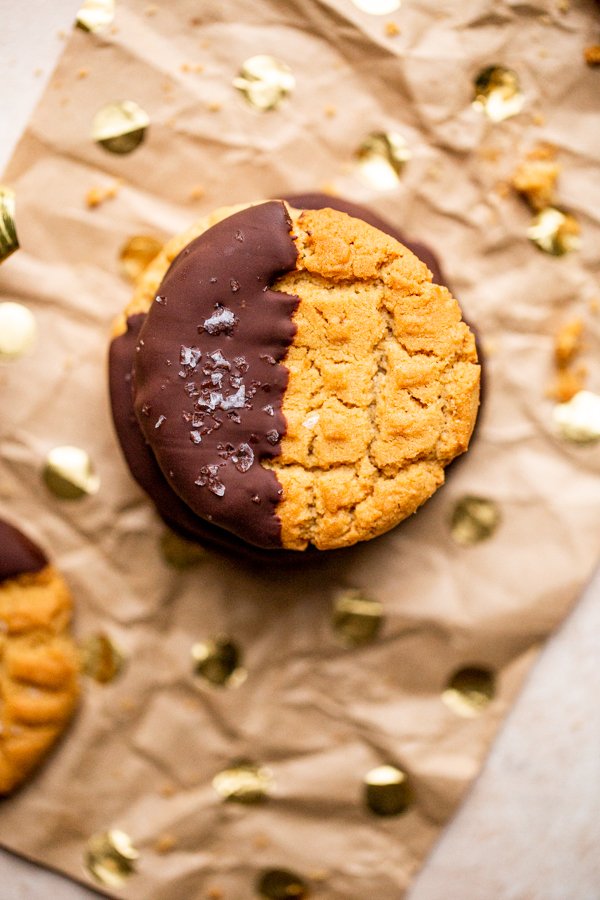
Peanut Butter Cookies with Chocolate and Sea Salt
Classic peanut butter cookies get dipped in melted chocolate and are sprinkled with flakey sea salt. The flavor balance is out of this world!
- Prep Time: 15 minutes
- Cook Time: 10 minutes
- Total Time: 25 minutes
- Yield: about 30 cookies 1x
- Category: Dessert
- Method: Oven
- Cuisine: American
Ingredients
- 3/4 cup Baker’s Corner Light Brown Sugar
- 1/2 cup + 2 Tbsp. Baker’s Corner Granulated Sugar, divided
- 3/4 cup Peanut Delight Creamy Peanut Butter (use good, ole creamy peanut butter, not natural or crunchy)
- 1/2 cup Simply Nature Organic Salted Butter, at room temperature
- 1 Simply Nature Organic Cage Free Brown Eggs, at room temperature
- 1 tsp. Stonemill Pure Vanilla Extract
- 1 and 1/2 cups Baker’s Corner All-Purpose Flour
- 1 tsp. Baker’s Corner Baking Soda
- 1/2 tsp. Baker’s Corner Baking Powder
- 1/2 tsp. sea salt
- 1 and 1/2 cups Baker’s Corner Semi-Sweet Chocolate Morsels
- 1 Tbsp. Simply Nature Organic Coconut Oil
- about 1–2 Tbsp. flakey sea salt, according to taste
Instructions
- Preheat the oven to 350F.
- Start by adding the brown sugar, 1/2 cup of the granulated sugar, peanut butter, and butter to a large bowl or the bowl of a standing mixture.
- Beat until light and fluffy with a whisk, handheld mixer, or the paddle attachment of a standing mixer until light and fluffy, about 1 minute.
- Then, add the egg and vanilla. Incorporate well by beating the mixture again and scrape down the sides of the bowl.
- Whisk together the flour, baking soda, baking powder, and sea salt in a separate bowl and add the dry mixture to the wet.
- Mix until everything is just combined.
- Scoop medium-sized balls of the cookie dough (about 2 Tbsp. per cookie) and lay them on a cookie sheet.
- Add the remaining sugar to a small bowl and dip a fork in the sugar. Make a crosshatching design on the cookies with the fork, pressing down lightly.
- Bake the cookies for 9-11 minutes, or until they’re just golden brown on the edges.
- Melt the chocolate and coconut oil together either in a double boiler or in the microwave.
- Once the cookies are completely cool (you want them to be cool so they don’t break), dip them in the chocolate, lay them on a sheet pan lined with a Silpat, wax, or parchment paper, and sprinkle with sea salt.
- Let them harden in the fridge before serving & enjoy with a tall glass of milk.
Notes
- If you’re wanting a small batch of cookies, follow the directions until step 8. Then, freeze the unbaked cookies you want to save for later on a Silpat, wax, or parchment paper and then store them in a zip-top container. When you’re ready to bake them, simply add 2-3 minutes to your bake time and follow the rest of the directions! Cookies will last for about 3 months in a well-sealed bag.
MAK’s Gift Guide for the Adventurous Babe | Practical Gear, Apparel & Toys

post contains affiliate links
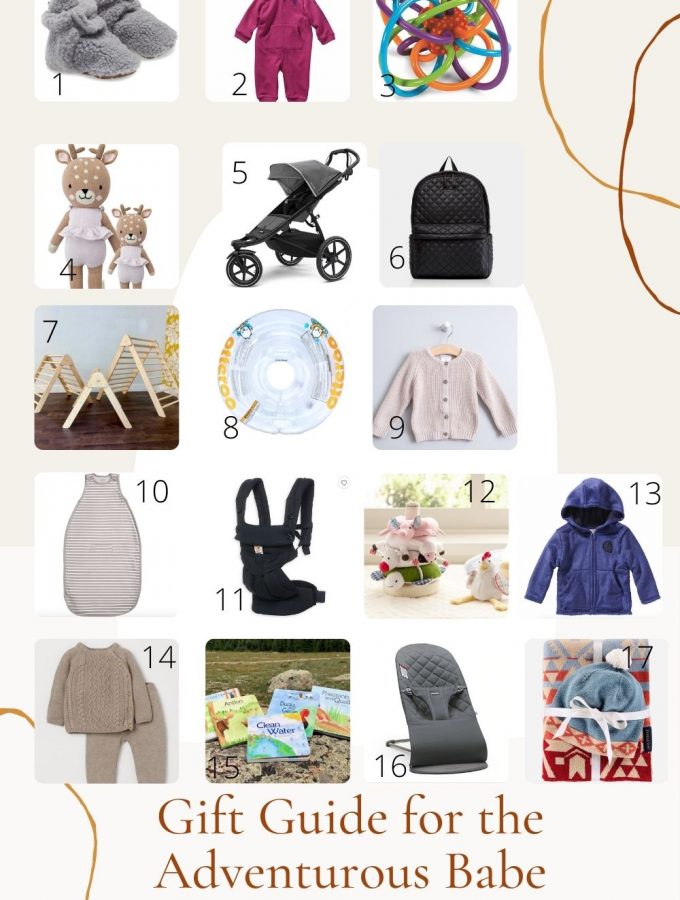
1)Fuzzy Booties (also in pink) | 2)Carhartt Coverall |3)Rattle |4)Cuddle and Kind Fawn | 5)Stroller | 6)MZ Wallace Backpack (waterproof, wipeable, lots of pockets)|7)Pikler Triangle |8)Otteroo Water Floatie |9)Cream Cardigan (Simply Ellie Boutique) | 10)Woolino 4 Seasons Sleep Sack (2-24 months) |11)Ergobaby Carrier |12)Farm Friends Stacker |13)Carhartt Fuzzy Jacket |14)Sweater Set (also in pink & blue) |15)Conservation Book Series | 16)Baby Bjorn Bouncer | 17)Pendelton Baby Blanket Set |
Gifting for babies can seem somewhat trivial. I mean, do they even know what’s going on? While they likely won’t remember, memories can be made by gifting a few, quality + useful things.
Let’s start with this Bouncer. So much fun for kiddos newborn and up to about 6 months. It’s great for setting outside, on the beach, or around the house. While we’re talking outdoor gear, this is simply the best Stroller for active families. Shock suspension for tough terrain, comfortable and a true jogging stroller. Throw all of your diaper bag essentials in this Backpack and you’re ready to go (and it doesn’t feel like a “diaper bag”). If your little loves to be held, grab this durable baby Carrier with lots of head support.
For the future conversationalist, this Book Series is adorable. Little animal lovers will also love this plush Farm Friends Stacker and sweet deer stuffed animal by Cuddle and Kind. Bonus – 1 doll provides up to 10 meals for children in need. And for babies 6+ months, this Pikler Triangle promotes play, strength, and adventure!
MAK’S Gift Guide for the Outdoorsy Guy Who Has Everything
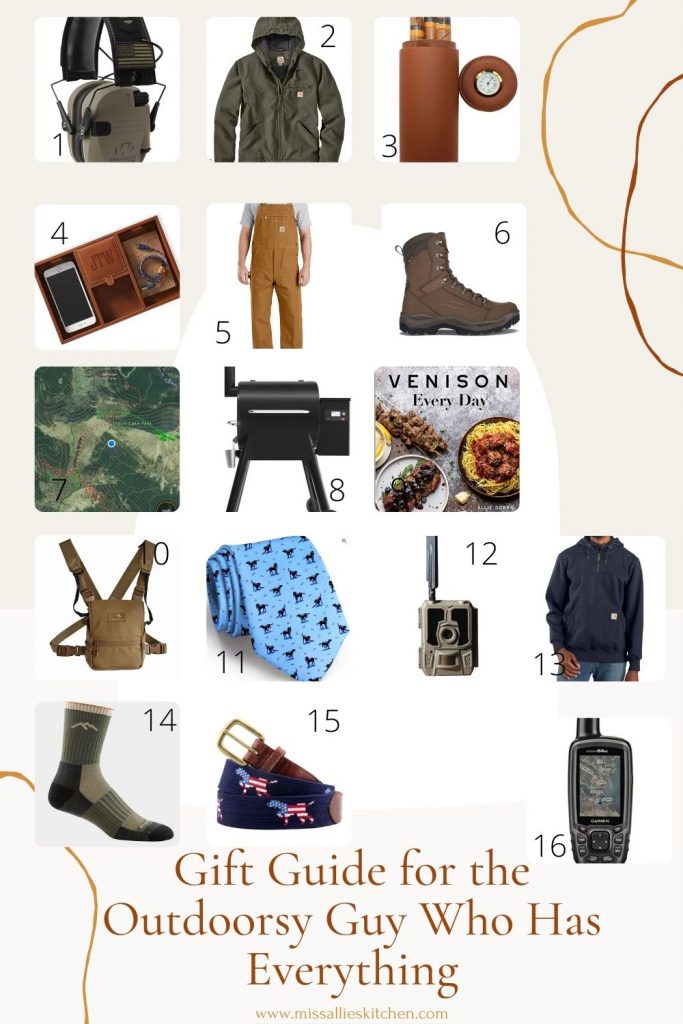
This post has been sponsored by Carhartt. As always, all opinions remain my own and I am proud to partner with brands I love and trust. Post contains affiliate links. Thanks for supporting MAK!
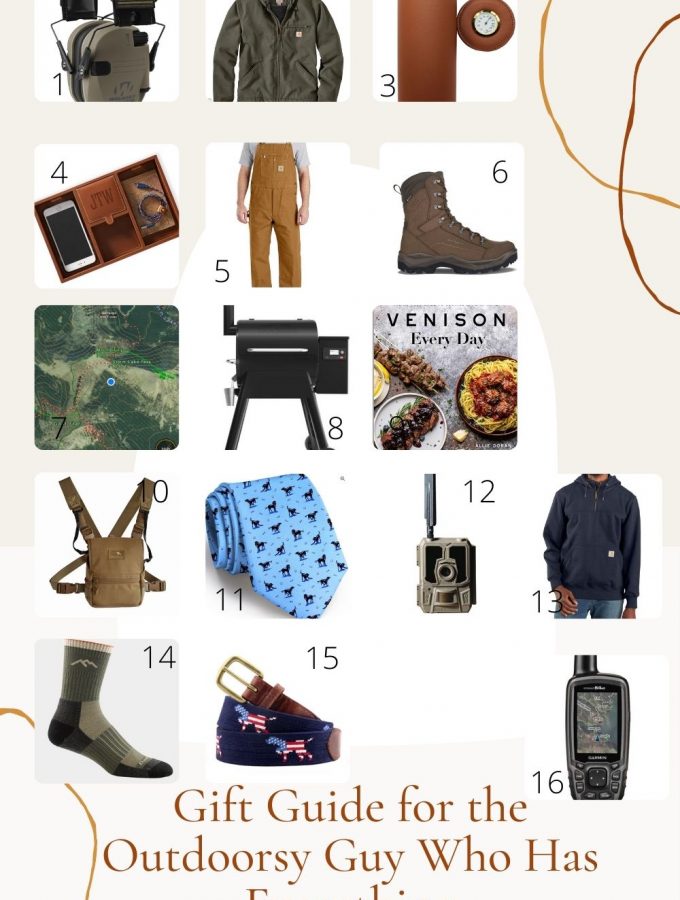
1) Walker’s Electronic Muff |2)Carhartt Sherpa-Lined Duck Jacket |3) Travel Cigar Holder |4) Leather Catchall Tray | 5)Carhartt Unlined Duck Bib Overalls |6)Lowa Boots |7)ONX Hunt Maps Subscription |8)Pro 575 Traeger Grill |9)Venison Every Day |10)Bino Pouch |11)Black Lab Tie |12)Cellular Trail Cam |13)Carhartt Mock Zip Sweatshirt | 14)Darn Tough Socks |15)Patriotic Dog Needlepoint Belt |16)Garmin GPS |
Let’s talk about Jared’s Carhartt picks/my favorite gifts for literally any guy on my list. This Mock Zip Sweatshirt is such a winner. My dad, brother AND Jared all have it. It’s so warm and durable (wind + rain friendly) and it’s nicer than the old hoodie hanging in your man’s closet. These Unlined Duck Bib Overalls are great because they aren’t as bulky as the original lined version. They fit SO nicely, are crazy durable, and there are a wide variety of sizes. And of course, the tried and true Carhartt Jacket. I think every man needs one, tbh. Sizing note – Jared is 6’3-6’4″ and wears a large REGULAR. We would say guys 6’5″ and up need a tall.
For the hunter in your life, a Trail Cam is always a safe bet. They can never have too many! Make sure they never get lost and can track their “spots” with this GPS. Jared also swears by ONX Hunt Maps. While they’re hiking around these Boots will keep them warm. This Bino Pouch lets them carry their binoculars hands-free, but they’re easy to access. And quality ear protection is a must.
For those that love to relax with a nice cigar, this travel Cigar Holder is stylish and is great for throwing in a golf or overnight bag. Grab a dog lover this Tie and Belt for quality, timeless touches of their canine friends.
Secretly, I think every guy has a Traeger Grill on their wish list, and make sure they have some great wild game recipes by giving them a copy of my new cookbook, Venison Every Day!
Make sure you check out my picks for her, baby and my favorite local and small businesses!
MAK’s Gift Guide for Her | Cozy, Durable & Timeless Picks
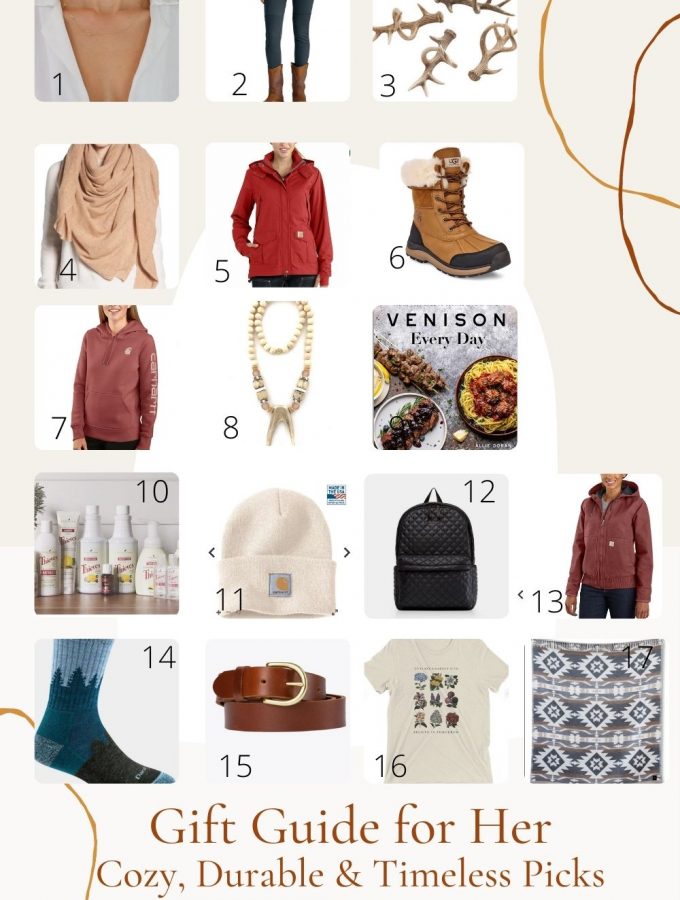

This post has been sponsored by Carhartt. As always, all opinions remain my own and I am proud to partner with brands I love and trust. Post contains affiliate links. Thanks for supporting MAK!
1)Initial Necklace (I have the 18k gold, 3 initial) |2)Carhartt Utility Leggings | 3)Antler Napkin Rings |4)Lightweight Cashmere Scarf/Wrap |5)Carhartt Shoreline Jacket |6)Ugg Waterproof Boots |7)Carhartt Pullover Sweatshirt|8)Antler Necklace |9)Venison Every Day Cookbook|10)Young Living Essential Oils/Cleaning Kits |11)Cream Carhartt Beanie |12)MZ Wallace Backpack | 13)Carhartt Duck Quilted Jacket | 14)Darn Tough Socks | 15)Classic Leather Belt | 16)To Plant a Garden Tee | 17)Sackcloth & Ashes Blanket |
Let’s talk about my favorite Carhartt picks. Carhartt holds a special place in my heart around the holidays. Our first Christmas together, Jared got me this jacket in the color shown above (item number 13). I was always working in the barn on cold, dark nights and stealing his much too big coats and it’s still one of the most functional and durable (yet pretty!) things I own. I treasure it because it was SUCH a thoughtful gift. I’m never without a beanie and love this sweatshirt for layering. The new Shoreline jacket is a perfect heavier weight rain/wind jacket. It’s got a really flattering cut so I wear it around town, but also know I can trust it on hikes, at the barn, and working around the yard! Of course, the leggings are crazy durable, don’t fall down AND hay, grass, lint, etc doesn’t stick to them! Any of these Carhartt picks will LAST for years and years and all items are true to size (if between sizes, I go with my smaller size). While you’re at it, check out my gift guide for him with Jared’s picks and my picks for baby to shop for the whole family!
Even outdoorsy gals like some luxury accessories. My Initial Necklace is such a lovely everyday piece that Jared had made with a letter representing him, our daughter Madison, and our dog Sadie. This Lightweight Cashmere Scarf/Wrap is perfect for throwing on for warmth, a travel blanket (when we can all travel again), and as a wrap for special occasions. This Leather Belt is a total classic & what a fun touch this Antler Necklace adds to an outfit. These boots are SO WARM but also…so cute.
For the home, I love adding a tasteful touch of the outdoors to my table with these Antler Napkin Rings. And your kitchen totally needs a copy of my new cookbook, Venison Every Day Cookbook. I’m all about safe/non-toxic cleaning with a baby around, and the Young Living Thieves line is my absolute favorite. MAK’s Social Media and Operations Specialist, Rebecca, is a Young Living consultant so visit her page or check her out on social media for her recommendations!
If you want to gift a Young Living Membership to someone, then follow these directions:
If someone is gifting a membership to another person, they will:
- Go to this link and select “Become a Member” at the top.
- Choose the starter bundle they want and any add-ons they’d like.
- On the Membership page, fill out the information for the person RECEIVING the gift.
- On the Shipping & Payment Page, make sure the shipping address is for the recipient, and then the payment/billing address is for the gifter.
- Then you’re all done! Rebecca is offering welcome gifts to anyone who signs up to be a member or buys $50 or more in products this year!
Happy gifting! For a small/local business guide, check out this guide!
Pumpkin Cheesecake Bars
This easy pumpkin cheesecake recipe calls for a buttery graham cracker crust and is made into bar form for easy eating and serving. Small batch friendly!
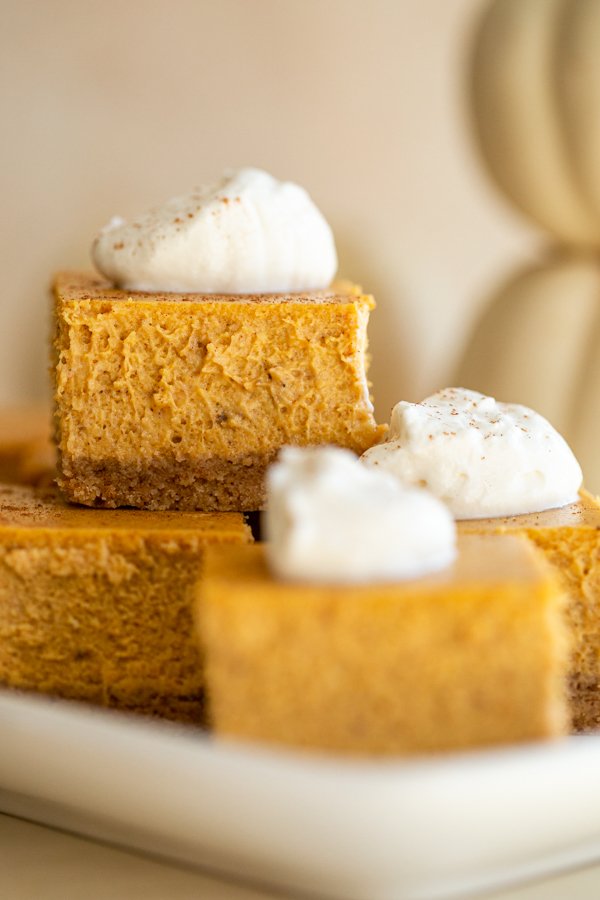
This delicious pumpkin cheesecake bars recipe is sponsored by Philadelphia Cream Cheese. As always, all opinions remain my own and I am proud to partner with brands I love. Thank you for supporting the growth of MAK!
Some things just go better together (have you heard that cute new song by Luke Combs?). Peanut butter & jelly. Chips and guac. Cold beer & football. Pumpkin and cheesecake.
Yes, you heard me correctly…pumpkin AND cheesecake. Let me explain.
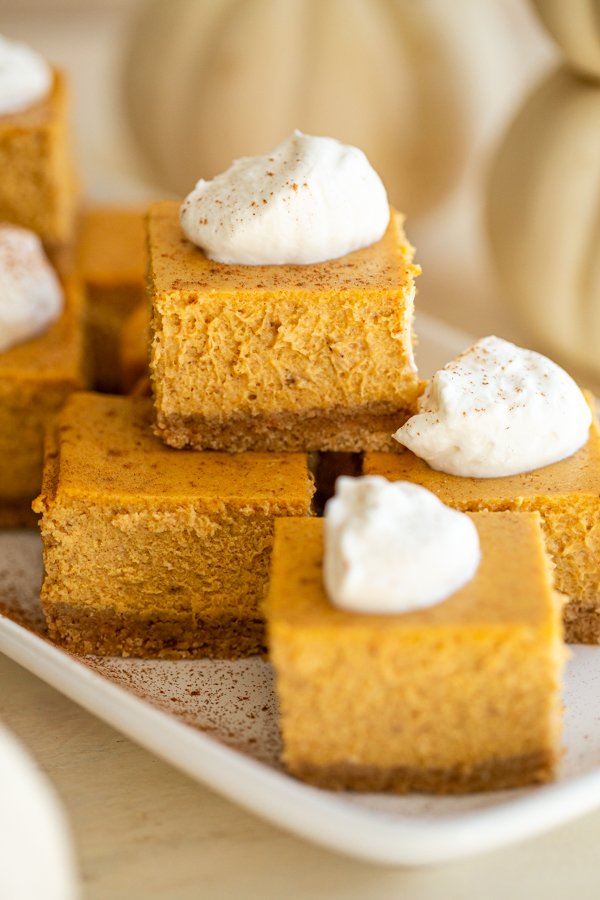
So, cheesecake is basically one of the most beloved desserts literally ever. What’s not to love? Especially when you use the king of cream cheese, Philadelphia Cream Cheese. Creamy, not too sweet, super decadent clouds of whipped cream cheese baked with a buttery graham cracker crust. Hi, where do I sign up? It’s delicious all year round, no matter how you make it.
But as we move into harvest and holiday time, there’s another shining dessert star. Pumpkin pie! If you’re anything like me, every year your look forward to sinking your fork into a thick slice of pumpkin heaven.
The dilemma for me comes on holidays like Thanksgiving. I want it all! I want cheesecake, I want pumpkin pie AND I want to sample maybe a brownie or piece of fruit pie, depending on my mood.
I have definitely won the award for most eaten on Thanksgiving from time to time BUT all of those things are even a lot for me. So, what’s a girl to do?!
The perfect solution is pumpkin cheesecake made into bars. Not only do you get the best of each cheesecake and pumpkin pie, but when you serve cheesecake in bars you can serve smaller portions which is perfect for any size gathering, even if it’s just you and your s/o.
How do you make cheesecake…pumpkin?!
The best thing about cheesecake and pumpkin pie is that they have similar ingredients and textures, so combining the two is very easy.
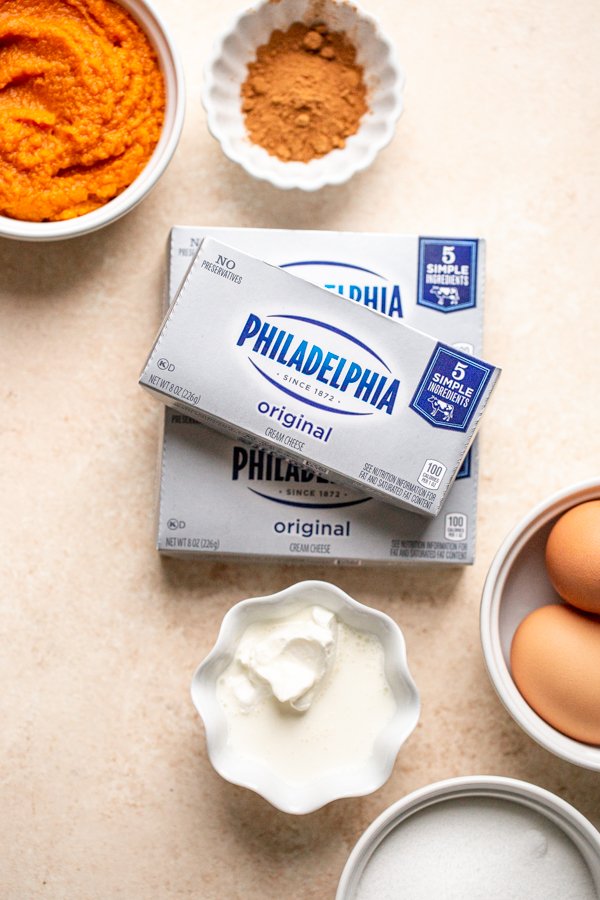
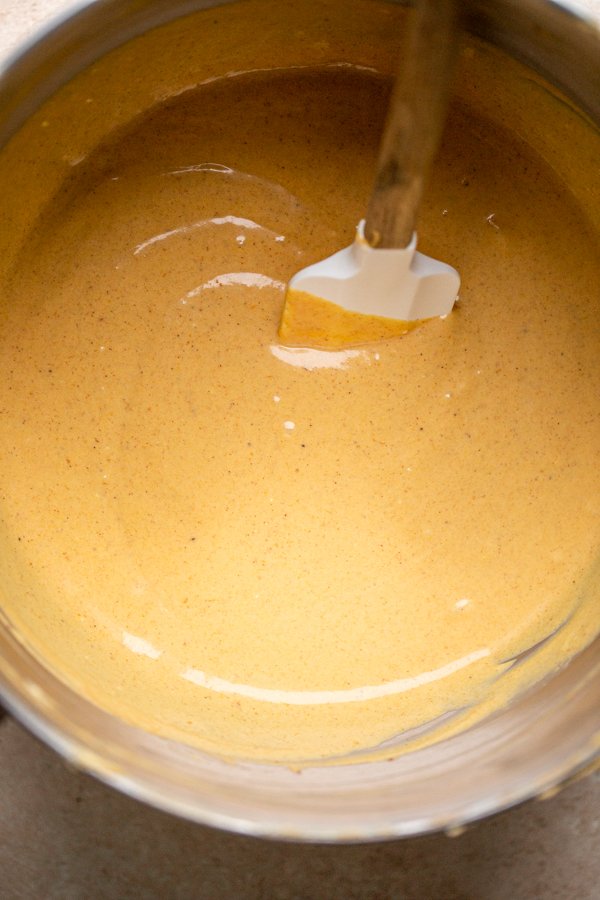
I start by making the cheesecake portion by whipping Philadelphia Cream Cheese with sugar. Then I add the pumpkin, pumpkin pie spice, heavy cream, sour cream, vanilla, and eggs!
Keeping Pumpkin Cheesecake From Cracking
The first trick I have for crack-free cheesecake is using good quality cream cheese. Philadelphia Cream Cheese is my favorite for baking and I always have about 4 packages of it on hand in my fridge. You want to make sure said cream cheese is softened so there aren’t any lumps in the batter.
The second is using a water bath. I actually just place a baking dish on the rack under where the cheesecake is in the oven and fill it with boiling water. It makes a steam room in the oven and you don’t have to mess with an actual water bath.
Thirdly, don’t open the oven while you’re baking. When the cheesecake is done, prop the oven open, turn it off and cool the cheesecake in there for an hour before taking it out and cooling on the counter fist and then in the fridge.
Cutting Cheesecake Bars Easily
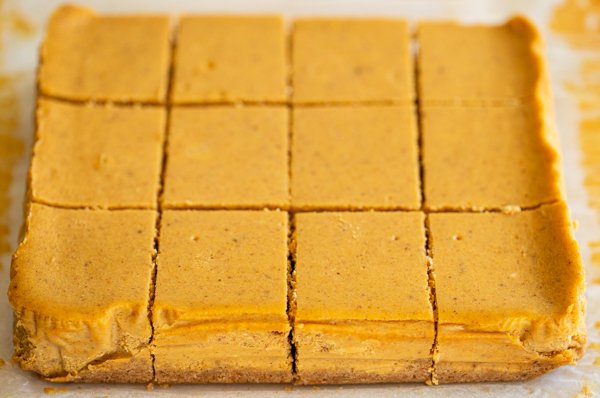
Cutting beautiful slices of cheesecake bars is easy! Just wipe down your sharp chef’s knife (carefully) between each slice with warm water. A clean knife makes a clean cut!
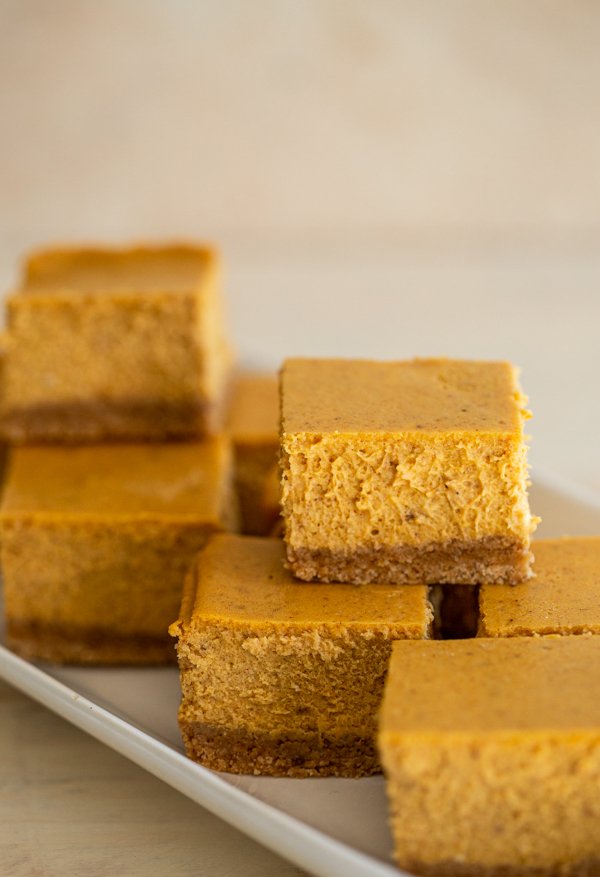
I know you’ll love this recipe! For more harvest and holiday cheesecake content, check out my Pecan Pie Cheesecake!
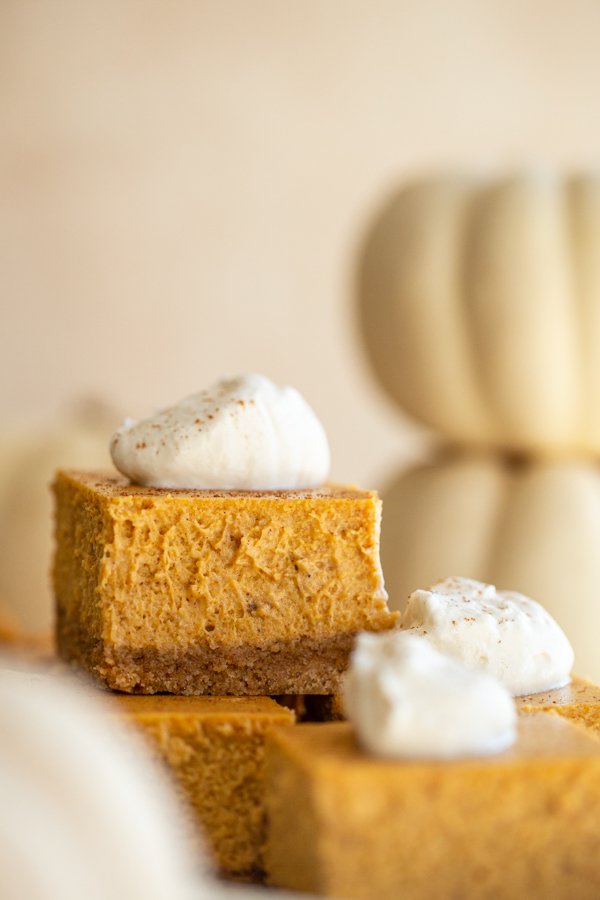
Pumpkin Cheesecake Bars
This easy pumpkin cheesecake recipe calls for a buttery graham cracker crust and is made into bar form for easy eating and serving. Small batch friendly!
- Prep Time: 15 minutes + 4 hours cooling time
- Cook Time: 45 minutes
- Total Time: 1 hour + 4 hours cooling time
- Yield: about 12 1x
- Category: Dessert
- Method: Oven
- Cuisine: American
Ingredients
For the crust:
- 9 graham cracker sheets (1 sleeve)
- 3 Tbsp. brown sugar
- 5 Tbsp. melted butter
For the pumpkin cheesecake:
- 2 pkg. (8oz. each) Philadelphia Cream Cheese, softened
- 2/3 cup sugar
- 1 cup pumpkin puree
- 2 Tbsp. heavy cream, at room temperature
- 2 Tbsp. sour cream, at room temperature
- 1 Tbsp. pumpkin pie spice
- 1 tsp. vanilla extract
- 3 eggs, at room temperature
- whipped cream, for serving (optional)
Instructions
-
Before beginning, set all ingredients out on the counter to come to room temperature. This is very important because it ensures a creamy cheesecake.
-
Preheat the oven to 325ºF and put a large pot of water on to boil. When it reaches a boiling point, pour it into a casserole dish or oven-safe pot placed on the bottom rack in the oven. This acts as a makeshift water bath and turns the oven into a “steam room”, ensuring that your crust won’t crack.
-
To make the crust, first, crush the graham crackers into crumbs. Mix together the graham cracker crumbs, butter, and brown sugar.
-
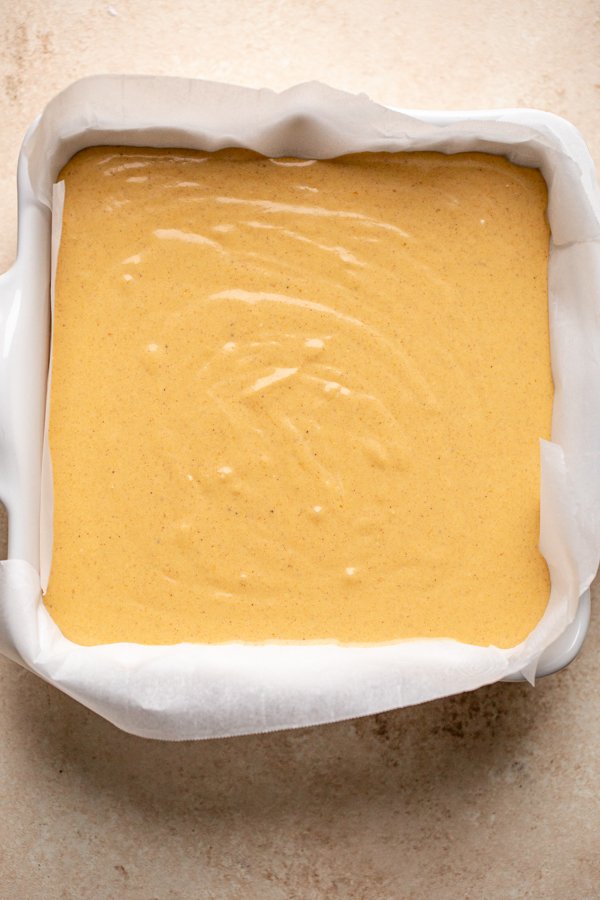
Grease an 8×8-inch baking dish, and line it with parchment paper so you can easily pull the bars out of the dish when you want to slice and serve.
-
Press the graham cracker mixture into the bottom of the dish and set aside.
-
To make the cheesecake filling, add the cream cheese to a bowl and beat with a standing or hand-held mixer for 30 seconds, or until smooth. Add the sugar and cream together for about 1 minute.
-
Add the pumpkin puree, heavy cream, sour cream, pumpkin pie spice, and vanilla and beat until everything is mixed well.
-
Crack the eggs into a separate bowl. Add the eggs one at a time to the cream cheese, scraping the sides of the bowl after each addition. Mix until the eggs are totally incorporated.
-
Pour the pumpkin cheesecake mixture into the dish. Place the dish on the middle rack of the oven. Do not open the oven.
-
Bake for 45 minutes to 55 minutes or until the sides look set but the center still jiggles slightly when nudged.
-
Turn the oven off and prop it open a little bit. Allow the cheesecake to cool for an hour in the oven.
-
After the hour has passed, allow the cheesecake to cool completely for 2-3 hours before placing in the fridge to cool for at least 2 hours.
-
When you’re ready to serve, pull up on the parchment to remove the sheet of pumpkin cheesecake. Slice into squares, cleaning the knife between each slice to get a clean cut. Enjoy!
Sourdough Stuffing with Cranberries and Apples
This classic stuffing recipe uses sourdough bread and is full of flavor from cranberries and apples. You need it on your Thanksgiving or Holiday table!
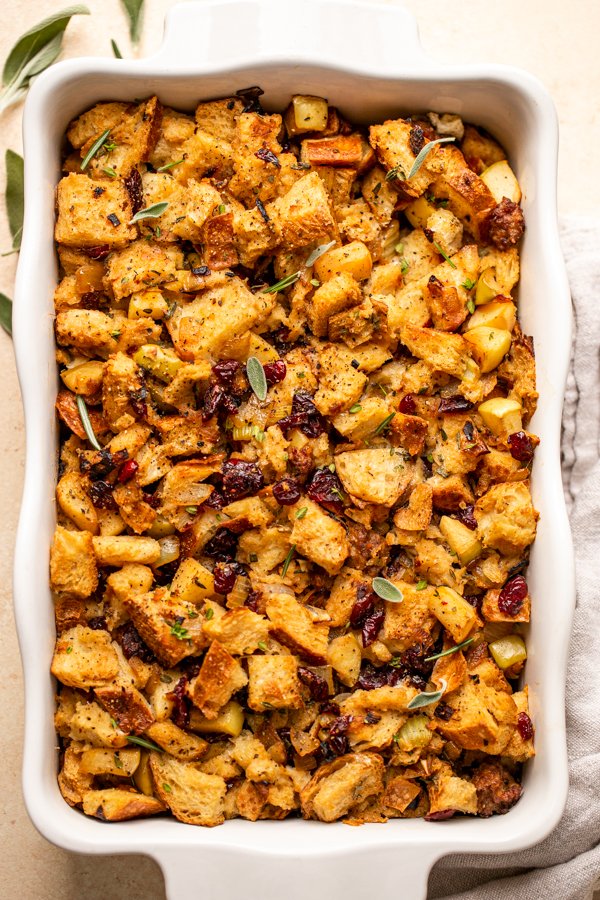
This delicious sourdough stuffing recipe is sponsored by ALDI USA. As always, all opinions remain my own and I’m proud to partner with brands I love. Thank you for supporting MAK!
There’s no doubt about it. On any Thanksgiving or holiday table, you’re bound to find stuffing, mashed potatoes, turkey, casseroles, cranberry sauce – the works.
I have a little confession, though. I could probably live without all of it. Except stuffing. And maybe some turkey and cranberry sauce. Please don’t hate me because I said I can live without mashed potatoes. BUT THE STUFFING! I can’t give that up.
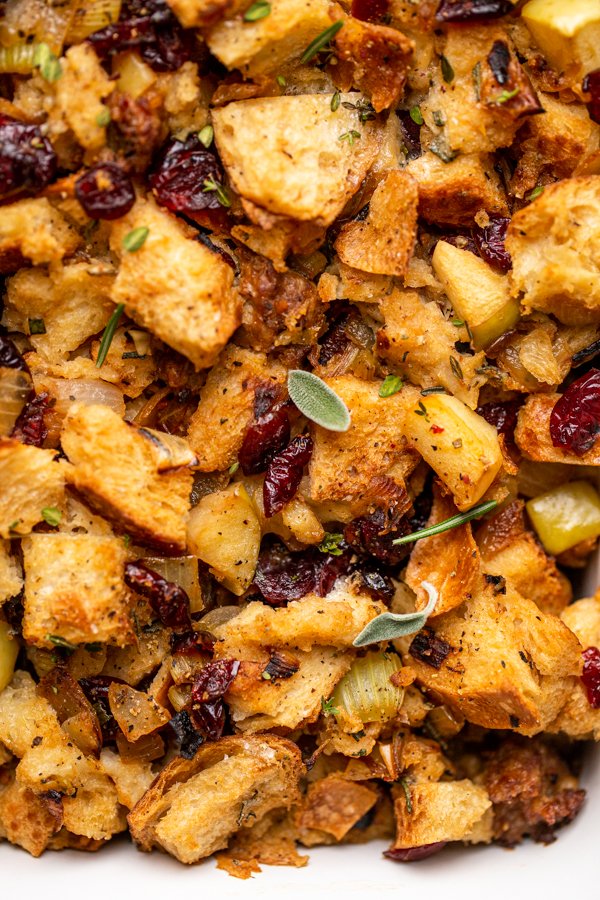
This sourdough stuffing recipe takes things up a notch with artisanal bread, cranberries, and apples. It’s simply the best.
Let’s talk about the first time I made a Thanksgiving meal for my family
About 4 years ago, Jared and I decided to have my family over to our old apartment for a second Thanksgiving meal. I was SO excited. I wanted to make the entire meal myself – all from scratch.
I spatchcocked my turkey, simmered cranberry sauce, and baked my pumpkin pie. My mom handled the mashed potatoes – like I said, not my area of expertise.
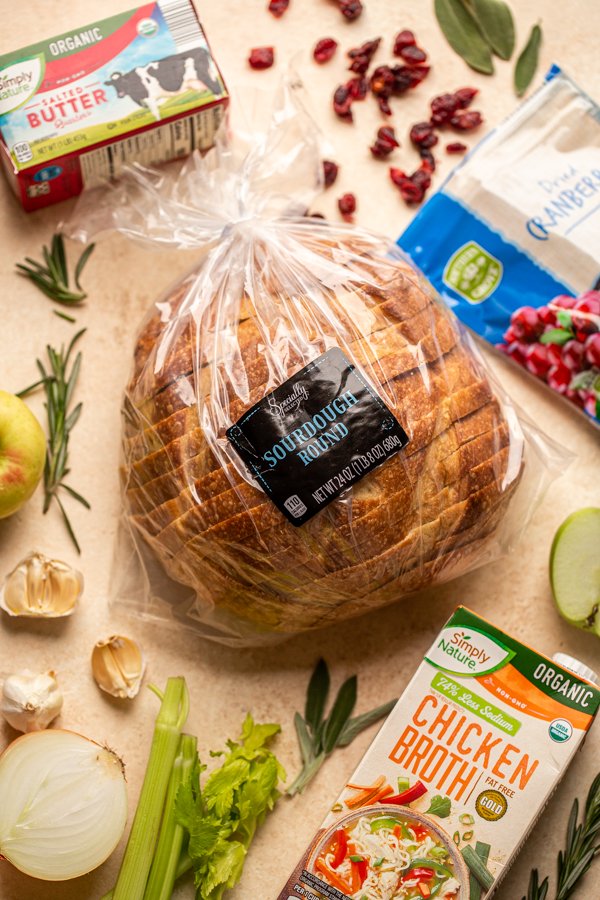
Of course, all of my ingredients came from ALDI USA. I am such a huge ALDI fan because I can get absolutely everything I need for the holidays and special meals, and still have room in the budget for epic cheeseboard ingredients.
For the stuffing that year, I had big plans. Before Jared and I got married, I was really into sourdough baking. So, I wanted to make stuffing with my homemade sourdough bread. And let me tell you what… best. stuffing. EVER. The day was a huge success.
How do you make stuffing with sourdough bread?
It’s really easy to make stuffing with sourdough bread. All you need to do is take a sourdough loaf (and it can be a day or three old) and cube it into bite-sized pieces.
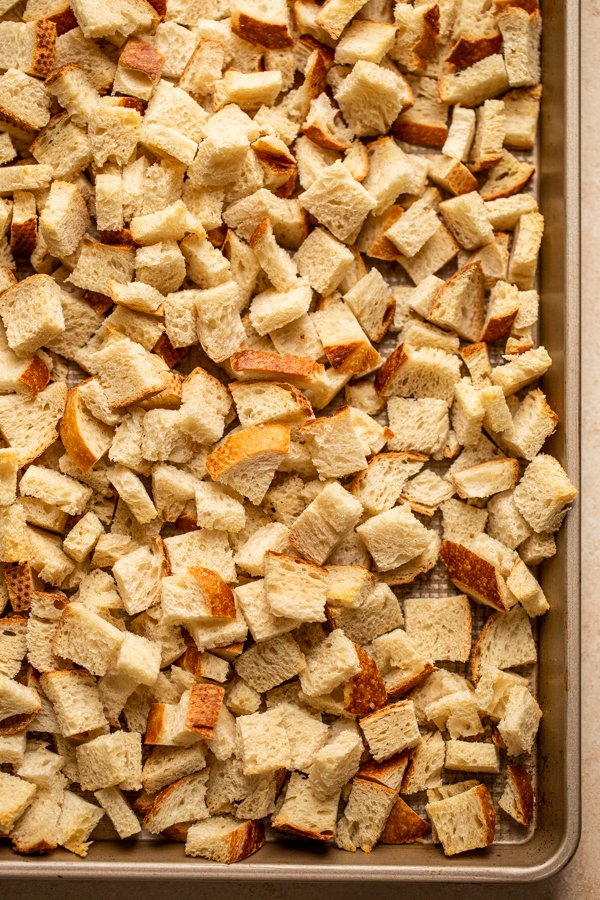
You then toast and sort of “dry out” the bread in the oven at 350F before baking it because you want the bread to be pretty hard. That sounds weird, but if you use fresh bread, you’ll end up with a soggy mess.
And now the dilemma comes in about the sourdough bread. Which is oh-so-delicious, but oh-so-much work. I was making bread regularly again this spring, but once our new baby came along, I had too many other things to take care of and neglected my starter. So, I get this amazing sourdough loaf from ALDI when I order my groceries and I don’t feel guilty one bit! It’s actually an award-winning product and the flavor is PERFECT for stuffing and it’s already sliced which makes my life so much easier. It’s the perfect hack for when you want flavorful sourdough, but without the hours and hours of work. However, if you’re making your own sourdough…this IS the recipe for you.
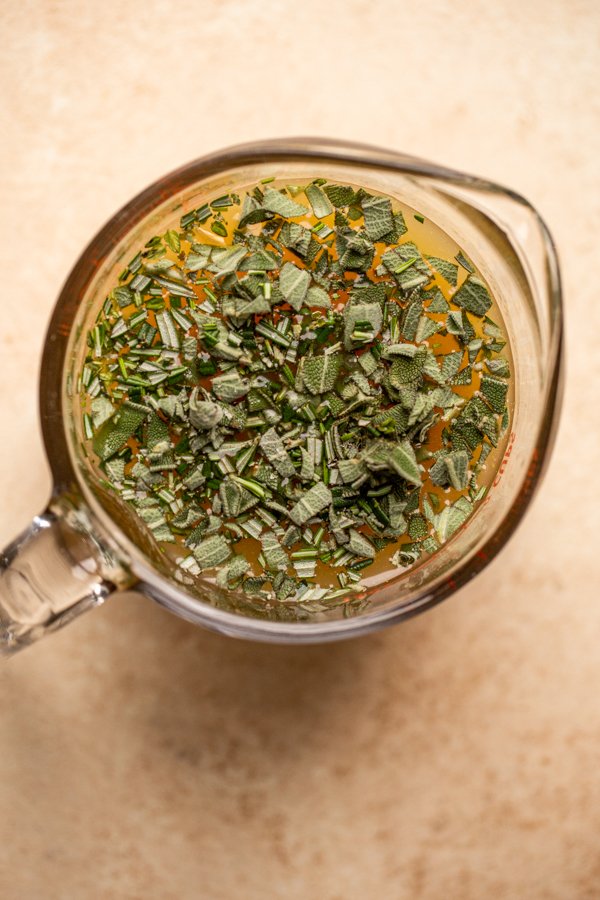
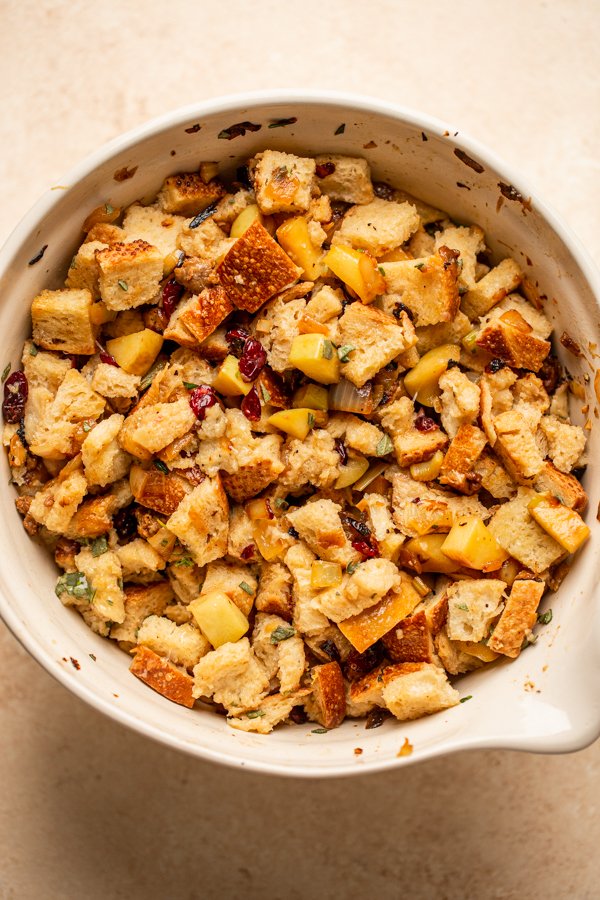
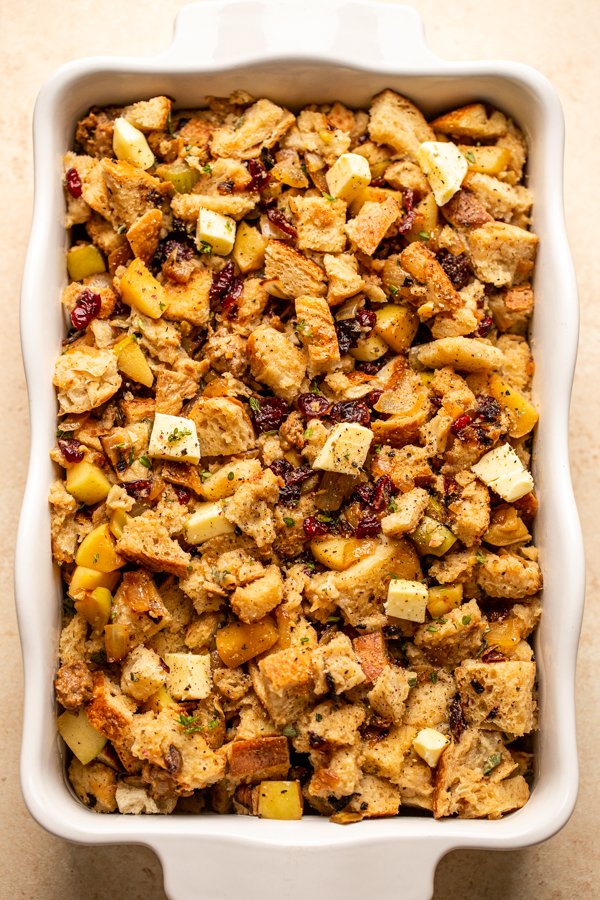
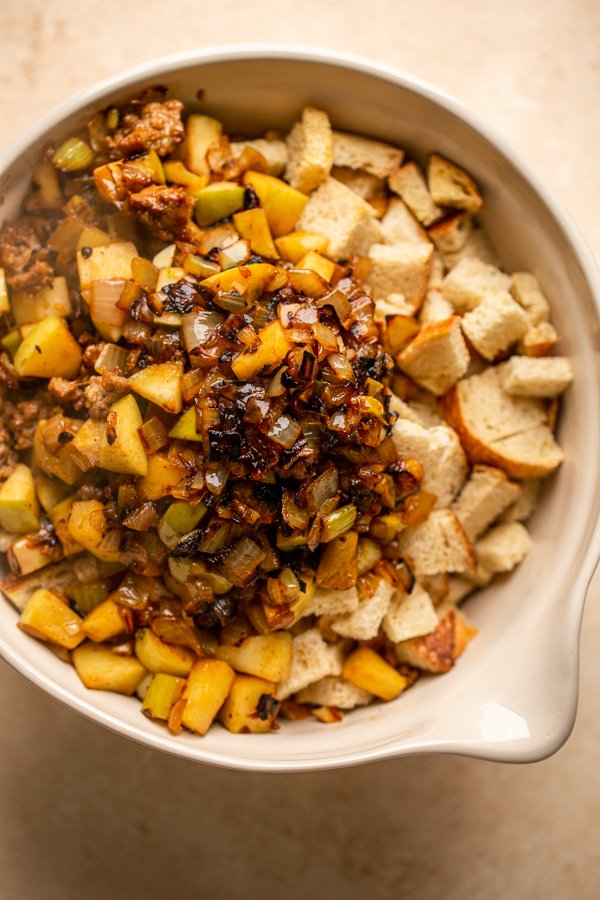
The rest of the sourdough stuffing recipe comes together traditionally. You sauté the filling ingredients (onions, celery, sausage if you’re using it, apples, and garlic) in plenty of butter for moisture.
Once the bread cubes are nice and dried out, you mix the flavorful fillings with the bread and bind it with chicken (or turkey!) broth and egg. Use good quality broth. I really love the organic variety from ALDI and always keep it on hand.
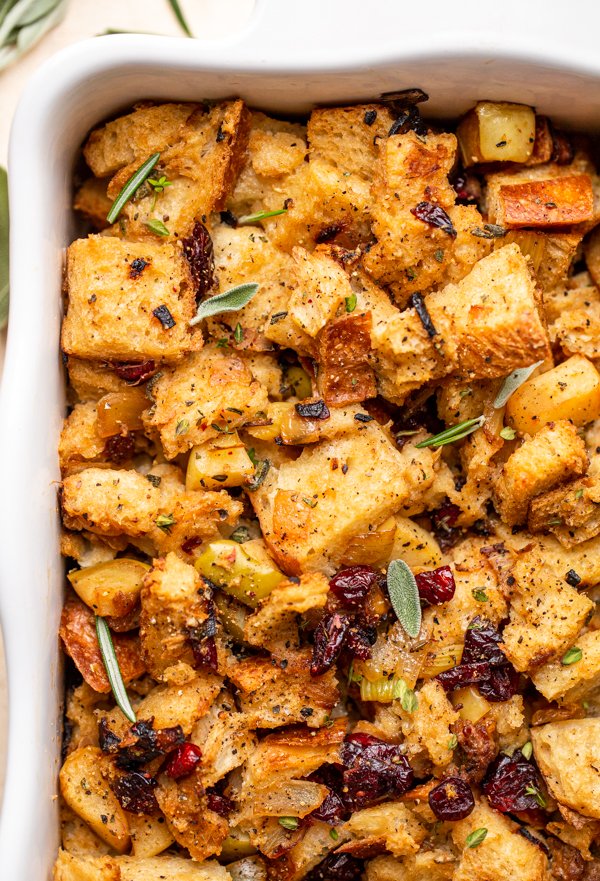
Everything gets baked in the oven, I like to use a buttered casserole dish as my vessel so the edges get toasty, but the middle is still soft and gooey – like good stuffing should be. I know you’re going to fall in love with this one, friends.
Need another side? Try my Sweet Potato Casserole (it’s got sugared pecans AND marshmallows)!
Print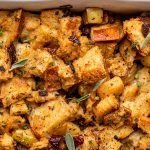
Sourdough Stuffing with Cranberries and Apples
This classic stuffing recipe uses sourdough bread and is full of flavor from cranberries and apples. You need it on your Thanksgiving or Holiday table!
- Prep Time: 20 minutes
- Cook Time: 35 minutes
- Total Time: 55 minutes
- Yield: 8 servings 1x
- Category: Sides
- Method: Oven
- Cuisine: American
Ingredients
- 1 (8 oz) Specialty Selected Sliced Sourdough Round, cubed
- 6 Tbsp. Simply Nature Organic Butter, divided
- 2 yellow onions, diced
- 4 celery stalks, diced
- 2 Mild Italian Sausage Links, with the casing removed (optional)
- 2 apples, cored and diced (I used 1 Granny Smith, 1 Gala)
- 4 garlic cloves, minced
- 2/3 cup Southern Grove Dried Cranberries
- 3 cups Simply Nature Organic Low Sodium Chicken Broth
- 2 Simply Nature Organic Cage Free Brown Eggs
- 2 Tbsp. roughly chopped sage leaves (or 2 tsp. dried and ground)
- 1 Tbsp. fresh rosemary, minced (or 1 tsp. dried)
- leaves from 5 fresh thyme sprigs (or 1/2 tsp. dried)
- 1 and 1/2 tsp. salt
- 1/2 tsp. pepper
Instructions
- Preheat the oven to 350F.
- When the bread is cubed, lay it on a large baking sheet and bake in the oven for 10-15 minutes until the cubes are nice and crunchy/hard. They shouldn’t be too toasted, just firm to the touch. You want to dry them out so the stuffing doesn’t get too soggy. Once done, transfer them to a large bowl.
- While the bread toasts, add 4 tablespoons of the butter to a large skillet over medium heat. When hot, add the onion and celery and sautè for about 7 minutes.
- Then, add the sausage links, if using, and brown for an additional 5 minutes. Next, add the apples and garlic. Sautè until the apples start to soften, about an additional 5 minutes.
- Once the apple mixture has cooked, add it along with the cranberries to the bowl with the bread.
- Whisk together the broth, eggs, rosemary, sage, salt, and pepper in a separate bowl and pour over the stuffing mixture, making sure everything is coated evenly.
- Pour the stuffing mixture into a large baking dish (I used a 9x13inch) and cover with foil. Bake for 20 minutes with the foil on and 10-15 with it off, or until the stuffing is golden brown.
- Cool until warm and serve!
Notes
- This recipe works with or without the sausage
- If you have a smaller group, this recipe works well halved. Additionally, if you have a large crowd, simply double the recipe or multiply to your needs.
Nutrition
- Serving Size: 1 serving
- Calories: 567
- Sugar: 16 g
- Sodium: 1208 mg
- Fat: 36 g
- Saturated Fat: 16 g
- Unsaturated Fat: 2 g
- Trans Fat: 0 g
- Carbohydrates: 27 g
- Fiber: 3 g
- Protein: 23 g
- Cholesterol: 152 mg
Lemony Sheet Pan Chicken and Potato Bake | With White Wine Butter Sauce
This easy chicken and potato bake recipe is made easily on a sheet pan. It’s weeknight-friendly but the flavorful white wine butter sauce makes it delicious enough for a weekend dinner.
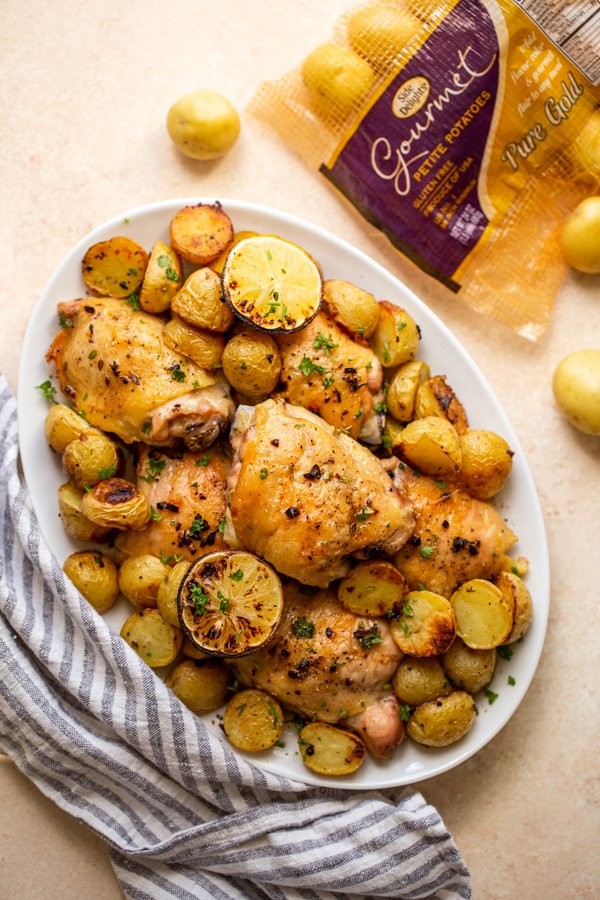
This amazing Lemony Sheen Pan Chicken and Potato Bake is sponsored by Masser Potatoes. As always, all thoughts and opinions remain my own, and I am proud to partner with brands I love. Thank you for supporting the growth of MAK.
Dinner is undoubtedly my favorite meal of the day. I like to make a loose meal plan for the week and each day at about lunch, I start thinking about what we’re eating.
There’s nothing better to me than sitting around the table with Jared at the end of the day. Sometimes (especially these days with a baby) we heat up leftovers and eat something super fast that’s thrown together. But on my favorite nights, we eat something a little bit more special complete with a glass of wine.
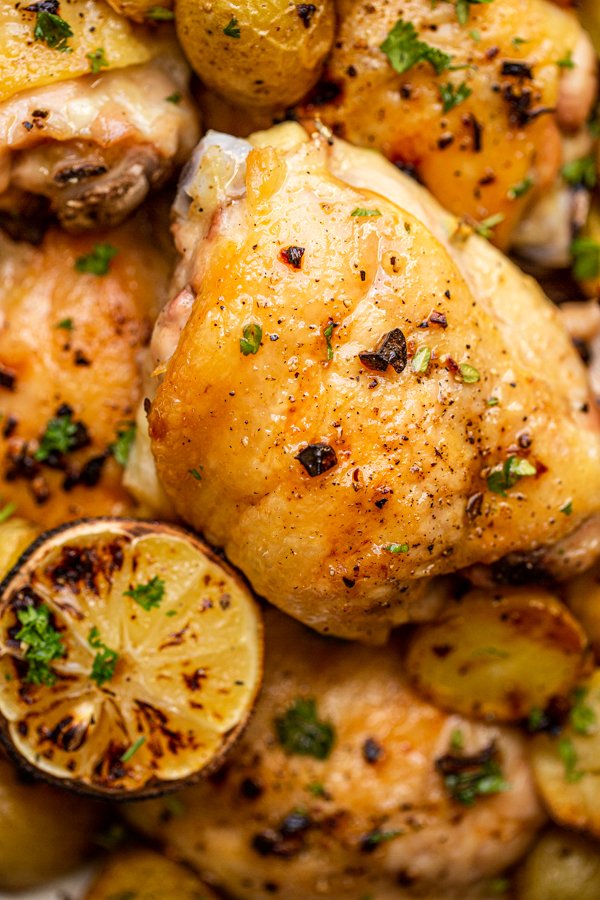
A total win in my book is when I can throw something together but have it feel a little special, too. This chicken and potato bake is EXACTLY that.
What makes this meal so perfect is that it bakes all on one pan. Minimal dishes, minimal active time, minimal cleanup time.
How do you make a one-pan chicken and potato bake?
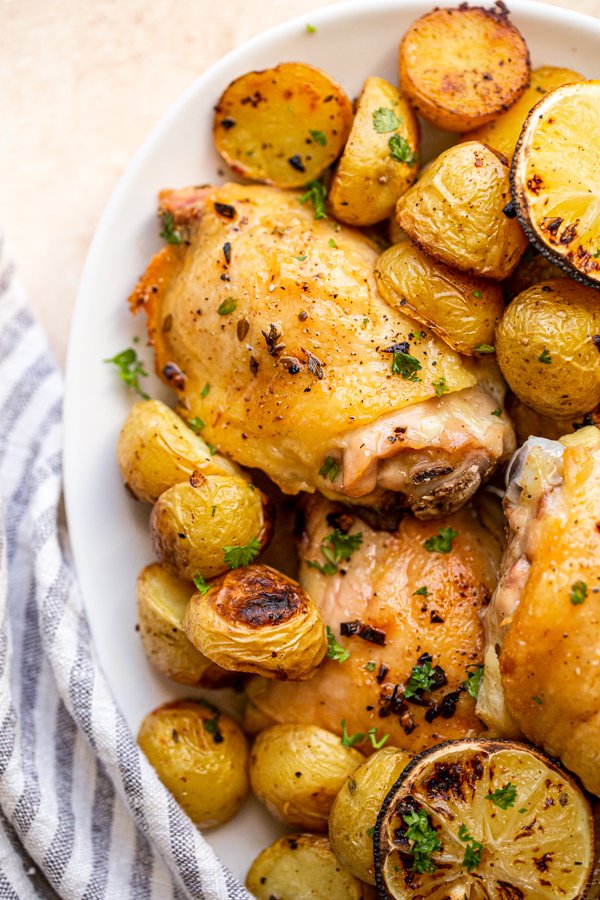
First I grab all of my ingredients. I usually just get some bone-in, skin-on chicken thighs and a bag of Side Delights® Gourmet Petite potatoes (available at ALDI which is where you guys know I do all my shopping). I love how rich and creamy these little potatoes are AND they’re grown right in PA! I always get the pure gold variety when I make this, but any of the Side Delights® Gourmet Petite potatoes will work perfectly.
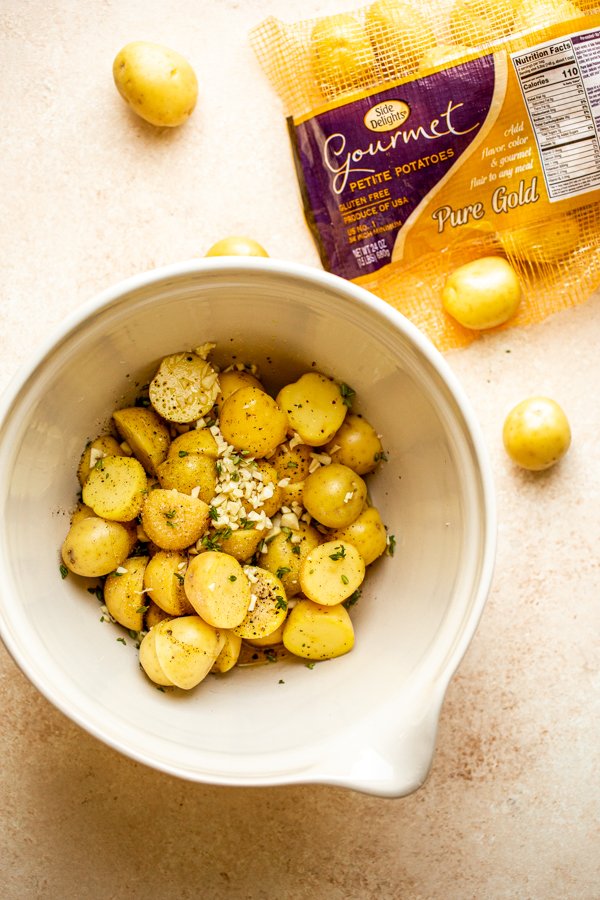
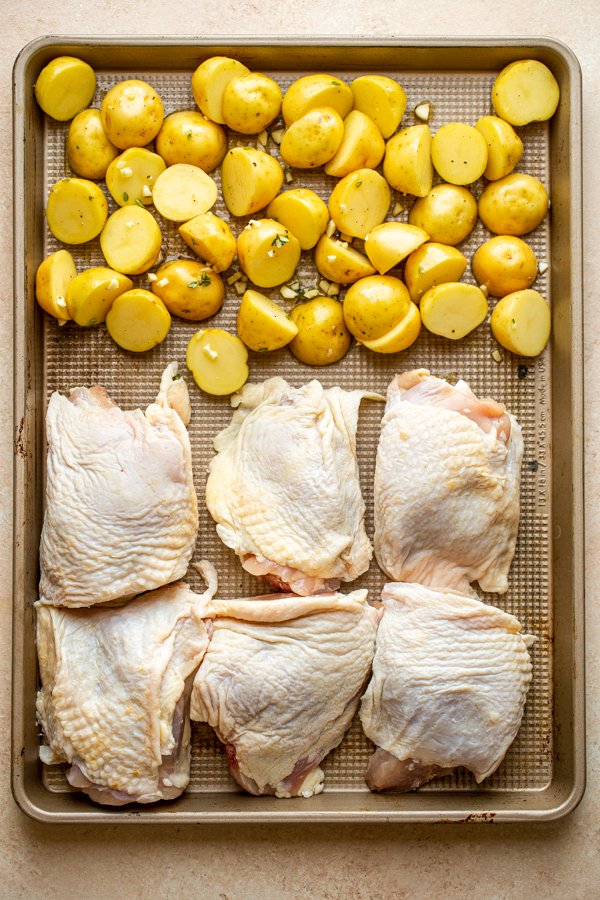
I mix together a flavorful lemon, herb dressing that I toss the potatoes in and then pour all over the chicken thighs. Then everything goes on one big baking sheet and gets slid into the oven to bake.
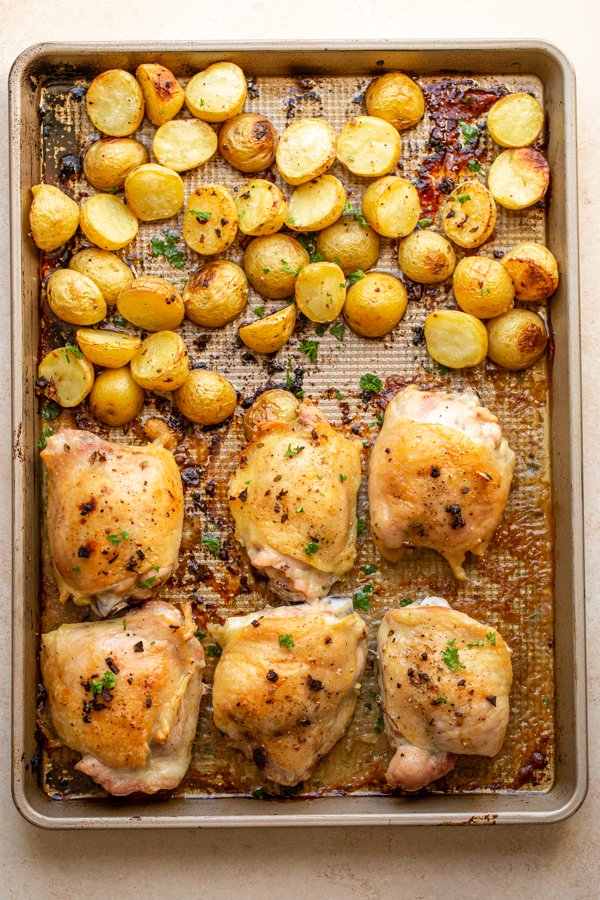
The chicken thighs and the Side Delights® Gourmet Petite potatoes have the same baking time, which is perfect. That means, no oven dance – everything is perfectly crispy, golden, and delicious at the same time.
What’s with this white wine butter sauce?
You can stop right after you pull the chicken and potatoes out of the oven. The result is so flavorful and delicious.
But if you have company for dinner or you want to make it a bit more special, make the white wine butter sauce.

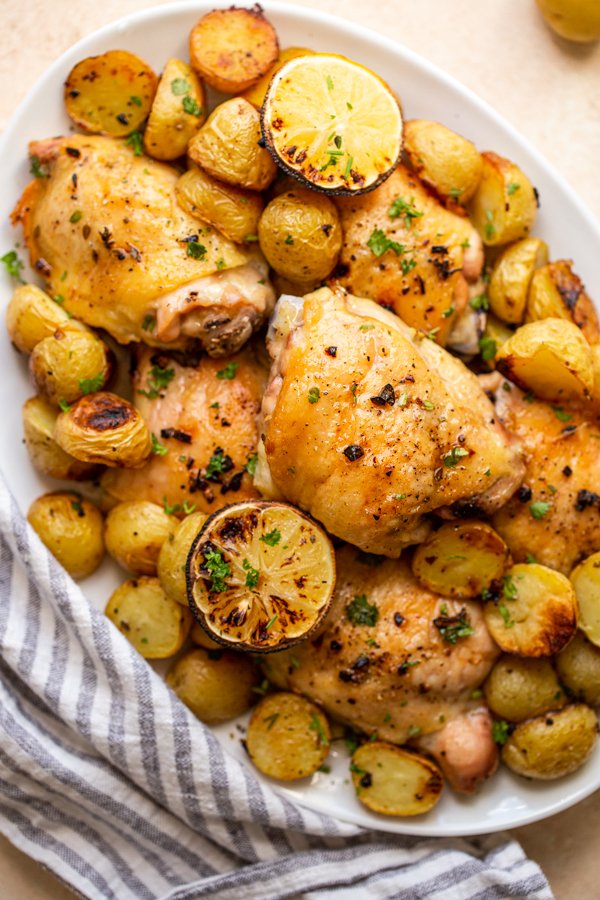
Remove the chicken and potatoes from the pan and place them on a serving platter. De-glaze the pan with some white wine and pour the pan drippings mixed with wine in a saucepan with some butter. Let everything get happy and reduced and pour over the chicken and potatoes.
It’s crazy simple, elegant, wholesome…what more could you want out of a one-pan meal?!
Love chicken thigh recipes? Don’t forget to try my Italian Baked Chicken Thighs!
Print
Sheet Pan Baked Chicken and Potatoes | With Lemon Butter Sauce
This chicken and potato bake recipe is made easily on a sheet pan. It’s weeknight-friendly but the flavorful sauce makes it a little fancy. The white wine butter sauce is optional, but highly recommended!
- Prep Time: 10 minutes
- Cook Time: 45 minutes
- Total Time: 55 minutes
- Yield: 4–6 servings 1x
- Category: Dinner
- Method: Oven
- Cuisine: American
Ingredients
- 6 bone-in, skin-on chicken thighs
- 1 and 1/2 lbs Side Delights® Gourmet Petite Pure Gold Potatoes
- 4 garlic cloves, minced
- 2 Tbsp. olive oil
- 1 lemon, juiced
- 1 and 1/2 tsp. salt, divided
- 1 tsp. pepper, divided
- 2 tsp. fresh thyme (or 1 tsp. dried)
For the white wine butter sauce:
- 3/4 cup dry white wine
- 2 Tbsp. butter
Instructions
- To begin, preheat the oven to 400F. Get the chicken thighs out of the fridge while you prepare the potatoes so they can come to room temperature to promote even cooking.
- Next, halve the potatoes and add them to a large bowl. To the potatoes, add the garlic cloves, olive oil, lemon juice, 1 teaspoon of the salt, 1/2 teaspoon of the pepper, and the thyme. Toss the potatoes, and scoop them out of the bowl and onto a large, rimmed baking sheet. Note that you want to leave the lemon garlic mixture in the bowl.
- Then, add the chicken thighs to the baking sheet on the other side. Pour the remaining lemon garlic mixture all over the chicken thighs and sprinkle the entire sheet pan with the remaining salt and pepper.
- Slide the sheet pan into the oven and bake for 40-50 minutes, or until the potatoes are soft and golden brown and the chicken has reached an internal temperature of 165F.
- To make the white wine butter sauce, remove the chicken and potatoes from the sheet pan and arrange them on a platter. Pour the white wine directly onto the baking sheet and scrape all of the bits of roasted potato and chicken from the bottom of the sheet pan.
- Place a mesh strainer over a medium saucepan and pour the wine and sheet pan sauce mixture over the strainer into the saucepan. Add the butter to the saucepan and place it over medium-high heat. Let the sauce come to a boil and reduce it to low and let it simmer for 10 minutes.
- Pour half of the sauce over the platter and serve immediately. Reserve the rest of the sauce for serving tableside.
Nutrition
- Serving Size: 1 serving
- Calories: 322
- Sugar: 1 g
- Sodium: 532 mg
- Fat: 14 g
- Saturated Fat: 4 g
- Unsaturated Fat: 8 g
- Trans Fat: 0 g
- Carbohydrates: 14 g
- Fiber: 1 g
- Protein: 30 g
- Cholesterol: 119 mg
Venison Enchiladas
These cheesy venison enchiladas are easy to make and have the perfect red enchilada sauce that goes great with wild game.
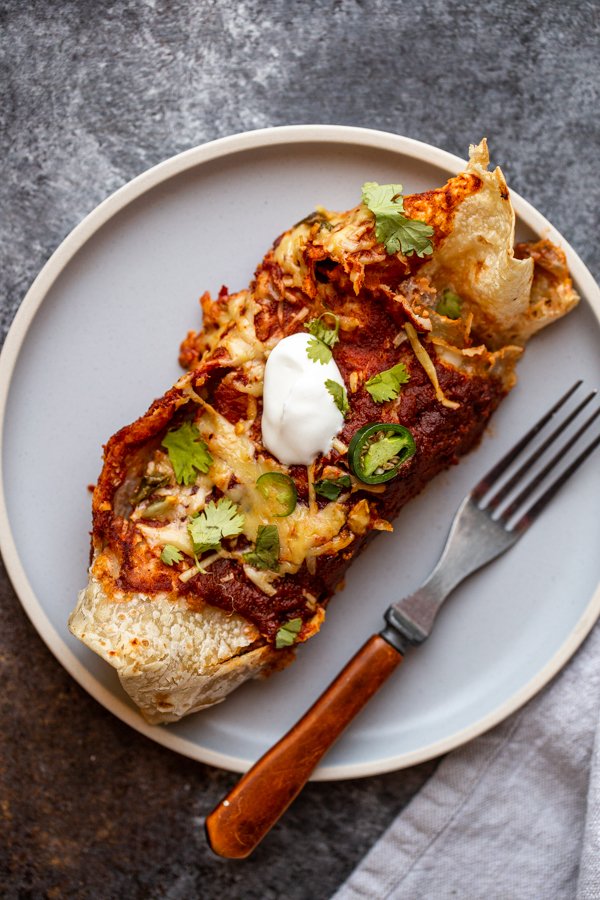
If I’m out to eat at a Mexican restaurant, I’m probably getting enchiladas. Like 8/10 chance. 100% chance of guac. But, I’m so glad I have a venison enchiladas recipe to make at home, because boy do I get a craving for them once in a while!
One things that’s hard about living in a small town is the lack of restaurants. We have some gems but the one thing that we’re missing is a really good Mexican restaurant. And GOSH do we need one because Mexican food is like our favorite kind of food.
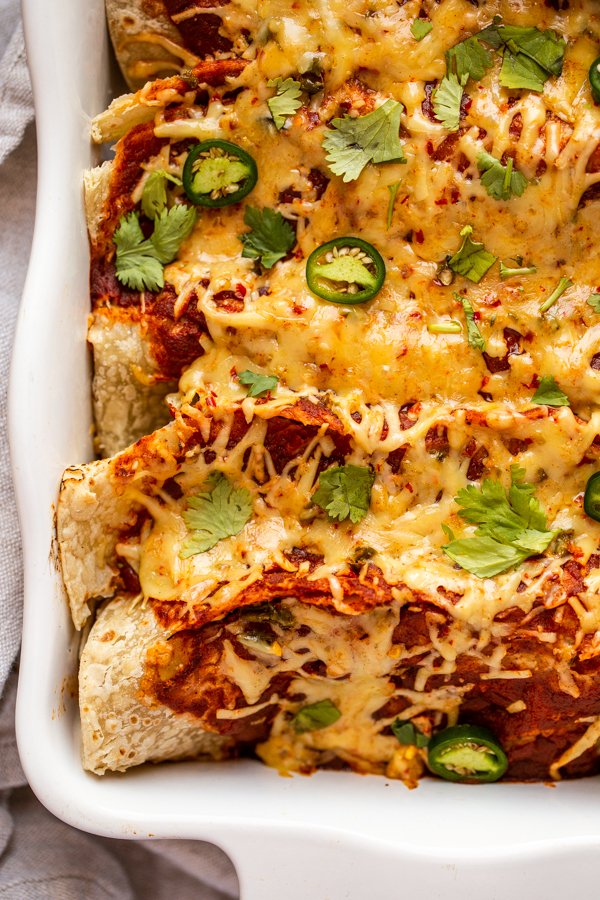
Seriously, Jared and I could eat Mexican food all of the time. So, since we can’t get it out, I make it all of the time at home. We make these enchiladas and these burrito bowls ALL of the time.
I do love it because it’s easy to make it healthier, but sometimes I can only do so many lettuce taco wraps (try the Barboca meat from my cookbook!) and chicken fajita bowls. Sometimes, you just need a real deal enchilada.
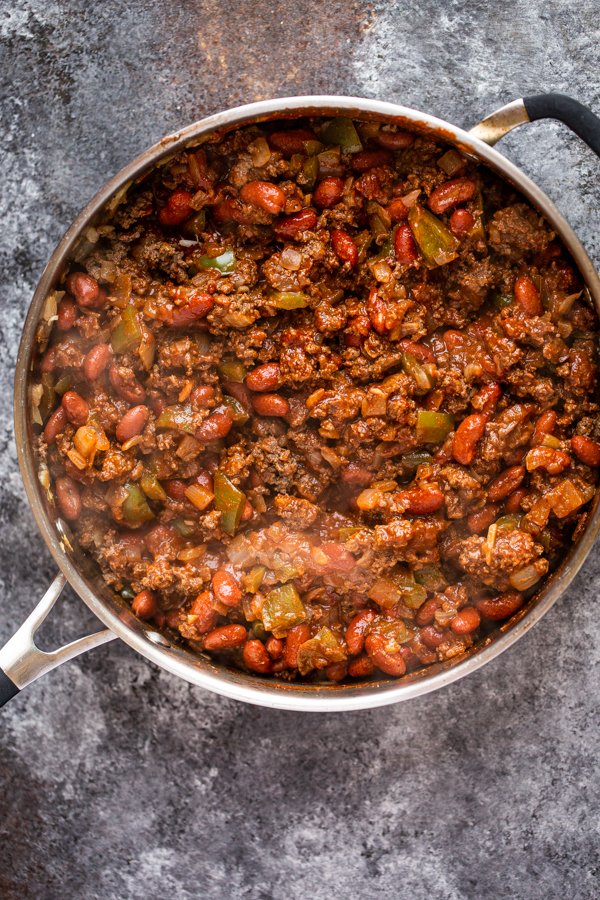
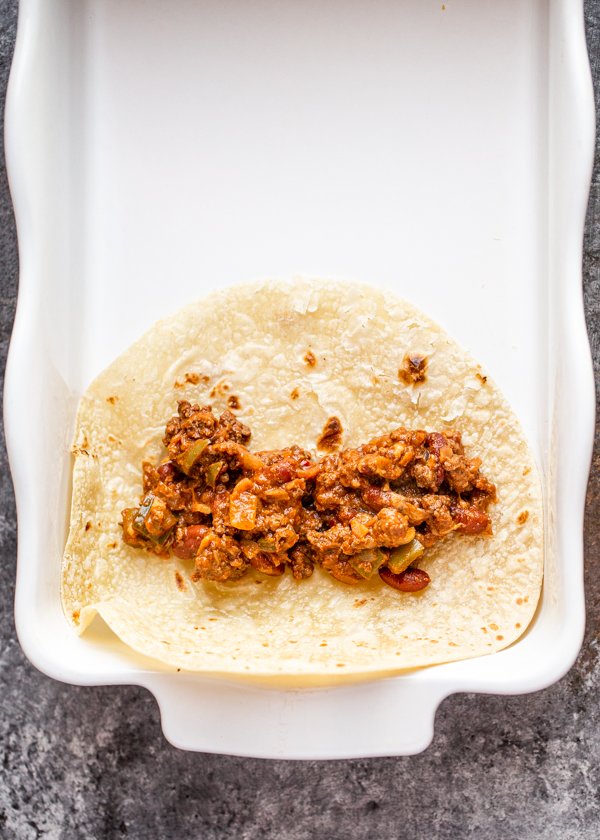
How do you make enchiladas with venison?
It’s so easy to make enchiladas with venison. You just need some ground deer meat (elk, bear, antelope, moose work, too!) and all of the regular enchilada suspects – tortillas, cheese, spices, beans and enchilada sauce.
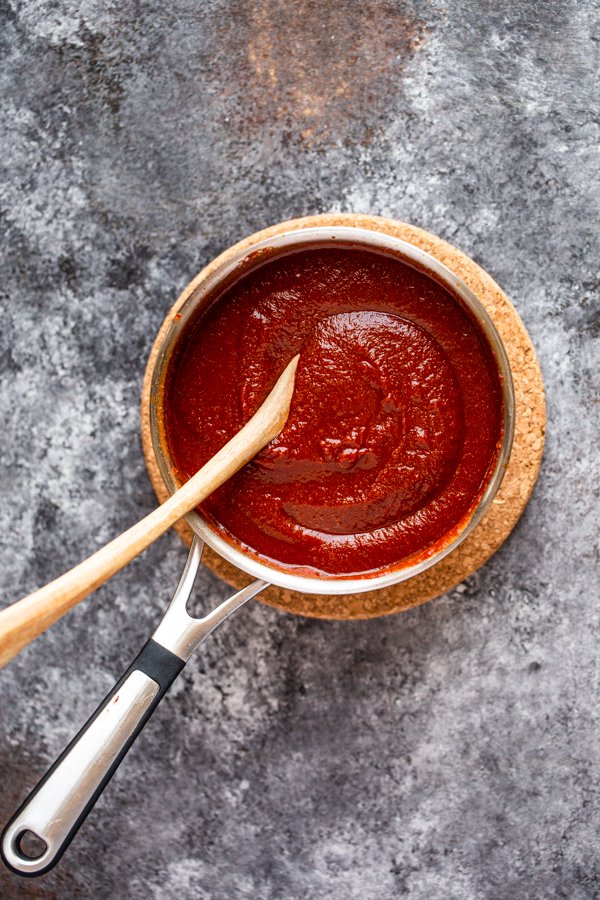
The real kicker here is the homemade enchilada sauce. Of course, you can use canned, red enchilada sauce, but I’d really encourage you to take the extra 5 minutes and make your own! It’s SO easy and mega flavorful.
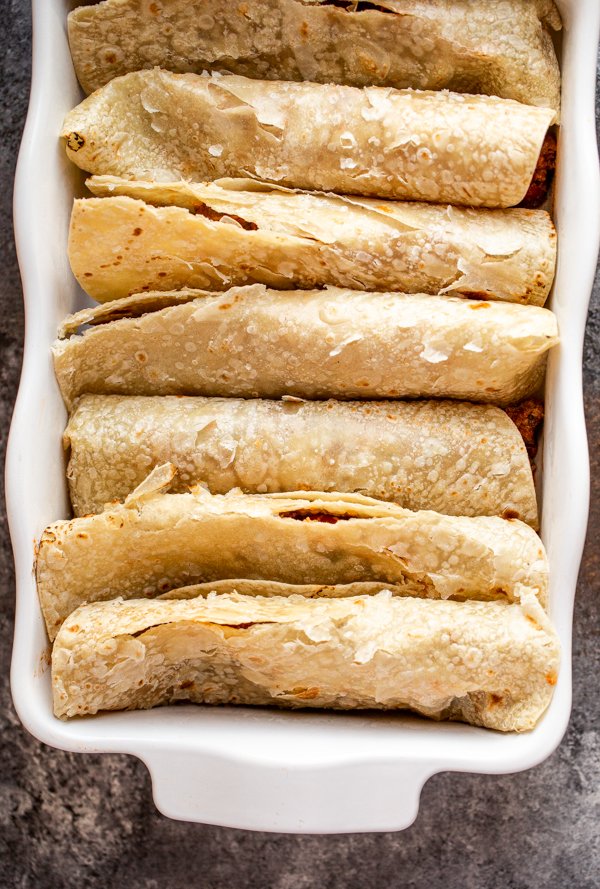
Once you cook up the enchilada filling, you just spoon rap, roll, and go! I love the extra acid this recipe uses (which is one of my favorite wild game tips – get the rest of my tips for free here).
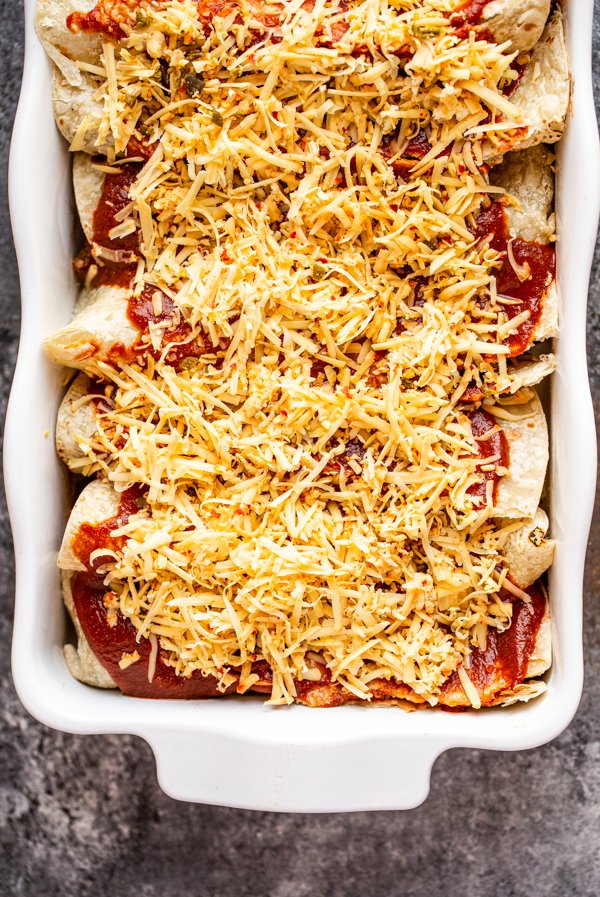
It bakes up so golden, delicious and bubbly. I like mine with a serious dollop of sour cream and some cilantro.
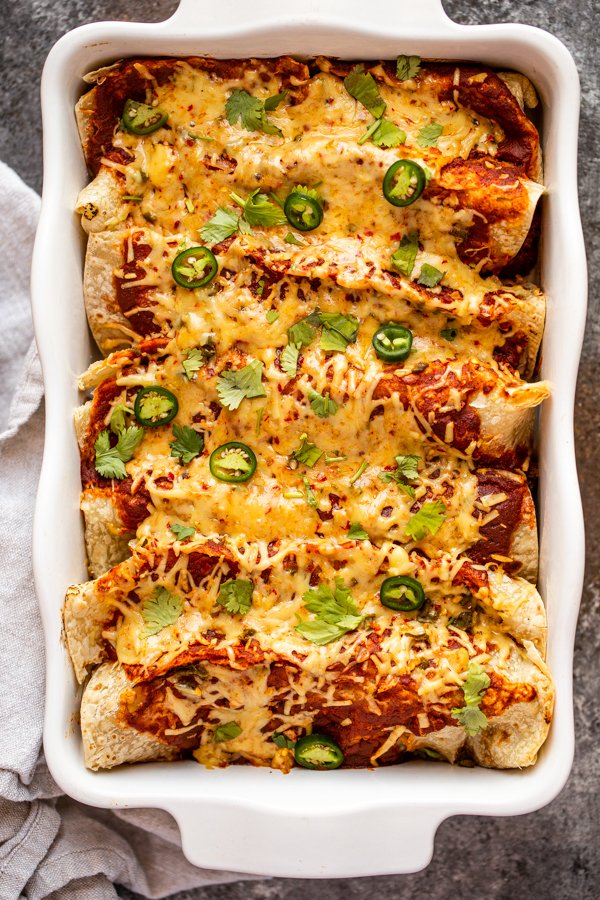
*pro tip – make a double batch and freeze one, it works like a charm and is a real lifesaver!
Need more venison recipes? Go checkout my cookbook!
PrintVenison Enchiladas
These cheesy venison enchiladas are easy to make and have the perfect red enchilada sauce that goes great with wild game.
- Prep Time: 25 minutes
- Cook Time: 30 minutes
- Total Time: 55 minutes
- Yield: 8 enchiladas 1x
- Category: Dinner
- Method: Oven
- Cuisine: Mexican American
Ingredients
For the enchilada sauce (you can do storebought, you’ll need 2 cups of sauce):
- 1 Tbsp. olive oil
- 2 Tbsp. chili powder
- 1 tsp. cumin
- 1 tsp. garlic powder
- 1 tsp. onion powder
- 3/4 tsp. salt
- 2 Tbsp. tomato paste
- 15 oz (or 2 cups) tomato sauce
For the enchiladas:
- 1 Tbsp. olive oil
- 1 yellow onion, diced
- 1 green bell pepper, diced
- 1 lb. ground venison (or elk, moose, antelope, bear, etc)
- 2 garlic cloves, minced
- 1 tsp. chili powder
- 3/4 tsp. salt
- 1/2 tsp. pepper
- 1 (15 oz) can beans (black, pinto, or kidney)
- 1 cup enchilada sauce + 1 cup enchilada sauce for the top
- 1 cup pepper jack cheese + 1 cup pepper jack cheese for the top
- 8 tortillas, I like flour or brown rice tortillas, I haven’t made this with corn
Instructions
- Preheat the oven to 350F.
- Start by making the enchilada sauce. In a small saucepan, add the olive oil over medium heat. Add the chili powder, cumin, garlic powder, onion powder, and salt and cook in the oil for 2 minutes to release the flavor. Then, add the tomato paste and tomato sauce and mix well. Let the sauce simmer covered on low heat while you make the filling.
- To make the enchiladas heat the remaining olive oil in a large skillet over medium heat. Add the onions and peppers and saute for 4-5 minutes before adding the meat. Brown the meat, this takes about 7-8 minutes.
- Then, add the garlic, chili powder, salt, and pepper to the meat mixture and cook for 2 minutes before stirring in the beans, 1 cup of the enchilada sauce, and 1 cup of the cheese. Mix well and remove from the heat.
- Then, get out a large casserole dish (I use an 11×7, but any large dish will work) and lay 1 tortilla in the dish. Spoon about a 1/4 cup portion of filling in a line on the tortilla and wrap the tortilla around the filling, making an open-ended burrito. Do this with the 8 remaining tortillas, stacking them against each other, until they’re all filled.
- Top with the remaining sauce and cheese and cover the dish with foil. Bake for 20 minutes covered, and 10 minutes uncovered in the oven, or until the cheese is bubbly.
- Serve with any desired toppings & enjoy!
Nutrition
- Serving Size: 1 enchilada
- Calories: 415
- Sugar: 10 g
- Sodium: 780 mg
- Fat: 17 g
- Saturated Fat: 5 g
- Unsaturated Fat: 7 g
- Trans Fat: 0 g
- Carbohydrates: 41 g
- Fiber: 8 g
- Protein: 24 g
- Cholesterol: 48 mg
 PREVIOUS