Wild game burger recipes with burger sauce will curb any burger craving. Perfect for using your favorite ground game meat, you need these easy, protein-packed meals for every season!

If you’ve got ground wild game in your freezer, it’s time to level up your burger game. Whether you’re working with venison, elk, or bison, I’ve got wild game burger recipes that are juicy, flavorful, and anything but boring. The secret? A little trick I swear by—grated frozen butter mixed right into the meat. It keeps those leaner cuts tender and mouthwatering. Add a dollop of my secret sauce, and you’ve got a burger that’ll rival any drive-thru classic.
From classic burgers you’ll crave again and again to low-carb burger bowls and even a cozy wild game burger soup, there’s something here for everyone. These recipes are perfect for busy weeknights, backyard cookouts, or meal prep for the week ahead. So grab that ground wild game and get ready to make burgers that’ll become a family favorite in no time!
TIPS AND TRICKS | PERFECTLY JUICY & DELICIOUS WILD GAME BURGER RECIPES & FINDING THE PERFECT MEAT-TO-FAT RATIO
Adding Fat
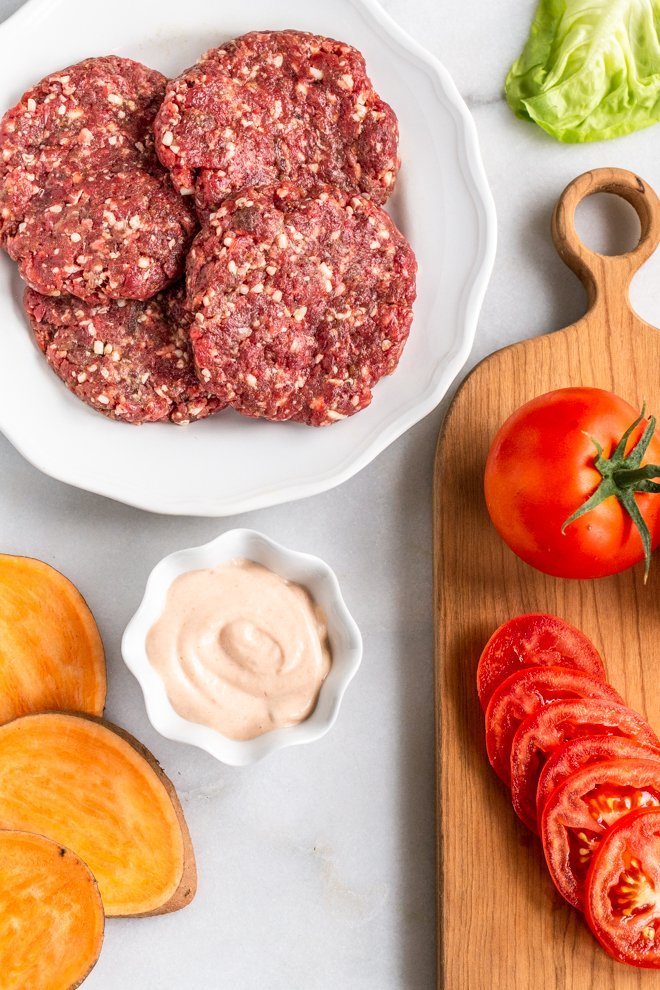
In this recipe, you’ll see below that I’m using cold, grated butter and mixing a bit into the patties. Not too much, you don’t want the burger to be greasy, but just about 1/2 tablespoon of grated butter per patty to give it some juice.
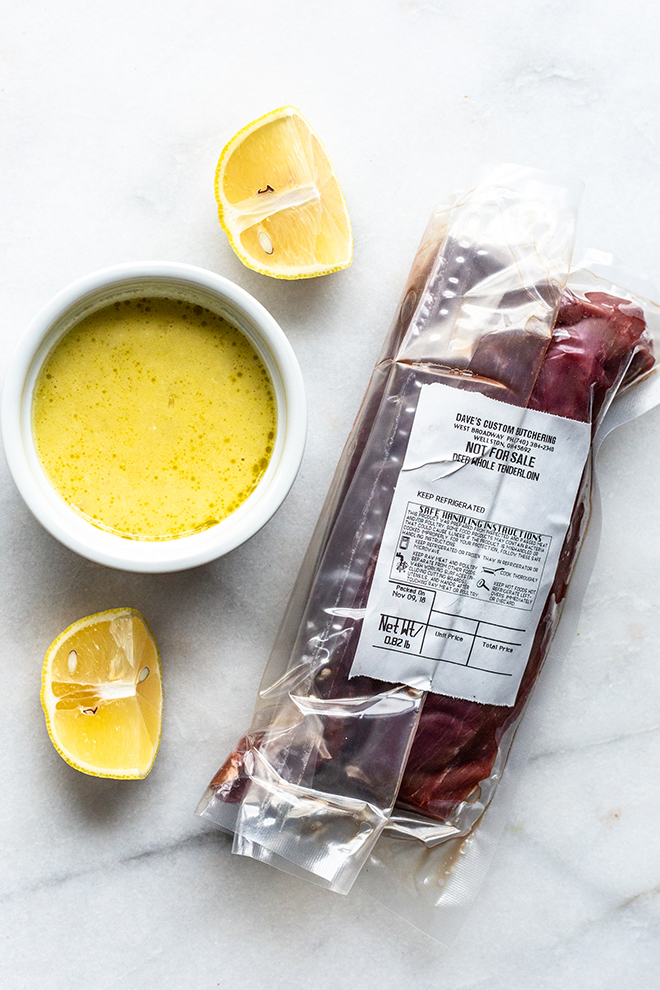
Our deer meat is also cut with 10% pork fat, so be sure to add some sort of fat to your grind (or have your butcher do it) when processing the meat.
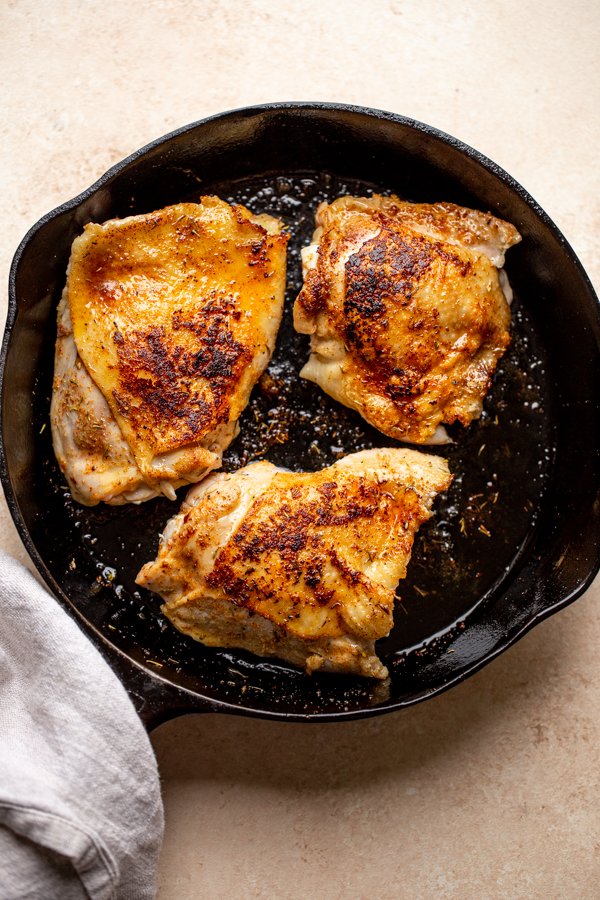
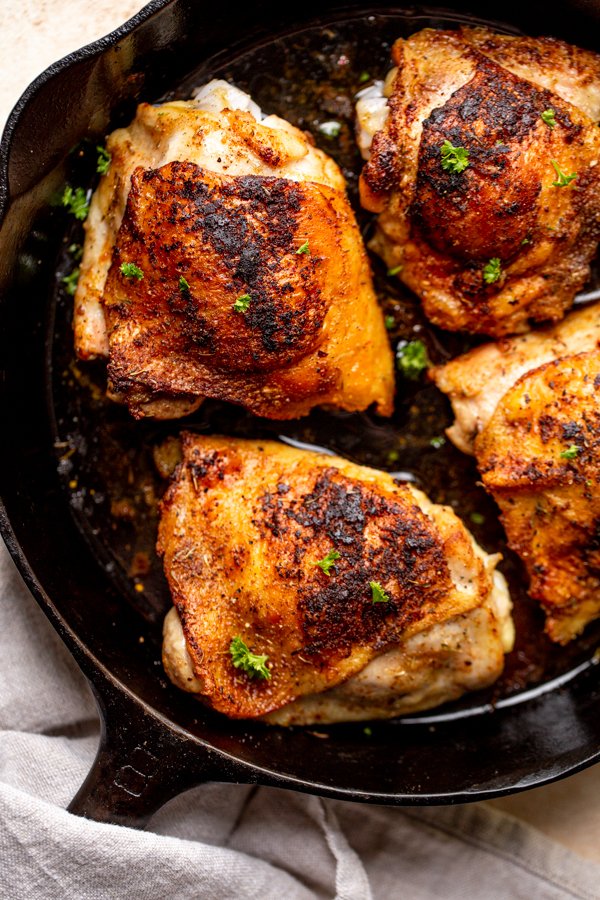
Cooking Wild Game Burger Recipes To Perfection
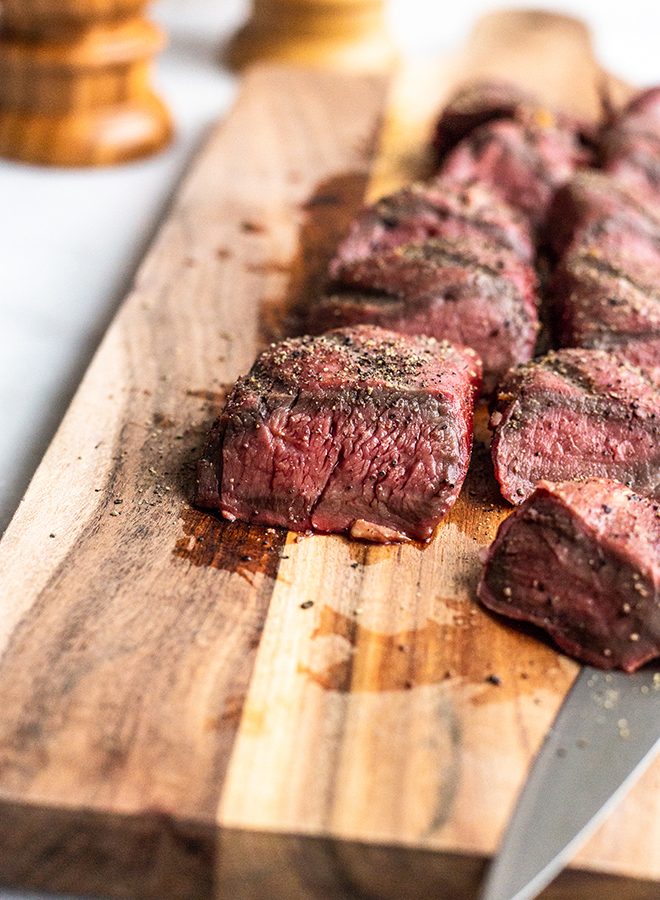
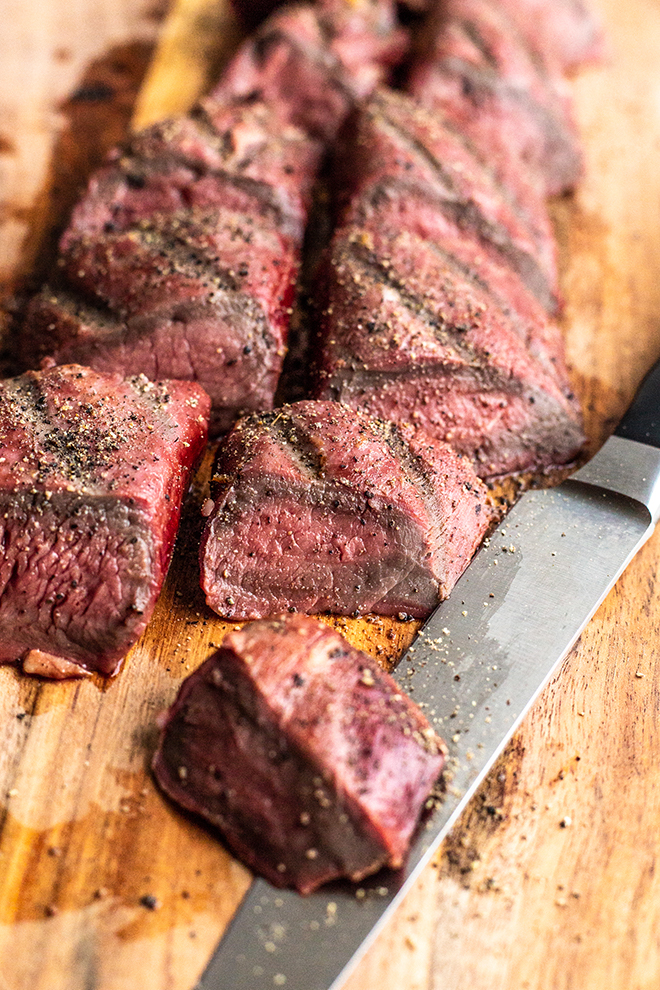
One of the #1 ways to ruin deer meat is to overcook it. I like my steaks rare to medium rare and my burgers just over medium, so about 140F internally.
Once your burgers reach about 140-145F, pull them off the heat source you’re using and let them rest for a few minutes before serving them. This is SO important.
How Do You Make Wild Game Burger Recipes Taste Good?
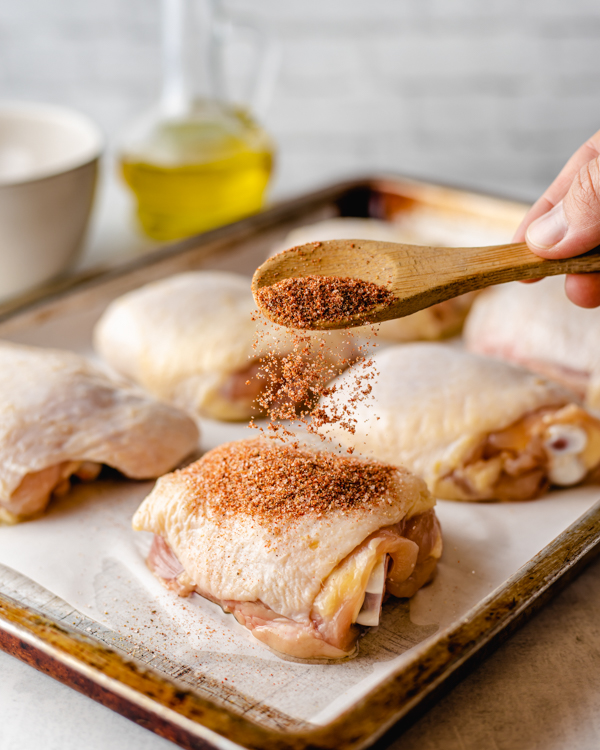
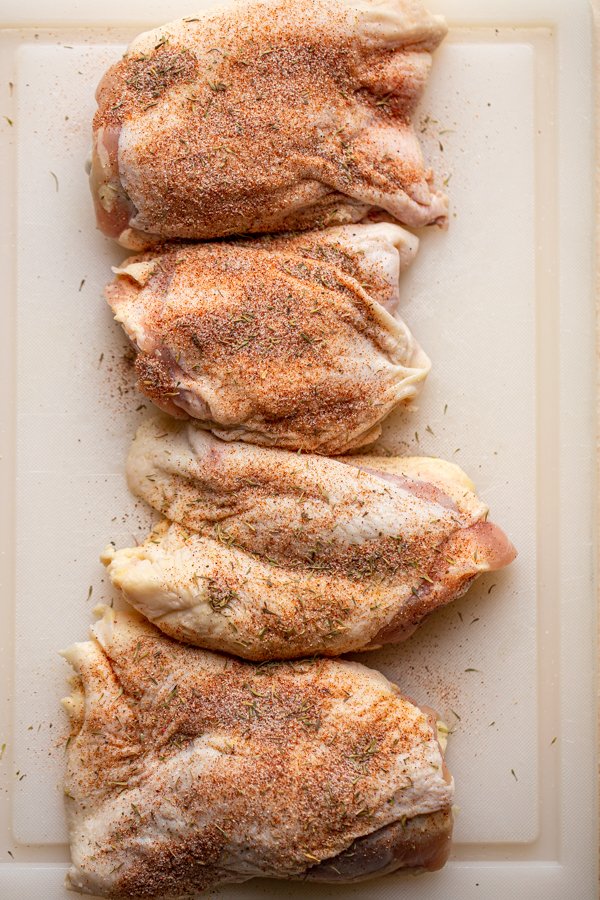
If you don’t love the flavor of venison, or even if you do and you want to enhance it, you’re going to want to add a bit of seasoning and acid to your burgers to let the meat shine.
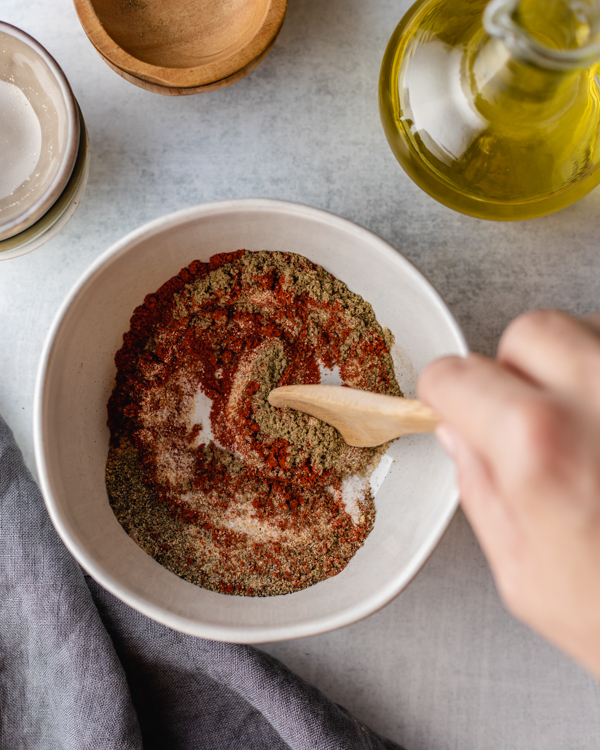
I add a bit of balsamic vinegar and Worcestershire sauce to combat the richness but bring out the meaty flavor.
Then, it’s just simple salt, pepper, garlic, and onion powder. It’s really that easy!
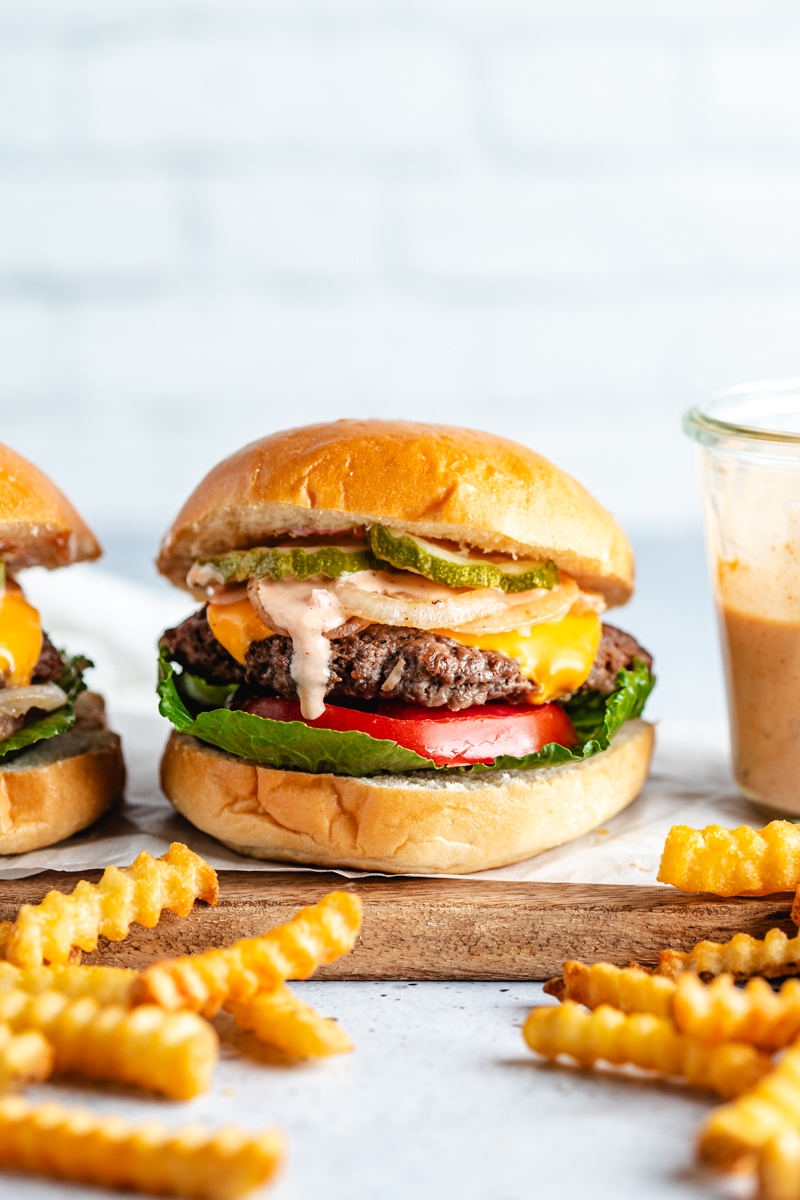
TOPPINGS FOR YOUR WILD GAME BURGER RECIPES WITH BURGER SAUCE
Here’s a tasty mix of classic, creative, and wild game–friendly burger toppings to try—perfect for customizing to your crowd or your mood:
Classic Burger Toppings
- Cheddar, Swiss, or American cheese
- Lettuce, tomato, and onion (raw or grilled)
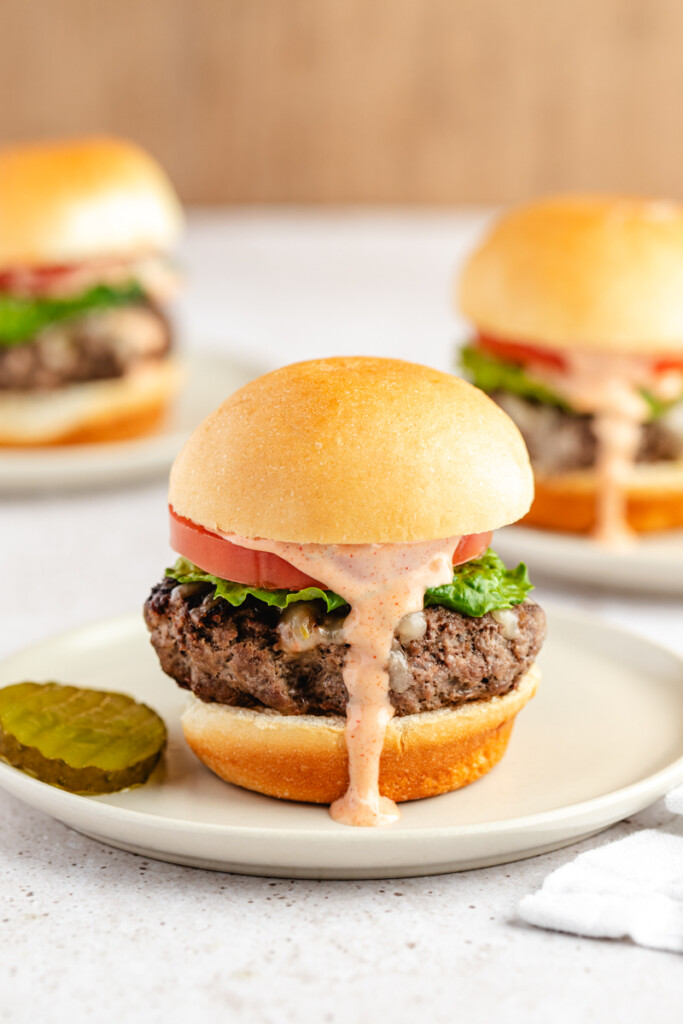
- Pickles – dill, bread & butter, or spicy
- Ketchup, mustard, and mayo
Bold & Gourmet Toppings
- Grilled mushrooms + Swiss cheese
- Caramelized onions
- Fried egg
- Bacon or venison bacon
- Avocado or guacamole
- Jalapeños
Wild Game–Loving Combos
- Blue cheese + caramelized onions (pairs great with venison)
- Pepper jack + spicy slaw
- Crispy onions + chipotle mayo
- Goat cheese + fig jam
- Sharp cheddar + apple slices + arugula
For my go-to secret sauce, check out the recipe below!
Let’s get cooking some wild game burger recipes:
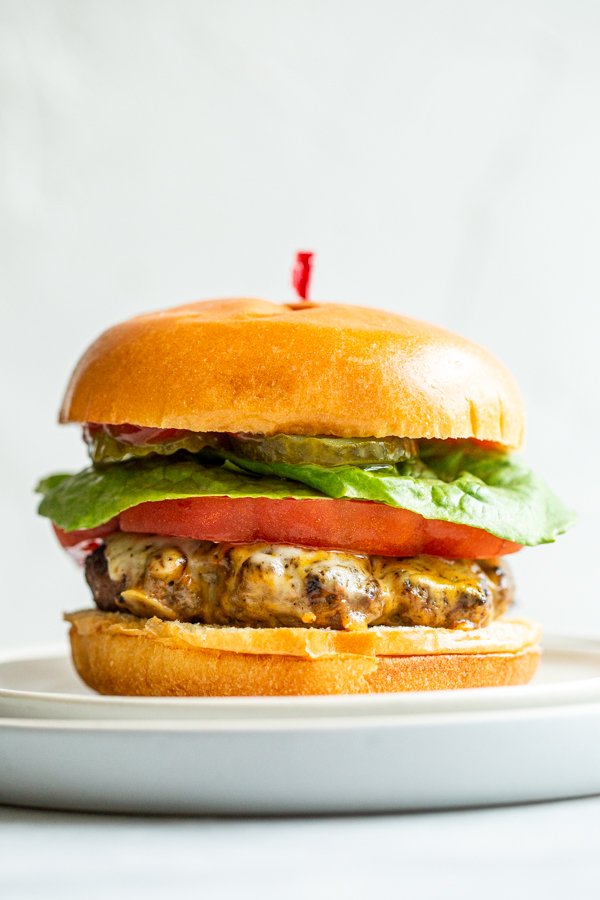
Perfect Venison Burgers
Making perfect venison burgers isn’t hard. All you need to do is add a bit of fat and a few flavors to make this underrated meat shine on burger night.
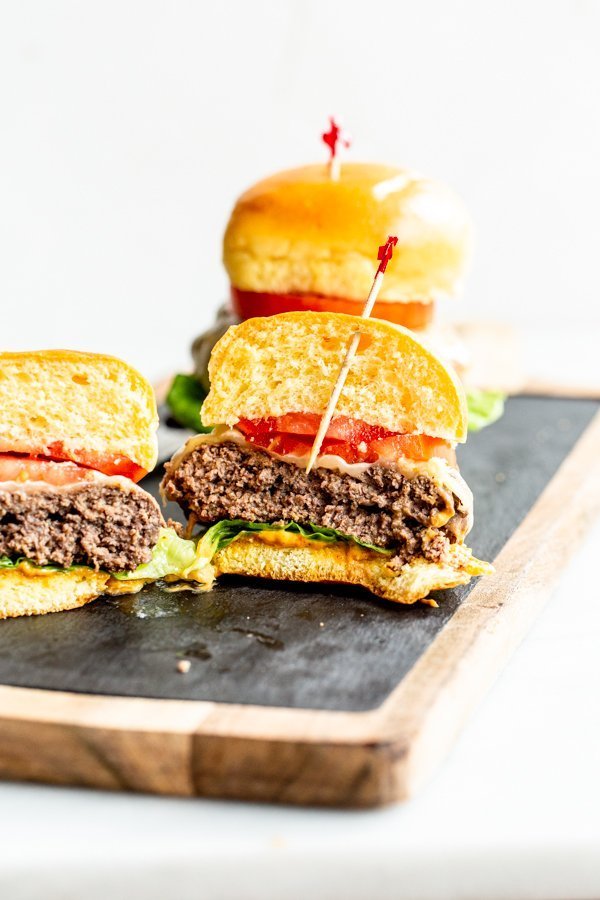
Venison Hamburger Sliders
This venison hamburger sliders recipe makes the most delicious mini burger buns with deer meat perfect for an appetizer or main!

Uncle Momo’s Venison Smash Burgers
Talk about a flavor explosion with these Smash Burgers! Caramelized ground venison patties get layered with onions and American cheese.
Bear Burger
Making a bear meat burger delicious can seem tricky because the meat must be well done, but this recipe is both juicy and flavorful.
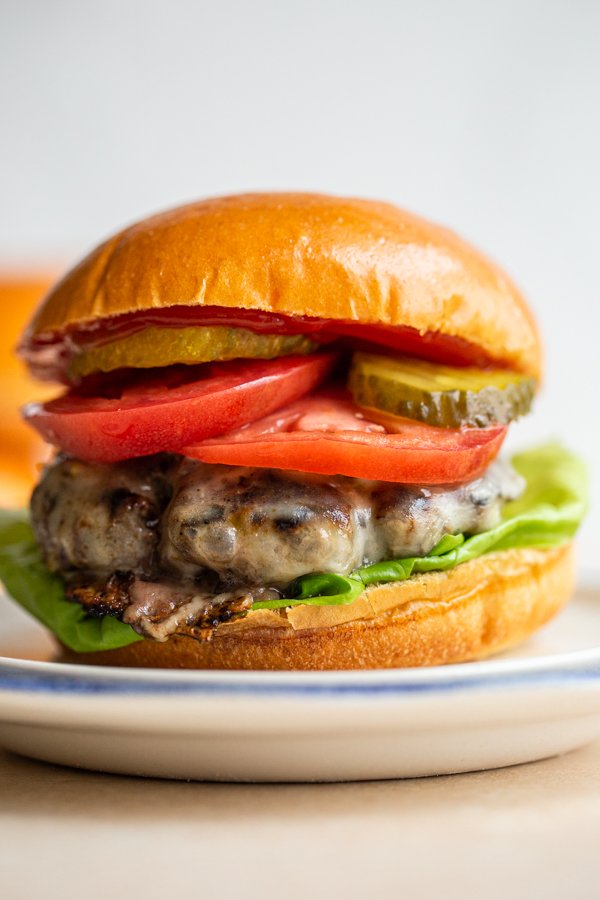
The Juiciest Elk Burgers
The juiciest elk burgers are the perfect recipe to use up the ground elk meat you have. Plus, I share some really simple tips and tricks that will make these the best burgers ever.
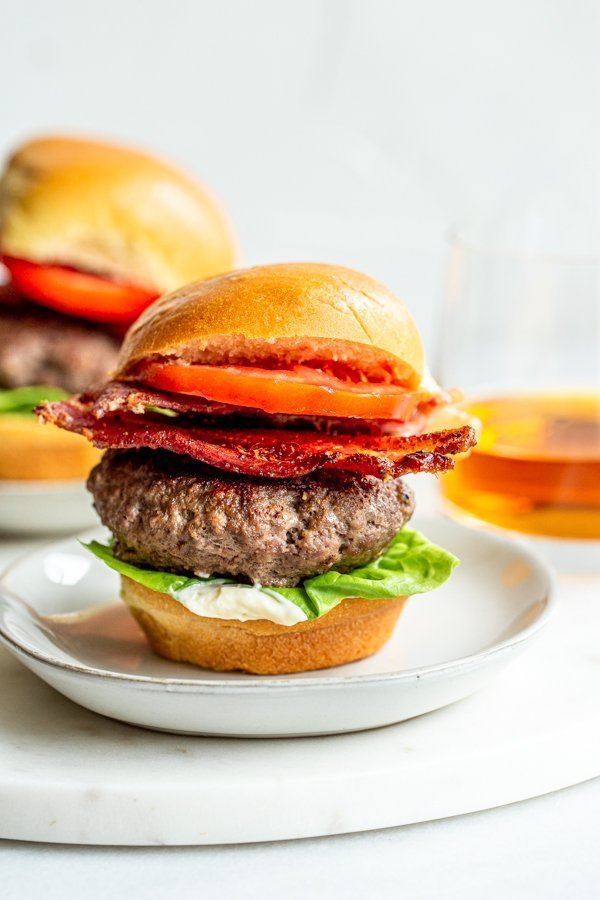
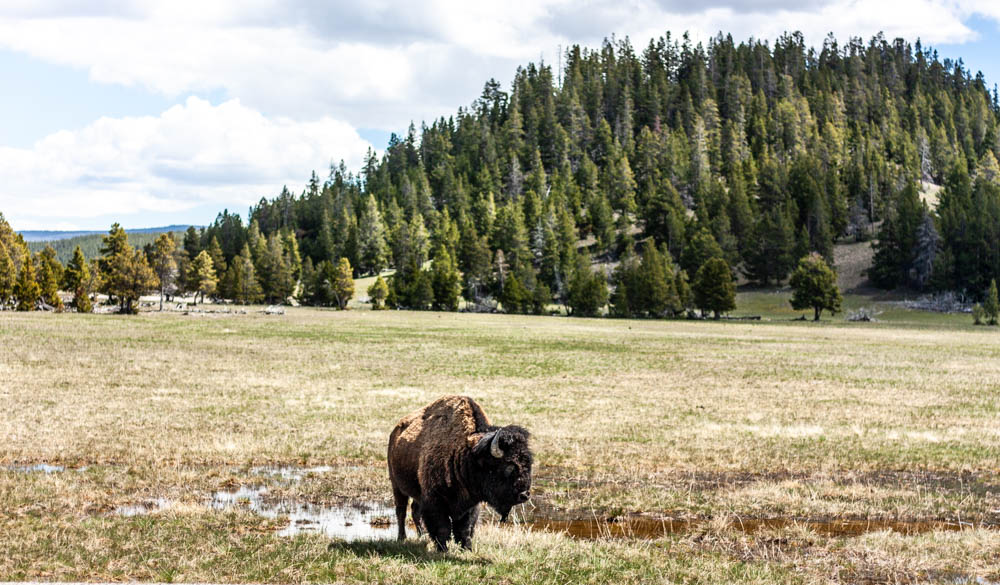
BLT Bison Burgers
These BLT bison burgers are packed with juicy bison meat, thick slices of bacon, fresh lettuce and tomato, and a secret ingredient that make these next level.
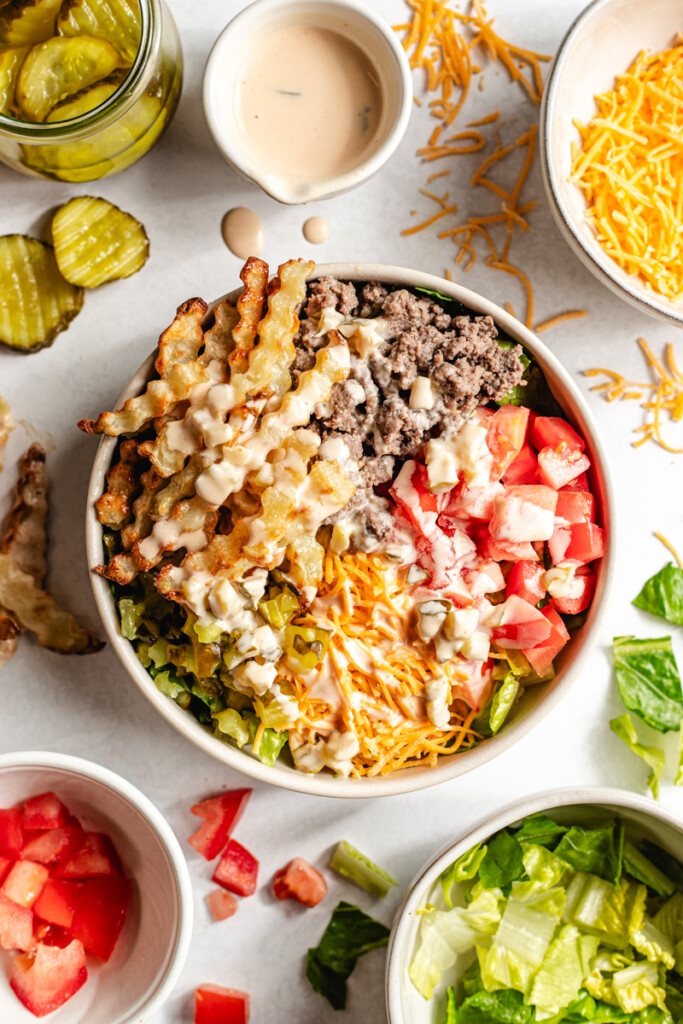
Venison Burger Bowl Recipe
Ground venison, crispy potatoes, tomatoes, pickles, cheese, and special sauce some together in this easy to make Venison Burger Bowl recipe!
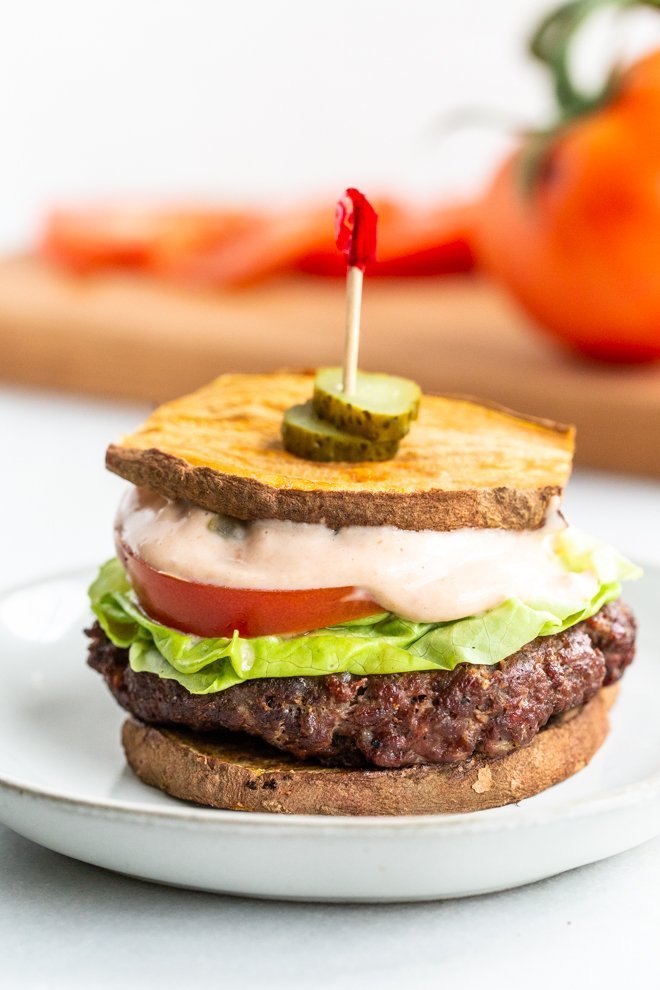
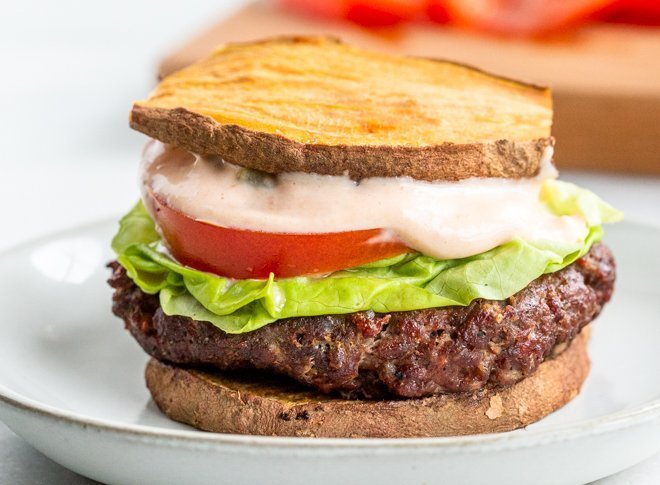
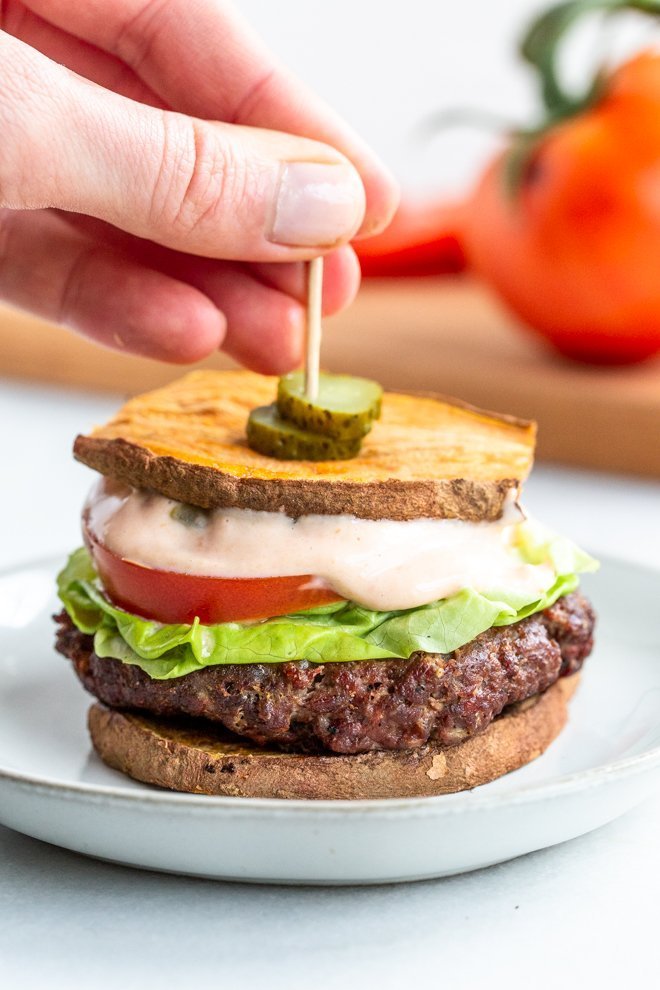
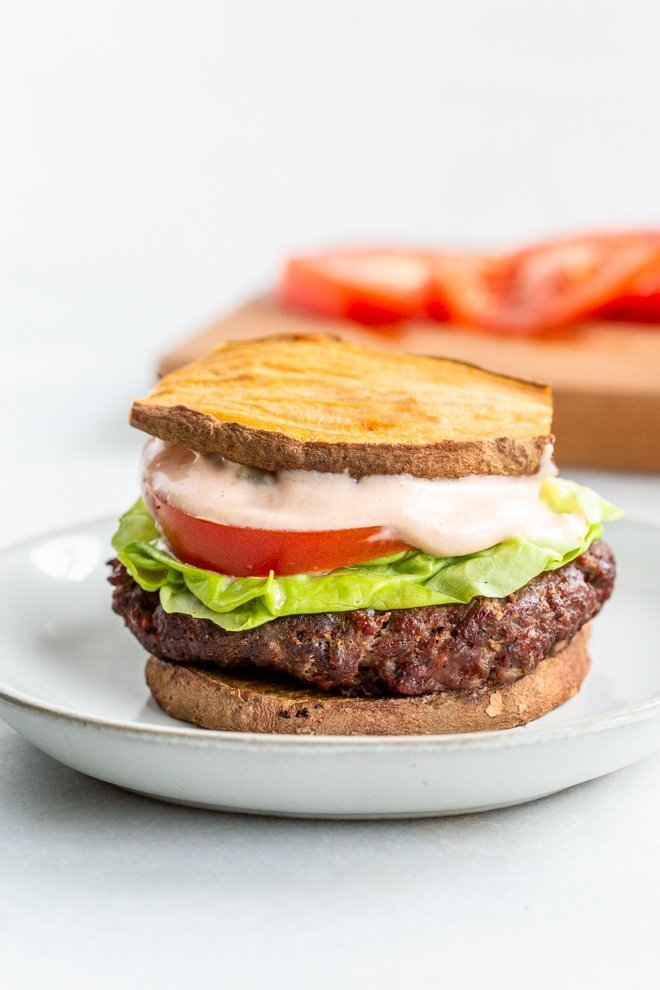
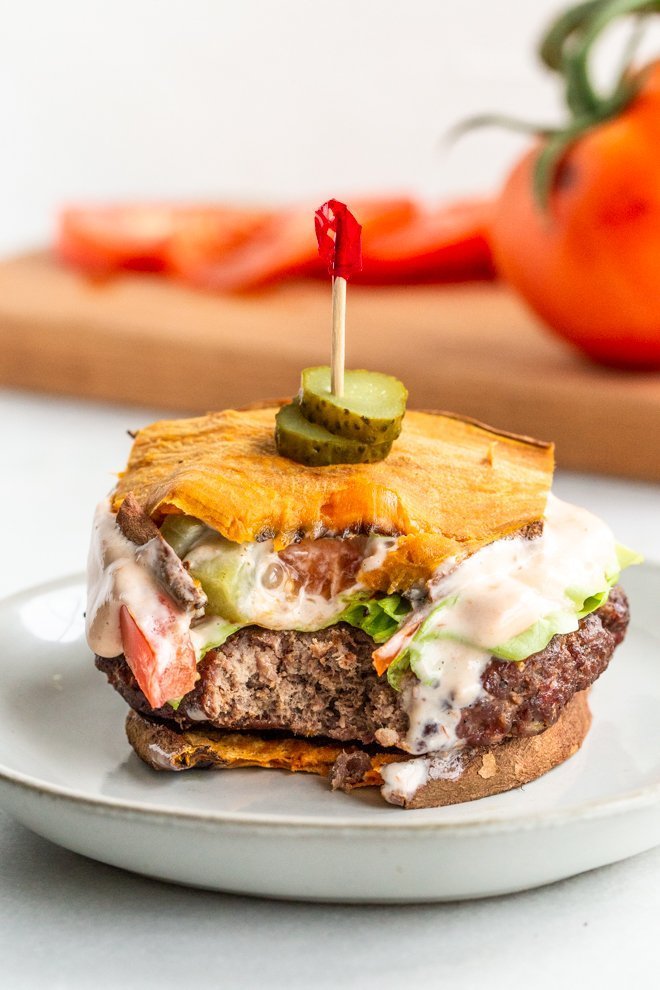
Healthy Whole30 Venison Burgers With Special Sauce
These healthy venison burgers are totally Whole30 compliant. They’re loaded with fresh veggies, topped with homemade special sauce and use grilled sweet potato buns.

Venison Hamburger Soup
One of our favorite venison soup recipes – hamburger soup! Ground venison simmers in broth with your favorite hamburger ingredients – onions, potatoes, tomatoes & more!

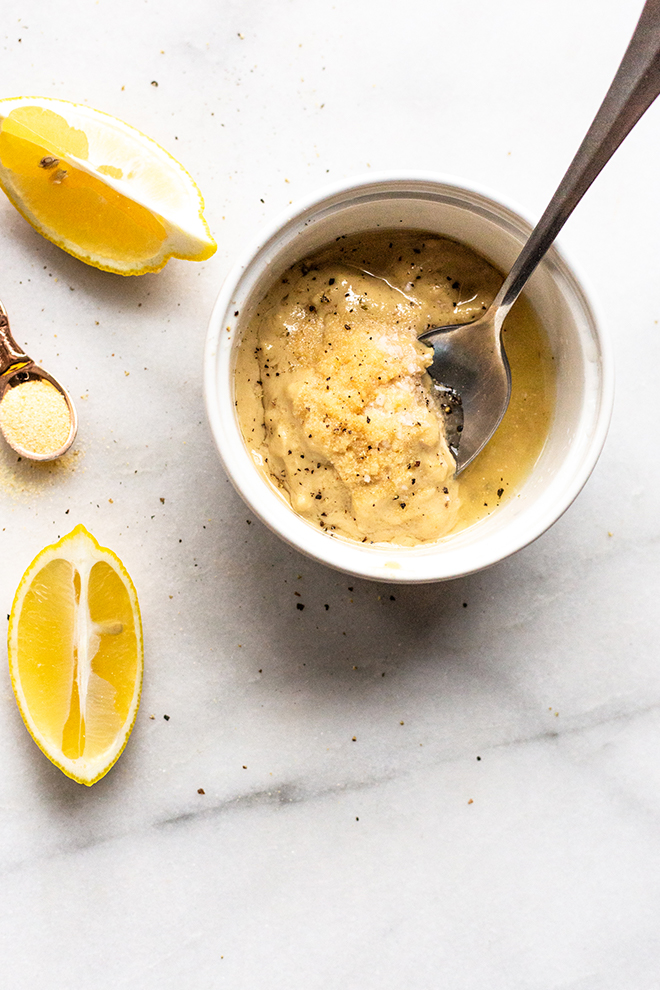
Burger Sauce for My Delicious Wild Game Burger Recipes | Classic & Smash Burgers, Sliders, Low-Carb & More
This is my go-to burger sauce recipe that pairs perfectly with ALL of these recipes!
Ingredients
- 1/2 cup mayo
- 3 Tbsp. ketchup
- 1 tsp. Dijon mustard
- 1 tbsp. white vinegar
- 2–3 tsp. minced dill pickles
- 1 tsp brown sugar
- 1 tbsp minced shallot or white onion
- ½ tsp paprika
- ½ tsp cayenne Pepper
- Salt and pepper to taste, if desired or needed
Instructions
- Mix together all of the burger sauce ingredients in a medium bowl and set aside or in the refrigerator until ready to use.


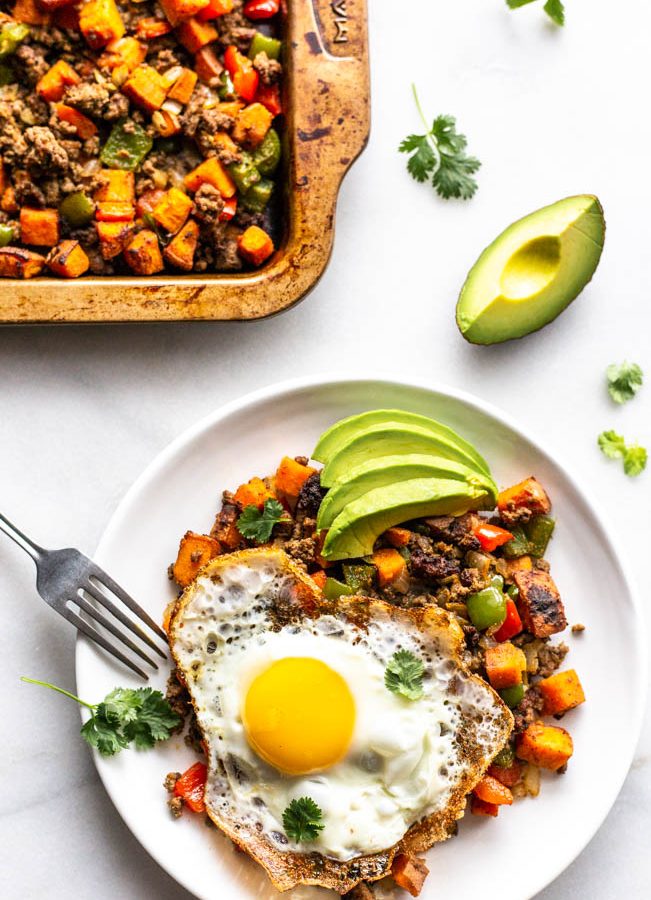
? This Whole30 Bison Sweet Potato Hash has crispy sweet potatoes and veggies, lean bison and the perfect blend of spices. You can top with fried eggs, avocado, and cilantro for the best brunch or breakfast. This lower carb version can be made with turkey, beef, or venison, too. You make it on the stovetop and crisp it in the oven for the perfect potato. This recipe is #whole30approved and #paleo. #healthy #healthyrecipe #paleofood #breakfast")
? This Whole30 Bison Sweet Potato Hash has crispy sweet potatoes and veggies, lean bison and the perfect blend of spices. You can top with fried eggs, avocado, and cilantro for the best brunch or breakfast. This lower carb version can be made with turkey, beef, or venison, too. You make it on the stovetop and crisp it in the oven for the perfect potato. This recipe is #whole30approved and #paleo. #healthy #healthyrecipe #paleofood #breakfast")
? This Whole30 Bison Sweet Potato Hash has crispy sweet potatoes and veggies, lean bison and the perfect blend of spices. You can top with fried eggs, avocado, and cilantro for the best brunch or breakfast. This lower carb version can be made with turkey, beef, or venison, too. You make it on the stovetop and crisp it in the oven for the perfect potato. This recipe is #whole30approved and #paleo. #healthy #healthyrecipe #paleofood #breakfast")
? This Whole30 Bison Sweet Potato Hash has crispy sweet potatoes and veggies, lean bison and the perfect blend of spices. You can top with fried eggs, avocado, and cilantro for the best brunch or breakfast. This lower carb version can be made with turkey, beef, or venison, too. You make it on the stovetop and crisp it in the oven for the perfect potato. This recipe is #whole30approved and #paleo. #healthy #healthyrecipe #paleofood #breakfast")
? This Whole30 Bison Sweet Potato Hash has crispy sweet potatoes and veggies, lean bison and the perfect blend of spices. You can top with fried eggs, avocado, and cilantro for the best brunch or breakfast. This lower carb version can be made with turkey, beef, or venison, too. You make it on the stovetop and crisp it in the oven for the perfect potato. This recipe is #whole30approved and #paleo. #healthy #healthyrecipe #paleofood #breakfast")
? This Whole30 Bison Sweet Potato Hash has crispy sweet potatoes and veggies, lean bison and the perfect blend of spices. You can top with fried eggs, avocado, and cilantro for the best brunch or breakfast. This lower carb version can be made with turkey, beef, or venison, too. You make it on the stovetop and crisp it in the oven for the perfect potato. This recipe is #whole30approved and #paleo. #healthy #healthyrecipe #paleofood #breakfast")
? This Whole30 Bison Sweet Potato Hash has crispy sweet potatoes and veggies, lean bison and the perfect blend of spices. You can top with fried eggs, avocado, and cilantro for the best brunch or breakfast. This lower carb version can be made with turkey, beef, or venison, too. You make it on the stovetop and crisp it in the oven for the perfect potato. This recipe is #whole30approved and #paleo. #healthy #healthyrecipe #paleofood #breakfast")
? This Whole30 Bison Sweet Potato Hash has crispy sweet potatoes and veggies, lean bison and the perfect blend of spices. You can top with fried eggs, avocado, and cilantro for the best brunch or breakfast. This lower carb version can be made with turkey, beef, or venison, too. You make it on the stovetop and crisp it in the oven for the perfect potato. This recipe is #whole30approved and #paleo. #healthy #healthyrecipe #paleofood #breakfast")